Malto Mario


Feast


The Lady & Sons


1,000 Italian Recipes

Friday, December 29, 2006

I Did It! I Finally Did It! Also.. Peabody Rocks!

For the past 3 (or is it 4?) years I've been trying, very unsucessfully, to recreate my Dad's Christmas Calamari Sauce. And lemme just tell yas.. this process has been very lonnnngggg, disasterous and heartbreaking. So let this lil post be a lesson to all you kids out there - Life is short! Do not take ANYTHING for granted! My Dad made this sauce every single Christmas Eve of his life (well his life with his family) and my Mother and I never, ever watched him do it. We never asked him to show us how to make our most favorite sauce in the world. And then he was gone.. and although we didn't even want to celebrate Christmas without him for a few years, when we were ready to bring back the traditions the way he would want us to.. we had no way of making the sauce. *sigh*

After last year's disaster, I decided that I would research any and all old Italian seafood sauces that I could get my hands on.. surely there is some Italian family out there that enjoys this sauce, eh?? By God, you'd think not after all of my failed attempts to find anything. And then one day, my Mom said to me, "You know, he cleaned squid for hours and when he boiled it, the water turned purple." Bingo! I had no idea he cleaned his own squid.. I had been buying it already cleaned and all I had to do was slice it. Duh! So this year, I bought whole squid and Hubbs and I spent an hour or more cleaning about 3 lbs. of it. Now THAT was an experience. If you've never cleaned squid before, you have no idea how many steps there are to it - as well as the ick factor. Nothin' like chopping heads off right below the eyeballs, my friends! heee!

Okay - without getting into more gorey details.. after we cleaned the squid, I managed to save a few very tiny ink sacs. We boiled the tubes and the tentacles with the ink sacks until we saw that the water was turning purple! Woo!! Frankly, I don't think the ink sacs had much to do with it though, as after I took the pieces out of the water, the sacs were pretty much still intact. I believe the color comes from the skin left on the tentacles. Anyhoo.. the rest of the process was quite easy.

My family's marinara sauce calls for tomato puree and after you dump the puree into your pot, you fill each can up with water to dilute it a bit. So I did that with this sauce as well.. only I used the water that we boiled the squid in to fill up those cans. I know he didn't season it like he did our regular marinara so I only put in salt and pepper along with all the calamari pieces parts.. and after a good 5 hours of simmering.. I had my Dad's Calamari Sauce. Finally.

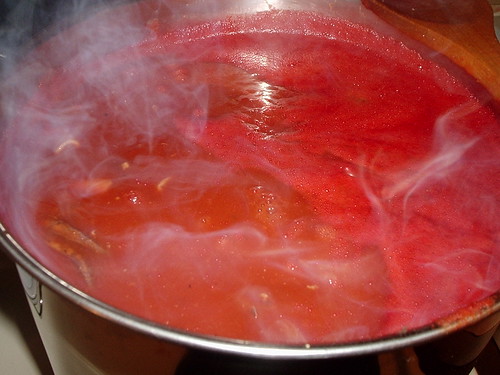
Dad's Calamari Sauce - FINALLY

This picture was taken only after an hour or two of simmering so the sauce was still bright red.. when it was finished it had turned a beautiful dark red and the calamari was melt in your mouth tender.

Rather than post this recipe here, because I realize not many people are going to be interested in a tomato sauce that features squid, hehehe, and because the steps are quite lengthy to type out - I will offer to type it all up for you and send through e-mail if you are interested, just drop me a line. This sauce really is magnificent :D

And now on to the appetizer and the dessert! Both recipes are from Peabody so I will just link you to her beautiful pictures and recipes.. but I just had to share how mine turned out.. both were a smashing success and both recipes were asked for by everyone who attended. Thank you, Peabody - I am now addicted to bread pudding (which I'd never had before) and that excellent bleu cheesey/oniony-peary jammy spread! Oh! I also took the remainder of the cheesecake to work so it wouldn't go to waste and everyone there loved it as well! =)

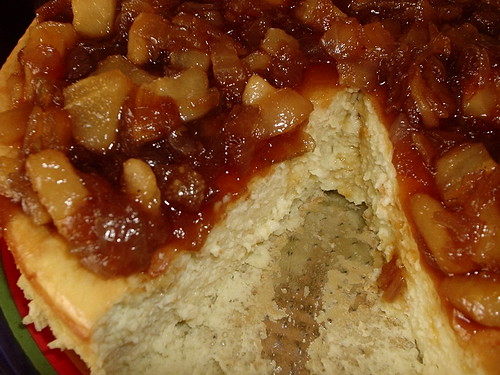
Bleu Cheese Cheesecake w/Onion Pear Jam

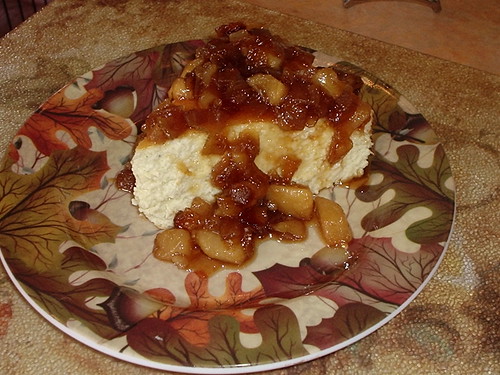
This large wedge was plenty for a crowd of 9 people, I served it with butter crackers and toasted slices of baguette..

Bleu Cheese Cheesecake slice
Peabody's Bleu Cheese Cheesecake with Onion-Pear Jam

1 3/4 lbs softened cream cheese
8 oz shredded Asiago cheese
8 oz blue cheese, crumbled
5 large eggs
1/3 cup heavy cream
1/4 tsp white pepper

Grease a 9-inch springform pan.
Preheat oven to 350F.
Cream cheeses together until smooth.
Add eggs one at a time.
Add cream and pepper. Combine.
Bake uncovered in a water bath until golden brown and center is set.About 45-50 minutes.
Cool Completely, remove sides of pan.

Onion Pear Jam

4 cups onions, diced
1 tsp olive oil
2 cups pears, peeled, chopped
2 TBSP fruit vinegar
1 cup brown sugar
1/4 tsp kosher salt
1 pinch cayenne pepper

Saute onions in oil until brown. Reduce heat and cook until glazed.
Add pears, vinegar, sugar, cayenne and salt. Cook till pears are crispy tender.
Remove mixture ans simmer juice utnil a thick glaze.
Mix pear onion mixture with glaze. Cool.
Cover cooled cheesecke with jam and serve with bread or crackers.

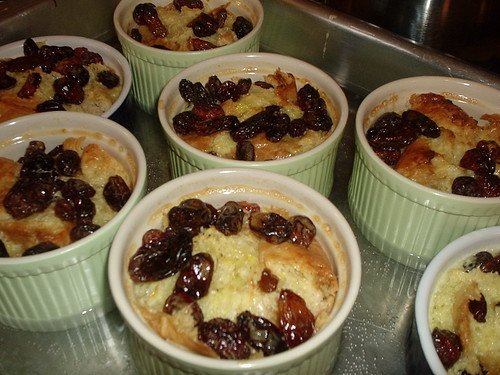
And here are the individual bread puddings.. when making this, I had to leave out the alcohol and the nuts. I subbed vanilla for the alcohol and MY GOD it was delicious! If making individuals like I did, the baking time was reduced by only 10 minutes or so.. just until the middles felt firm when inserting a thin knife.

Individual bread pudding

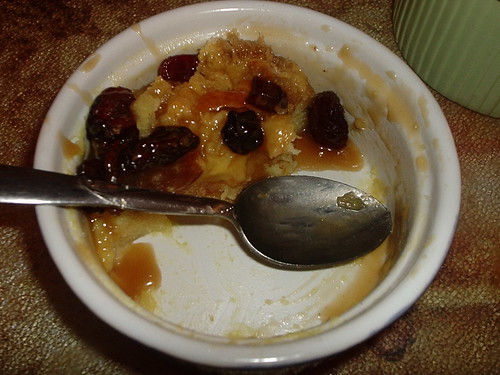
Half way through devouring mine I realized I forgot to take a picture with the dreamy toffee sauce drizzled over it.. so this is all ya get to see. hehee

Dear Sweet Jebus this was good!
Peabody's Croissant Bread Pudding with Pecan Toffee Sauce

4 large croissants or 6 small ones
1 pint heavy cream
4 egg yolks
½ cup of sugar
1 teaspoon nutmeg
1 cup raisins

Preheat oven to 350F.
1.Tear croissants into pieces and place int o baking dish. Sprinkle bread with the raisins.
2.Mix the egg yolks, sugar and nutmeg together in a bowl. Then stir in the heavy cream.
3.Pour the custard over the bread. Press down the bread pieces until the bread is soaked with the custard. You will most likely have extra custard depending on how stale your crossiants are. Don’t feel like you have to use all the custard.
4.Place pan into another pan that will hold a water bath. Bake the bread pudding for 45 minutes until golden on top. Cool 10 minutes and serve warm.

Pecan Toffee Sauce

3/4 cup packed brown sugar
1/3 cup unsalted butter
1/3 cup whipping cream
1 TBSP Amaretto
1/2 cup chopped pecans, toasted
1.Stir brown sugar and butter in heavy medium saucepan over medium heat until melted and smooth, about 2 minutes.
2. Add cream and Amaretto and bring to a simmer. Simmer for about 5 minutes and then add pecans.

To see gorgeous shots of these two recipes, check out the loverly Peabody's site for the Bleu Cheese Cheesecake with Onion-Pear Jam and the Croissant Bread Pudding with Pecan Toffee Sauce - I can't describe how good both of these were.. you have to try them for yourselves! :D

Labels: , , , , , , ,

Wednesday, December 27, 2006

My Two Favorite Spaces

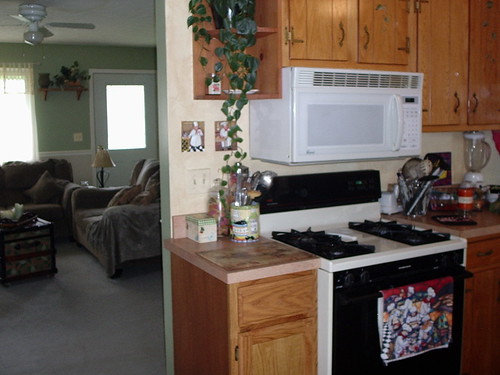
As I mentioned a few days ago, the beautiful Ilva has made a request to see pictures of our kitchens. I am only too happy to oblige as I heart my lil kitchen to bits. :D

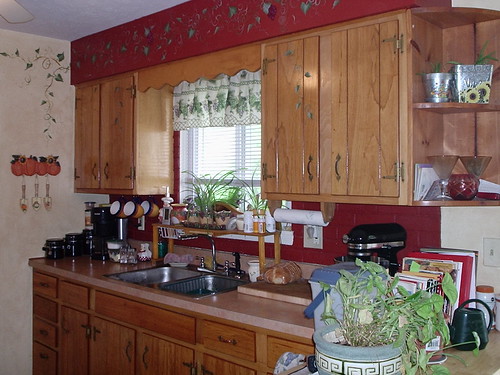
My Kitchen - West wall

This is my kitchen's west wall looking out to our backyard. When we first moved in, I hired my friend, Beth, to paint a few rooms in my house - and the kitchen and dining area were the first two she hit. I wanted a Tuscan feeling - mainly the look of plaster chipping off a brick wall with the brick peeking through. I also wanted lots of curly whimsical vines and grapes. She gave it all to me and I was very pleased with the results. =) Below are just some different views:

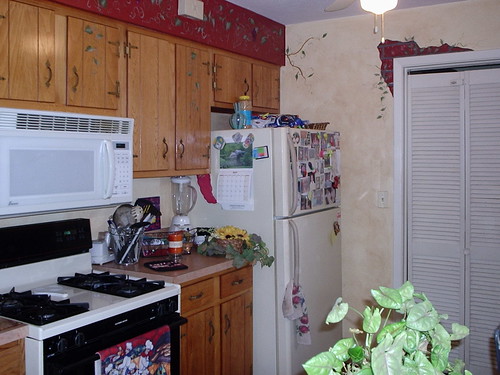
My Kitchen - East wall

The east wall - the fridge is now barely noticeable as the front and sides are pretty much covered up by pictures of my nieces and nephews!

My Kitchen - East Wall looking into living room

This angle just shows that my kitchen opens up into my living room.

My living room looking into the dining room

And this picture is my living room looking into the dining area - which seems to be the only picture I took of the dining area. If you look on top of the bookshelf you'll see a picture of Chloe when she was a puppy - she use to literally fall asleep in her water bowl. hee!

Below are pictures of my office - my 2nd most favorite place in my house =)

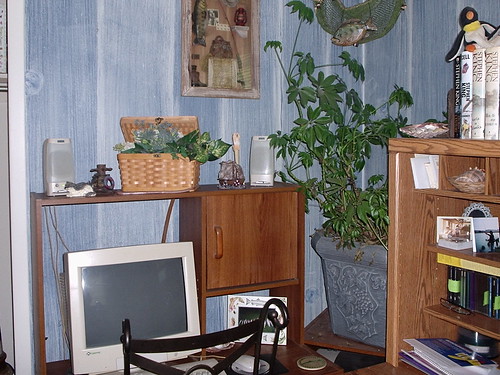
My office - My desk

The office has a nautical theme and Beth painted the walls to look like wood planks. Yes, you don't see much blue wood around, but I saw a picture of a room with blue wood walls so I hadda have it. :D This is my desk, btw. If you look closely at my monitor, you will see a picture on my desktop of a breathtaking view of an italian hillside. This picture was taken by Ilva many months ago (back when this picture of my office was taken) and I fell in love with it so much that I made it into my wallpaper so I could look at it alla time.

Hubbs' desk

This is Hubbs' tiny lil desk, with my old Gateway PC - that he uses to play online poker and read up on where the good fishin' is happenin'. hee!

So there you have it.. the 2 spaces where I spend all my time. Now it's your turn! Show us yours! :D

Whoops! I forgot to include the e-mail address - so please send your permalink to Ilva so she can add it to the round up! =)

xoxo

Labels: ,

Friday, December 22, 2006

Another lil FYI

Haven't posted much lately - I'm sure most can relate to how busy things get during the holidays. I just wanted to take this opportunity to say a few things, if you don't mind? =)

Firstly.. my dear friend Ilva, has sent a call out to us foodie bloggers to share a photo or two of our kitchens - if she gets enough submissions she'll do a round up of them. Quite frankly, I think it's a smashing idea - it may have been done before, but lots of us weren't around then - so speaking for myself, I'd love to see what your kitchens look like! All you have to do is a post a picture or two (or more!) of your kitchen and send the permalink to Ilva. I don't believe she's given a set deadline, but I'd imagine it's probably a good thing to do it as soon as you can. =)

Next on the list was going to be a big THANK YOU THANK YOU THANK YOU to some friends of mine who surprised the heck outta me this Christmas.. I was going to post pictures and the whole nine yards, but I don't want to take away from how truly heartfelt my gratitude is for being one of the luckiest gals around the blogosphere. (Not that my posts with the big hurrahs! and pictures weren't as equally heartfelt.. ahh yous guys know what I mean.) =) And so, Thank You, my friends, for making me feel loved and special.. you rock. =)

Tomorrow is my family's Christmas Eve - yes we're a day early, but you'll have that. So hopefully, if all goes as planned, I'll have posts with actual food - the kind that I've prepared even! Here are some hints though.. check out these two posts - I'm going to try to recreate both of them.

And finally.. I hope you all have a very safe and Happy Holiday!
xoxo

Labels:

BBM: The Holiday Edition!

Hooooray! Today I received my fabulous package from my BBM partner, Pam of Pam's Pantry! I was so excited! *squee*

I've got to admit.. just this morning I e-mailed Stephanie, the lovely hostess of BBM and author of the more often than not, too cute for words blog (her son is adorable!) Dispensing Happiness, to ask her if she'd let me know who my BBM partner was because I hadn't received my package yet and I wanted to find out if it had been sent or not because I get antsy that way (I can't wait long to open birthday and Xmas presents either.) hee! Had I waited just one more day!! Imma dork. I think we can all agree on that. I'm sorry, Pam, Imma dork who can't wait to open presents! Even though Imma dork and was a freakin week late in sending my own BBM package - Doh!

Okay.. so you're DYING to know what was in the box aren't you? I KNOW that you are!

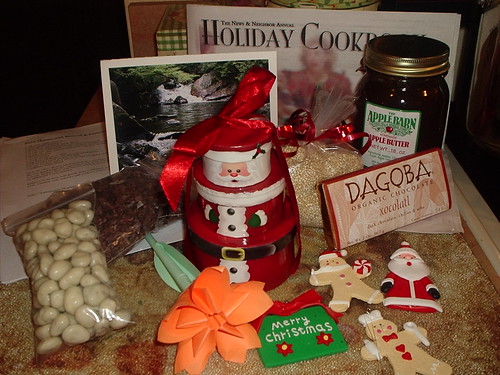
BBM - The Holiday Edition 2006
Ta! Da!

Starting from the top left and moving clockwise:

3 of Pam's very yummy looking recipes, including Pink Stuff, which is, and I quote "THE holiday delicacy at my husband's family's gatherings", her Cranberry Crunch Bars Yum! And last but not least as this sounds quite delish, her Zesty Quinoa with Broccoli & Cashews. I've wanted to try Quinoa in the worst way as I've seen a lot of my favorite bloggers using it.

The card she sent, which was fabbbulllouss! Not only was there a picture on the front that she took during a hiking trip this year, but the inside and back cover is covered in handwritten detail about what was in my box as well as a few tidbits about herself - Congrats on your Masters, Pam! =)

Directly behind the card is copy of her local newspaper's Holiday Cookbook. I love this - I've found some fantastic recipes in my own local newspaper's cooking inserts, so I can't wait to browse through this one!

In front of the holiday insert is a locally made jar of the darkest apple butter I've ever seen. I am so breaking into that tomorrow morning and slathering it on my toast!!

Next to the apple butter is QUINOA!! WOOO! Pam said she had just discovered it and liked it a lot so she thought she'd send some - I'm so happy she did! =))

Since it's in the same vicinity shall we all look upon and take a moment of silence for the bar of Dagoba Xocolatl? ...... Ahh yes.. a delectible combination of dark chocolate, cocoa nibs and chilies. And if there was any doubt, my friends, I've already broke into it - heavenly.. just heavenly. ;)

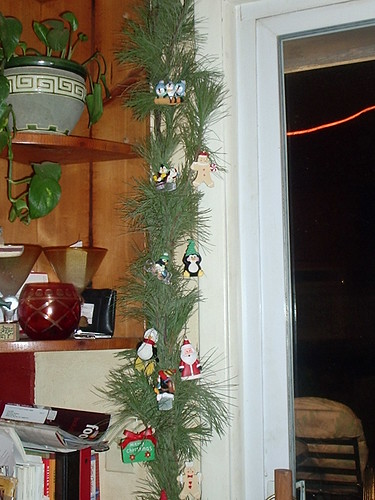
Underneath the mighty chocolate is the cutest lil ornaments I've ever seen- they are tiny and at first I thought they were edible! hahaha! Here's the only part I'm not sure about (no, I figured out they weren't edible after I nibbled. duh) - I don't know if Pam made these or not? She said she's a crafty kinda gal (gotta love that!) so it would not be surprising had she made them. Either way, I've already decided that they will find their home amongst my penguins on the pine roping that hangs around my slider doors - have a looksee:

Hanging ornaments 2006
Please refrain from looking at my cluttered shelves and cooking binders, books & notes.. as well as my patio furniture that's still on the deck on Dec. 22nd..

Carrying on.. Next we've got the cutest lil Santa Claus. He's made of 3 lil round boxes and each box is filled with sesame seed candy. Unfortunately, I won't be able to test if these lil seeds will bother me as Hubbs has already claimed them. Mmm hmm.. there's a shocker. But I get the cute lil Claus and he is a welcome addition to my Christmas decorations from here on out =)

Okay do you see that orange flower? Is it not beautiful? It is! And it's made of paper.. and Pam made it! I love things like this, and orange is one of my favorite colors.. so this lil hand made flower will look great sitting atop my desk in the office!

Finally (but not near least-ly!) we've got a bag of yogurt raisins - I've dipped, they are delish! And a bag of real cocoa nibs! Ohhh my.. the things I could do with these babies! I look forward to experimenting!

This was a great package - I've been extraordinarily lucky, as both of my BBM partners have sent me things that I truly love. Thank you so much, Pam - you rocked my BBM: Holiday Edition! And a special thanks to Stephanie of Dispensing Happiness.. without her mad organizational skills and patience with naggy and antsy people like me e-mailin' her all the time, this terrific event would not happen!

xoxo

Labels: ,

Tuesday, December 19, 2006

FYI

Hey.. just wanted to let you know, had you been wondering how Ivonne and Helen are doing on their vacations - I received an e-mail after Helen arrived in Paris and although one of her bags was lost somewhere between South Carolina and Paris, she was having a good time visiting with family. =)

I received a post card from Ivonne yesterday - with a beautiful picture of Berlin on the front and a sweet lil note on the back letting me know she was having a wonderful time. I'm so happy to hear from her! I believe she'll be back in the day or so.. can't wait to hear about her trip!

Okay.. just wanted to letchas know.

xoxo

Oh! I checked my settings and nothing has been changed since I upgraded to the new blogger format. I don't know why you can't comment and I'm very sad because of it. Remind me to NEVER update Blogger again. Also, I've been on their "help" site to see if I can get advice, but they aren't even acknowledging that anything is wrong..

Labels:

Monday, December 18, 2006

Sugar Sugar.. She No Likes Me.

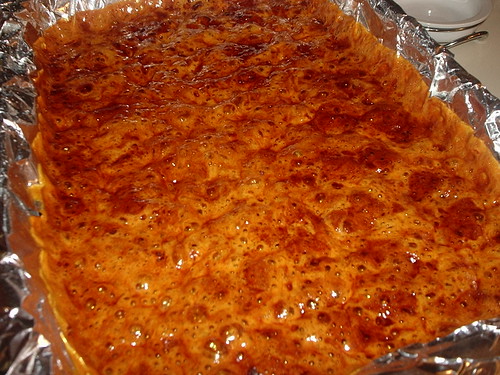
Horribly burnt honeycomb

Would you care to guess what this is? No, it isn't a perfectly baked cheesy sheet pizza. No.. not some kind of ooey gooey yummy pasta dish..

This is honeycomb candy. Honeycomb candy gone way wrong. This is December's Kitchen Disaster! Woooo!!

After reading my loverly friend Ellie's post regarding her perfectly executed attempt at making honeycomb candy, I knew I had to try it myself. I lurve honeycomb - it's my favorite among the hard candies - and thought it would be a very nice lil treat to wrap up and give to friends. Mmm hmm. If you haven't yet.. go have a look at Ellie's candy - I'll wait.

... ... *whistling* ... ... *humming* ... ... *wondering if that's a cobweb in the corner of my office or is that a REAL SPIDER *eek!!!* web?* ... ... *Gawd, I don't wanna go to work today* ... ...

Oh hi! You're back! Okay.. so, is that not the most gorgeous honeycomb candy you've ever seen? It's goldeny and bubbly and thick and you can almost taste the crispedy goodness of it, yes?!

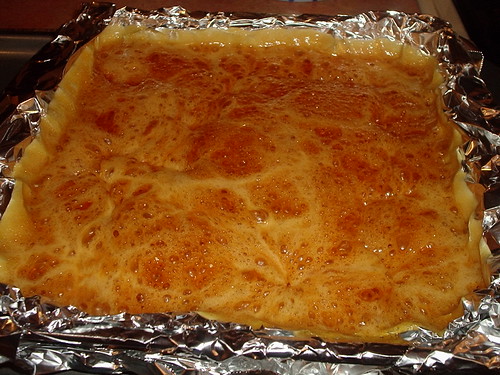
'kay here's mine - and, please, keep in mind that this is the SECOND attempt which was cooked for a lesser amount of time...

Underdone honeycomb??

Not so comby honeycomb

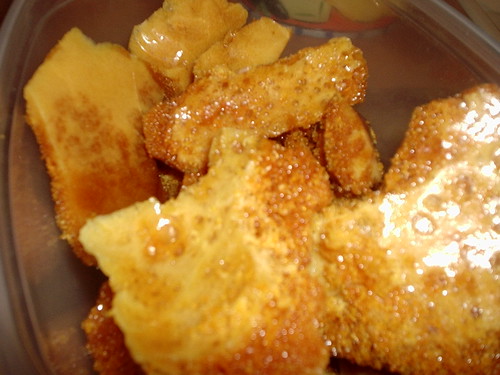
Not very comby is it? Kinda goldeny here and orangey there, eh? Kinda thin, kinda looks more like a dissection of a bone, doncha think? Those bubbles are so small and so close together there is no crispedy, there is only crunchedy and then stuckedy to your teethedy. Gah.

At least on the second attempt, after breaking it into pieces I didn't find the inside to be so brown it was almost black. And at least on the second attempt, when I took a small piece to at least see if it tasted okay, I didn't get a mouth full of baking soda flavor. So I guess on some accounts, you could say that the 2nd batch was mildly successful - although not even close to the destination I was going for.

I'm rather afraid now. I doubt I'm going to give this a third try, although it frosts my rather large heiney that I can't get it right. This might work better if I were to invest in a candy thermometer, but I can't see dropping $25.00 or more on something that I'll use, what? Maybe once a year? On the other hand, I am definitely a poor judge on what the color should look like for the perfect honeycomb, that's fer shnizzle.

I am going to take my 2nd attempt to work today - at least it won't go to waste. The guys will only care it's sugar and not give a damn that it's not what it's suppose to be. hee!

I am bummed though.. I had great expectations of making several batches of the stuff.. including a couple with a lil orange infusion.. yum :( 'kay you master candy makers out there - advice please? Ellie Muh Lurve? Peabody? Any body?

Fifteen minutes burned it and 10 minutes wasn't enough.. do I dare try again and take it off the heat at 12 minutes? I did find using a 9" x 13" inch pan made it too thin, so the 2nd attempt was poured into an 8" x 8" pan and the thickness was much better. I also used a whisk on the 2nd attempt when I stirred in the baking soda - I think that helped incorporate it better, alleviating that horrible soda taste from the first one. I've got 2 days before I have Xmas dinner with my girlie friends and until next Saturday before my family comes to my house for our Xmas get together.. so I've got some time to try it again - but I don't know if I've got the nerve. heheee

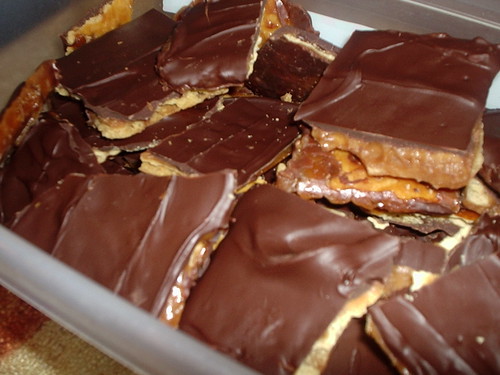
On a happier note, I tried Paula Deen's Pine Bark again - this time I took Peabody's advice and waited a full 30 seconds before moving the chocolate around slightly.. then I walked away. Waited another full 30 seconds before going back and spreading it slighly again - then walked away. Went back after a final 30 seconds (mebbe a tad bit longer even) and the chocolate spread like frosting - just as she said it would. Yay! I also cooked the brown sugar/butter mixture longer and this time the "toffee" wasn't grainy in the least. A perfect batch is what I got! So at least I'll have that to share =) Thanks Peabody!! =))

Pine Bark Revisited
Paula Deen's Pine Bark

35 saltine crackers
1 cup butter
1 cup packed light brown sugar
1/2 teaspoon almond extract
5 (4-ounce) milk chocolate bars, broken into pieces

Preheat oven to 400 degrees F.
Line a 15 by 10 by 1-inch jelly roll pan with tin foil. Lightly spray foil with a non-stick cooking spray.

Place saltine crackers, salty side up, in prepared pan. In a saucepan, boil butter and sugar for 2 to 3 minutes, stirring constantly. Remove from heat and stir in almond extract. Pour mixture over crackers and bake for 4 to 6 minutes. Remove from oven, top with candy bars, and spread evenly as chocolate begins to melt. Cool slightly and transfer onto waxed paper. Allow to cool completely.

Labels: , , , ,

Sunday, December 17, 2006

Creamsicles!

***UPDATED 12/26/06***
Hey all.. checkin out my favorite blogs and when I got to Anna's Cookie Madness I was surprised to see she had posted about this same fudge. After reading her post, I found out that she is the AnnaCG who put the recipe on recipezaar! What a coinkydink. ;) Anyhoo.. she's changed the recipe to mellow out some of that sweetness, so I've put her new changes into the recipe below.***

If there is one treat that I still crave from my childhood it's creamsicles. You know.. the orange popsicle that has vanilla ice cream inside? As Rachael would say, "Yum-o!"

So when I was figuring out what home made treat I could send my BBM partner, I happened upon a recipe for peanut butter fudge. I figured peanut butter is a pretty safe flavor and I also thought that fudge would travel well, so I printed it out. I made it, and it was quite easy to make (I've never made fudge before) and I thought it turned out pretty darned tasty! Well, unfortunatley, things kept getting in the way of my sending her package out by the deadline, so I found myself with another weekend to make a few more things for her. The guilt! Ohhh the guilt!! But the guilt turned out to be in her favor.. although her package went out a week late, it also gained two more items! hehe

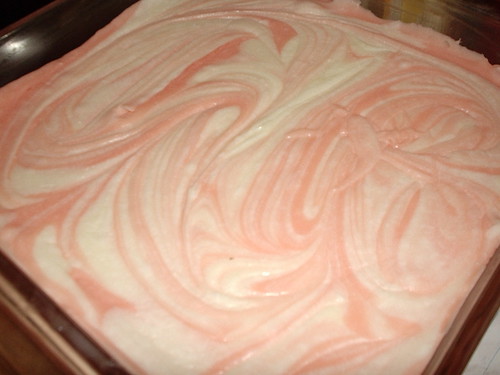
On the same peanutty road, I decided to make peanut brittle and packaged that up for her - and then I went back to the fudge recipes and low and behold there was a recipe for Orange Creamsicle fudge! I had never heard of such a thing and knew there was no way I wasn't going to make it. I just figured if it didn't turn out well, then I'd make her a different flavor. Although extremely sweet (ya'll know about my sweet tooth.. suffice to say this stuff is so sweet that a tiny piece did me just fine) it tastes exactly like an orange creamsicle. I was quite happy with it =)

Well I figure I'm not the only orange creamsicle lover in the world so I thought I'd share the recipe with yous. If you try it, I'd like your opinion!

After it's set
Orange Creamsicle Fudge
Courtesy of AnnaCG and Recipezaar.com

1 (7 oz.) jar marshmallow creme
12 oz. white chocolate chips (1 bag)
1 c. granulated sugar
2/3 c. heavy cream
12 TBS. salted butter
3 tsp. orange extract
orange food coloring I probably used about 5 drops of red and 4 drops of yellow

Line a 9 inch square pan with "Release" foil or line with regular foil and spray with cooking spray.

Place marshmallow crème and white chips in a large mixing bowl.

Combine sugar, cream and butter in saucepan. Turn heat to medium and cook, stirring once or twice, until mixture reaches 235 degrees F. *See Note*

Remove from heat immediately and pour hot cream mixture into mixing bowl with chips and marshmallow crème. Stir well with a wooden spoon -- mixture might look slightly stretchy and unappetizing, but don't worry, it will smooth out.

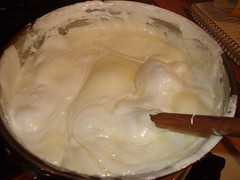
The Beginnings of Fudge

Remove 1 cup of mixture and set aside. To remaining mixture, add orange extract and orange food coloring.

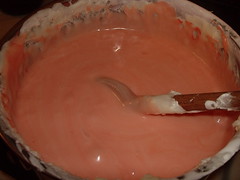
Mmm orangey..

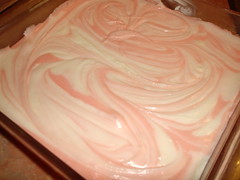
Pour orange mixture into prepared pan. Pour, or spoon, white mixture on top and swirl.

Voila! Orange Creamsicle Fudge =)

Let cool to room temperature (about 40 minutes) then chill for one hour or until set. Lift fudge from pan using foil handles and using a large knife, score into squares.

My Notes: I don't have a candy thermometer, therefore I used the ball technique (is that what it's even called?) where you test the fudge temperature by taking a lil of it on a spoon and drizzle it into a glass of cold water. If the mixture turns into small smooshy-like balls then it's at the correct temperature for fudge. You can learn more about this technique here. Also as you can see, I didn't use the foil that Anna suggests, I just buttered my glass 9 x 9 pan and it worked well. But, by all means, use the foil if that's easier for you - I can see how it'd be much easier on the clean up as well! =)

Labels: ,

Saturday, December 16, 2006

Paula.. You've Disappointed Me

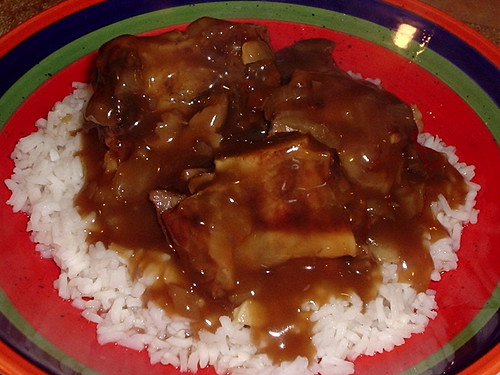
I made this last week after watching an episode of Paula's Home Cookin' show.. where she was having a cook-off with her two sons, Jamie & Bobby. *swoon* Her entry was her beef short ribs. Dear sweet Jebus did they look good.

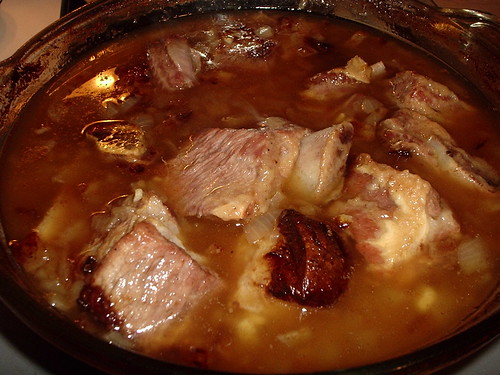
The next day I was at my favorite butcher's and bought myself some beef shortribs - I couldn't wait to get home to make them. I followed the recipe without making any changes and what I was rewarded with was, unfortunately, tasteless ribs in a soupy broth topped off with a layer of grease. Yum! *shudder*

I was sorely disappointed, but didn't want to throw them out - they were extremely tender, I'll give them that. So what'd I do?? Yes.. I cheated. I opened up a jar of store-bought mushroom gravy. Mmm hmmmm.. I poured it over the ribs and rice and voila! They were quite tasty. Sad people.. very sad.

I wasn't even going to post about them, but as usual, I find it so hard to believe that Paula has a bad recipe. I've had such good luck with most of her recipes, that I feel this might have been an error on my end? So if anyone wants to try this recipe, please let me know how they turned out. I'd be very happy to find out it was something I did (or didn't do?) instead of a bad Paula recipe.

Paula's Short Ribs doctored
Paula's Short Ribs
Courtesy of Paula Deen, copied from here.
The above photo is the doctored ribs.. with the store-bought gravy.

3 pounds short ribs
1/2 cup House Seasoning, recipe follows
2 tablespoons all-purpose flour
Oil
2 cloves garlic, chopped, plus 2 more cloves chopped
Water
Beef Broth, plus more for roasting
Salt and freshly ground black pepper
1 onion, sliced
White rice, for serving

Preheat oven to 350 degrees F.
Season ribs using House Seasoning. Lightly dust with 2 tablespoons flour.

In a Dutch oven, place a small amount of oil. Add the 2 garlic cloves and cook until lightly browned. Add the ribs and brown on each side. Add half water and half beef broth to cover ribs. Bring to a boil. Remove the ribs from the Dutch oven and place in a casserole dish. Add the remaining garlic, salt and pepper, onions, and about 1 cup broth to the ribs. Roast ribs for 2 hours. Serve over buttered white rice.

House Seasoning:
1 cup salt
1/4 cup black pepper
1/4 cup garlic powder

Combine all ingredients in a bowl.

Paula's Short Ribs
Straight out of the oven.. soupy.. marshy looking.. *sigh*

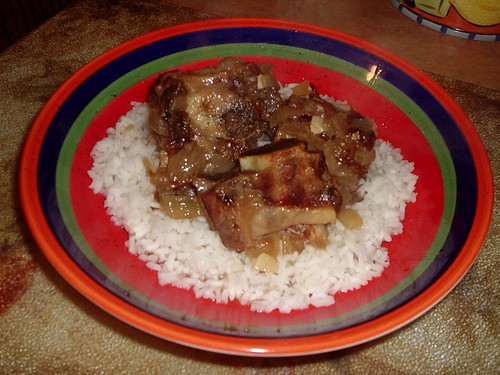
Paula's Short Ribs
Here they are sans gravy.. sad looking, aren't they?

Labels: , , ,

Wednesday, December 13, 2006

Simple is Sometimes Incredibly Good!

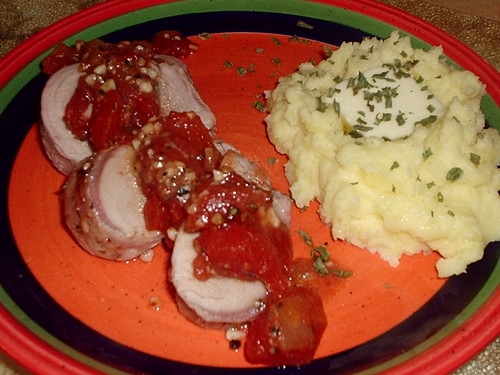
This was last week - so tired after work and didn't want to mess in the kitchen for long. I knew it was going to be a hectic day when I woke up so I took a pork tenderloin out of the freezer - they are so flavorful and easy to cook.

Well then I forgot about it.. and didn't think about dinner again until about 10 minutes before leaving work for the day. I did a quick search on recipezaar and allrecipes - and to be truthful, even though it's only been a week, I can't think of which site I found this on! I do know that it was the first recipe I found that didn't call for marinating for hours. The recipe is super easy, quick and only has 5 ingredients. At that point, all I wanted to do was get home, get in my jammies and make a cup of tea, so I didn't really care that it probably wouldn't be a great recipe. Like I said, the pork tenderloin is so flavorful and tender anyway - you really can't screw one up.

After an hour or so of unwinding, I looked at the recipe again and realized I had no fresh tomatoes - so I opened a can of diced tomatoes, the kind with the onions and garlic added. I couldn't even be bothered with peeling and mincing cloves of garlic, so I used 2 tsps. of the minced garlic in a bottle. I just had no gumption whatsoever that evening. As long as it was edible and hot, I didn't care. Ever have days like that?

Well was I happily surprised 30 minutes after I put this dish together. The diced tomatoes and garlic roasted in the oven as you place them next to the pork in a large roasting pan, instead of on or under the pork.. the pork was tender, juicy and had lots of flavor after seasoning it with salt, pepper and a lil garlic rubbed in. Combine the two and we had one of the tastiest, quick pork tenderloin dinners I've ever had. It was fabulous!! I had put more energy and time into the smashed potatoes that went with the pork - and they didn't turn out nearly as good! ha!

Quick night.. tired as hell.. no energy whatsoever? Try this recipe. You will NOT be disappointed.

The easiest most flavorful pork tenderloin EVER
Super Easy and Amazingly Tasty Pork Tenderloin

Serves 2
1 pork tenderloin
1 can (14 oz? 10 oz? the regular size) of diced tomatoes with garlic and onion added
2 tsp. minced garlic
Salt & Pepper to taste
olive oil
12 oz. fresh mushrooms (I didn't have them so I omitted them)

Preheat oven to 425º F.

In a rather large roasting pan, combine the tomatoes and garlic, season with S&P - spread in an even layer on one side of the pan, then drizzle a lil olive oil over the top. Place the tenderloin, also seasoned with S&P and a lil garlic, next to the tomatoes on the other side of the roasting pan. Place in preheated oven and roast for 30 minutes or until the internal temperature of the pork reaches 160º F.

Labels: ,

Tuesday, December 12, 2006

Peabody's Aunt was a Lucky Lil Girl!

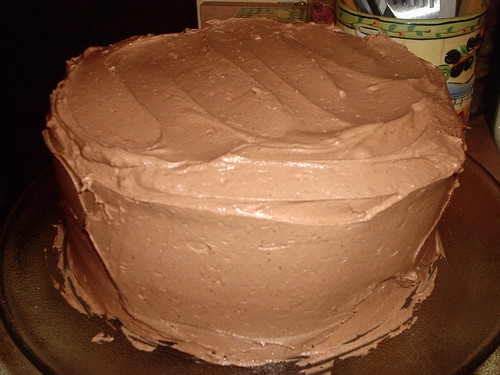
I know that many of you were right there with me, drooling all over your keyboards and chins, while looking at these pictures of Peabody's Aunt's Mother's Chocolate Cake. *swoon*

Some of you might recall, I've been on a quest to find the ultimate chocolate cake recipe, since I've tasted the ultimate chocolate cake and it's creator won't share the recipe. Well, Peabody, bless her cotton socks, was on a similar quest to re-create her Aunt's Mother's chocolate cake that she had when she was a girl - and this must be quite a cake as she remembers it still to this day, and it changed her mind about chocolate cake back then. Which, I'm sure, was only a few weeks ago. *cough*

Anyhoo, moving right along.. She also was hoping that she'd be helping me in my quest for that ultimate cake, for which I am grateful =) I have no flippin idea why this took me so long to make, but FINALLY I have accomplished it this past weekend. Actually, I have a feeling, that soon I am going to be put on a strict diet *gasp* and I know that I'm running outta time, so I just had to make it right-now-before-they-take-away-the-good-juju! Gah.

Peabody's Aunt's Mother's Chocolate Cake!

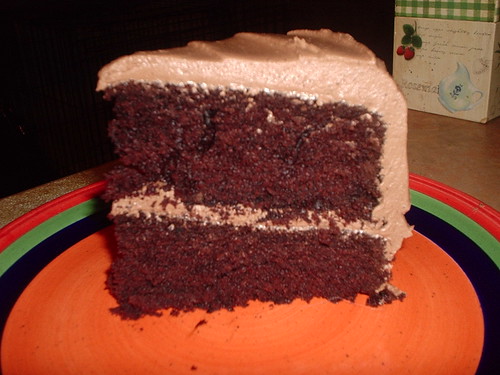
Is that not a pretty cake, or what? (don't look down to the mess I made on the cake dish! Oh! And cock your head to the left so it looks even!) I am proud to say that this is the prettiest cake I've ever made! The frosting was divine.. not only in taste, but in texture and fluffiness, so frosting this cake was a breeze. This is a HUGE compliment coming from me.. the Queen of frosting disasters. hee!

The cake was fantastic.. extra chocolatey with a nice crumb and paired with that amazing frosting this cake comes very, very close to the ultimate chocolate cake for me. The texture was just a bit off though.. that ultimate chocolate cake I tasted this past summer was a bit more dense, where this cake is nice and light while still being decadent. All in all though, if I don't ever find that ultimate recipe.. this cake will do just fine. I'll be making it again and again, of that I am sure.

Thank you, Peabody, for sharing this recipe! You've helped me come as close to the ultimate chocolate cake as I've ever been.. and you've given me yet another reason why I really need to purchase Tish Boyle's The Cake Book!! :D

Peabody's Aunt's Mother's Chocolate Cake!
Deeply Dark Devil's Food Cake

Instead of typing out the instructions, I'm going to direct you to Peabody's site so you can follow hers, the way I did. =)

Labels: , , ,

Sunday, December 10, 2006

Blog of the Week December 10, 2006

My new salute to a favorite blogger of mine is not so much to turn you on to her blog, as she's already got quite a following and you've probably already added her to your blogroll. But this salute is more my way of saying thanks for making me laugh and giggle so much!

Thank you, Brilynn, of Jumbo Empanadas, for bringing so much to the table. Yes, her recipes are divine. And yes, she's a very talented cook and baker - you'll be copying her recipes after one quick glance at her blog, for sure. But it's the way that she writes that keeps me coming back for more. I literally need to keep a hand clamped tightly over my mouth while reading her posts while I'm at work because huge belly laughs or shrill giggles will emit from my throat without my knowledge. There are some posts that have kept me giggling for hours after reading them, as well. Brilynn is the kind of gal that makes you want to spend time with her, even during mundane events - because you know you'll have fun.

If laughter isn't what you look for in a blog (how could you not?) then allow me to highlight some of my favorite recipes that she's shared with us. First there is Key Lime Pie Cookies. These cookies look light and airy and she promises a good punch of Key Lime tang. Yum! Not in the mood for a cookie? How about Molten Lava Chocolate Cake? Hello! I could eat these for breakfast (followed by a nap, but nevertheless!). On the prowl for something savory? Might I suggest Bri’s Roasted Butternut Squash Risotto with special guests Zucchini and Sage? Creamy, luscious and so tasty!

These are just a few terrific recipes, I didn't even highlight my favorites from August, November and December! And there are many.. but you check them out for yourselves. =) No kiddin' kids, this lil blog has it all. Delicious recipes, inspiring photos, belly busting laughs, and if that's still not enough for you - she's also a genius with Photoshop!

Enjoy =)

xoxo

Labels:

Friday, December 08, 2006

I Won Chocolate!!

'kay so this was a very stressful, hectic week and I didn't do much in the "new recipe - never been blogged about before" category. Although I did make one helluva tasty and super easy pork tenderloin a couple nights ago - which I fully intend on sharing with yous, but I'm sorry - chocolate takes precedence above everything else. Especially expensive and exotic gourmet truffles, that were FREE because YOU WON THEM! Oh. Yeah. Baby.

So it all started one day as I was perusing blogs and checking out various blog rolls, when I came about a blogger in Columbus. Columbus is about 3 hours south of us. I've visited Columbus once, but very briefly. Actually - I was only there for the state fair because Ted "Uncle Tedly Von Nugentberger" Nugent was playing with his fellow band members in a lil 80's rock band called The Damn Yankees. I believe that was concert No. 5 of the summer - more specifically The Damn Yankees 5th concert that I attended that summer, as a friend and I followed them all over the tri-state area like sad lil puppies. Good times. Good times.

Anyhoo.. where was I?

Ahh yes! Columbus! Home of Becke who is the author of a great blog called Columbus Foodie. Becke's blog features quite a few restaurant reviews as well as some tasty dishes she whips up in her kitchen. As per my usual ritual when I find a new blog that I like, I started going through the archives to get a better idea of the person behind the drool-worthy pictures and recipes. It didn't take me long to find a post she'd written about a local chocolatier, who happens to be a good friend of hers. His name is Daniel Cooper and he's the Master Chocolatier of Pure Imagination Chocolatier. The post was an introduction, of sorts, to encourage her readers to try some of Daniel's confections. After reading about how he started creating his chocolates (in his basement by reading books!) I was amazed and more than curious. Further reading led to her announcement of how she believes in Daniel and his chocolate creations so much, that she was offering a free box of 9 handmade truffles of your choice - all you had to do was leave a comment! Hell, I was already going to comment on how in awe I was that this man now owned a thriving shop, has more than a few celebrities as clients AND provides custom made truffles for the awards season in Hollywood.. and it all started in his basement. Fabulous. So I left my comment and read a lil more into her archives before moving on. I went back a few times to read her current posts, and quite frankly, forgot all about the truffle contest.

Until last Friday night when I checked e-mail before going to bed and there was the notice from Becke that I had won the contest! WOO!! I've never won anything before. So this was quite exciting for me. =) Becke asked me to check out Pure Imagination's website to get an idea of what kinds of truffles they offer, pick 9 of them and send her a list with my address. I'm sure you can guess what I did into the wee hours of the night, eh? So I picked my 9 sinfully droolicious truffle flavors, wrote her back and yesterday I received my box. Be still my heart. =)

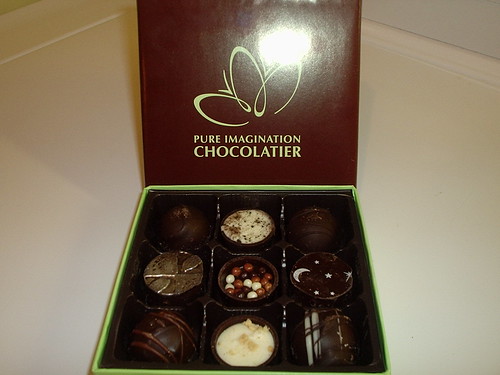
Pure Imagination Truffles

Aren't they gorgeous? Oh I had such glorious plans for this post.. I wanted so badly to review each truffle just like Cybele does on her Candy Blog that I heart so very much! I spent a good hour, before sitting here to write this post, photographing each truffle and then groups of truffles and then each truffle carefully cut in half so you could see the creamy wonderous insides.. I had planned on tasting each and every one so that I could write up something fabulous that would make every person on the face of the planet flock to Pure Imagination to clean him out of his truffles!! Ohhh I had plans!!!

Fifty blurry pictures later - and that one above, in all it's explosive flash beauty is the only flippin picture that was not so distorted that you couldn't recognize what I was trying to capture. Have I ever mentioned how much I hate the crap cam? *sigh* I even set the damn camera on the counter and just touched the freakin' button to avoid my shaky hands = blurry picture results! My crap cam sucks. And I suck too. Ya wanna know why? I'm gonna tell ya.

After seeing that all my pictures were useless and knowing I couldn't really go back because I had cut all my lil truffles in half, I decided I'd review them anyway - on taste alone if I had too! So what is my next brilliant move? I don't take the time to get Pure Imagination's website up in front of me so I'd know what truffle I was tasting - I just dive right in and the first one I taste is the The Theobroma Truffle. This is how the truffle is described on their website:

"This wonderful flavor combination was featured in the movie “Chocolat” and contains nutmeg, clove, and cayenne pepper. We enrobe ours in our signature dark chocolate."

Notice the words in bold? Mmm hmm.. yes, this lil truffle packs a mighty punch. It is truly delicious, but it's firey hot. The burn starts on the top of your tongue and trickles down the back of your throat. A lovely sensation, actually. I thoroughly enjoyed it. BUT, the firey stuff? Yeah, it kinda killed all known living taste buds on my tongue - therefore each and every half-a-truffle I had after, was pretty close to creamy tastelessness. It's amazing I don't get paid for reviewing products, isn't it?

Forging on.. I can confidently say that these are very smooth and creamy truffles as well as simply gorgeous to look at. Although I thought that the Midnight Extra Dark Truffle, and the Mousse Au Chocolat Dark Truffle were very similar in taste although very different in appearance.

The Cappuccino Truffle and the Tiramisu Truffle did not have very prominent coffee flavors, actually I did not taste coffee notes at all - keep in mind my burnt tongue though.

The Key Lime Truffle had a nice lime flavor, although I wish it were a bit stronger. It's almost in the background as opposed to the nice zing of lime that I had hoped for.

I had asked for the Blood Orange Mimosa Truffle but they were out of them, so Becke chose to replace it with The Relic Truffle and I'm glad she chose this one. I love the look of it and the crunch of the roasted cocoa nibs was fabulous.

The Fresh Spiced Cinnamon Truffle was the perfect combination of cinnamon and dark chocolate ganache. The cinnamon had a warm flavor but wasn't over-powering. I loved it.

Finally, the Pearls of Pure Imagination Truffle was the prettiest of the bunch, had a wonderful crunch due to the assorted chocolate pearls laid on top of the creamy dark chocolate ganache. If you haven't guessed by the name, this is one of their most popular in their signature line. I can see why.

I'll be trying the 2nd half of these lil chocolate treats another night and have already marked the Theobroma truffle to enjoy LAST. hee! But from first impressions, I'd say The Relic, the Fresh Cinnamon, the Pearls of Pure Imagination and the Theobroma are my favorites in this box. =)

Thank you Becke for sending me delicious truffles! And thank you, Daniel, for reading those books and experimenting in your basement all those years ago! I thoroughly enjoyed this lil taste test (admittedly unorganized and unprofessional as it were) and I look forward to trying other flavors in the future. :D

xoxo

Labels:

Monday, December 04, 2006

A Gift From a Very Special Friend and WCC No. 12!

I have been just waiting for the perfect opportunity to share with yous this:

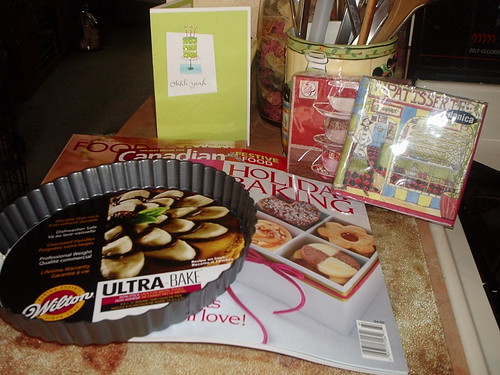
From Ivonne :D

This was a completely unexpected surprise that I received in my mailbox last month, around my birthday! My dear, sweet friend, Ivonne, sent me this package of some excellent Canadian cooking magazines, two adorably printed packages of cocktail napkins and a tart (or quiche) pan! I've wanted this pan for soooooo long and she knew I wanted one and she sent me one. I didn't know what to say.. I still can't find the exact words to express how special she has made me feel and how grateful I am to her for sending such a lovely present with a special message inside the cute, glittery card. Again, Ivonne, thank you! Thank you, so much! =)

And so, this perfect opportunity has arisen. The lovely Sara's WCC No. 12 - Party Foods! What better party food than a scrumptious tart, yes? There are sweet tarts and savory tarts, tarts made with mousse and tarts made with fresh berries and fruit. There are delectable tarts made of fresh veggies and tarts made of chocolate! The possibilities are endless and I think I've managed to link to most of the reasons why I've wanted a tart pan so badly! hee!

With an incredible craving for asparagus this past week, I decided that I needed to find a recipe for a savory tart that featured asparagus. I searched high and low through my cookbooks to no avail and then all over the interweb until I happened upon a new site to me, Food Down Under. A pretty cool site, featuring cuisine from all over the world. Catagorized by either country or type of dish, finding tart recipes was a breeze.. finding tart recipes featuring asparagus was even easier! There were a few to choose from, but I settled upon this one. I liked the idea of a crust made from phyllo dough and the cheeses included in the ingredient list were pretty mild, so I knew the asparagus would shine through. And that it did. =)

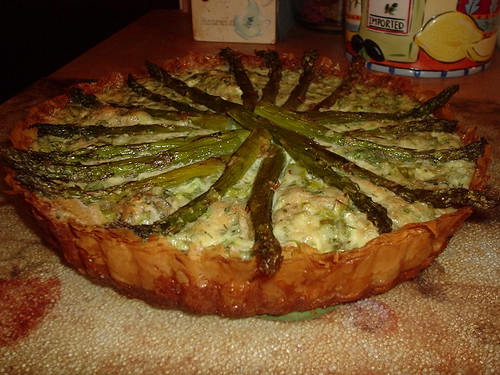
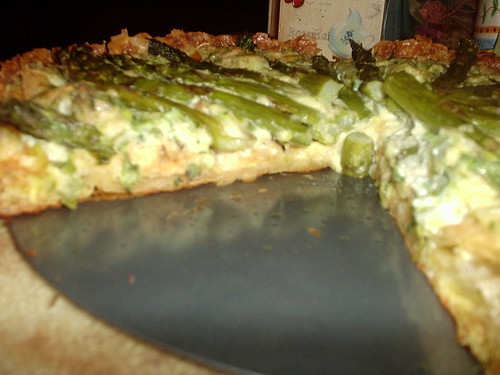
Asparagus Tart
Asparagus Tart No. 182
Courtesy of Food Down Under

Asparagus Tart II


12 sheets phyllo pastry
2 TBS. butter
1 lb. asparagus
1/2 cup milk
1/2 cup marscarpone cheese
2 eggs
1/2 cup fresh grated Parmesan cheese
2 TBS. chives
2 TBS. parsley
1 TBS. chopped fresh tarragon
1/2 tsp salt
pepper to taste
1 TBS. bread crumbs - plain or seasoned

Preheat oven to 400º F.

Melt the butter and lightly brush a 9 inch deep pie plate or quiche tin. Set aside.

Open the phyllo pastry on a flat work surface and brush a little butter around the edges of 1 sheet, brushing a 'zigzag' of butter up and down the sheet of pastry. Place another sheet on top and butter as before. Fold these two sheets in half (so that you have a four sheet depth) then place this in the prepared tin, hanging over the edge slightly and covering part of the sides and base.

Repeat with the remaining sheets of pastry, buttering and folding as before and placing in the tin until the base and sides are totally covered. Bake in the oven for 10 minutes then allow to cool.

Reduce oven temperature to 350º F.

Trim the asparagus so that each spear is 3 inches long then slice all the remaining offcuts of asparagus finely. Cook the asparagus spears in a pot of boiling salted water until just crisp-tender, about 4 minutes then drain well on kitchen paper.

Mix together the milk, marscarpone cheese, eggs, cheese, chives, parsley, tarragon and salt in bowl then season with pepper. Add the finely sliced asparagus off-cuts and mix well.

Sprinkle a tablespoon of dry breadcrumbs over the base then pour the cheese custard into the tin. Arrange the asparagus spears in a circular fashion on top of the custard, tips towards the edge and ends meeting in center.

Bake until tart puffs well and the top browns, about 35 minutes. Cool slightly

This tart was delicious. It was creamy and had a great crunch thanks to the crispy phyllo dough. The taste of asparagus paired beautifully with the mascarpone and parmigiano reggiano cheeses. It was very easy to make and I had it done within an hour. This tart can be served warm or at room temperature. Perfect for parties! It's quite pretty too, isn't it? :D

The only thing I changed in this recipe was to roast the asparagus instead of boiling it. And the only thing I would change the next time I make the recipe is to omit the tarragon. I could do without it.

Now I would like to apologize to Sara for getting this recipe in so late! She's already got the round-up posted - go check it out, the submissions are fabulous! And I'd like to once again thank my friend, Ivonne, for much more than a wonderful birthday present, but for just being my friend. =)

Okay enough with the mooshiness.. I'm going to bed. :P

xoxo

Labels: , , ,

Sunday, December 03, 2006

A Biscotti Recipe, 4 Extremely Talented Bakers.. and Me. =)

*UPDATED* - Cinnamon Sugar Biscotti recipe added below

I just got done reading Peabody's, Brilynn's, Helene's and Ivonne's posts about their biscotti. I couldn't be more impressed and awed. What a fabulous job you guys did!! Thank you so much for joining Ivonne and I in baking this recipe! I truly look forward to next month and can't wait to see what we'll be making. :D Oh yes.. I've decided.. and made that executive decision without being anywhere nears an executive, that we shall do this again next month.. Oh yes, my friends, we shall. Muahahaa!

This was my first time baking biscotti. I've always paid the big bucks for these crunchy cookies and never even gave it a thought. Until Ivonne and I were talking about what to make this month and after suggestions of panettone (scared the bejebus outta me) and Christmas cookies, she came up with biscotti. My eyes lit up and a very large smile appeared on my face. Of course! Biscotti! Perfect! And so it was settled. By this time, I had already spoken with Peabody about her wishes to join us and Ivonne had spoken to Brilynn - so now the 2 of us had become 4. I was tickled. A few days later, as I was writing what seems to be my weekly letter to Helene, I realized she'd probably enjoy making biscotti too, so I invited her as well. I was very happy to find out that she was definitely up for it - now we had 5! And I was just delighted. =)

Well let me tell you.. had I known how easy it was to make such delicious biscotti in my own kitchen I would have NEVER shelled out a dime for those "gourmet" cookies I've always loved. Of course this is thanks to Dorie Greenspan and her fabulous book, Baking: From My Home To Yours. Kids? If you haven't bought or begged for this book yet, seriously - get on it. You will NOT be disappointed. Her inclusion of Thelma Labensky's recipe for Chocolate Biscotti was heaven sent. When I read the ingredients and saw espresso powder in the list, I knew this would be a damn good biscotto. And ohhhh is it! The cookie has a nice crunch and isn't too sweet. The chocolate is very pronounced, thanks to the espresso powder. I don't digest nuts well, so I left out the almonds but kept in the chunks of semi-sweet chocolate. Well duh. Aside from that, I followed the recipe to the T. Right up to the option of dipping them into white chocolate. Not a white chocolate fan here. Actually, I hate the stuff. BUT, my creative juices were flowin' and I thought adding cinnamon to white chocolate might make it good enough to eat. Alas, this did not come to fruition as my white chocolate would not melt. I used a double boiler and gently brought the heat up, but my chocolate would only melt to a thick, frosting like, consistency. So I chucked it. And then I ran to the freezer for my good semi-sweet stash and got on with the dipping!

Chocolate Biscotti
Adapted from Baking: From My Home to Yours by Dorie Greenspan, Houghton Mifflin Company, Nov 2006

2 c. all-purpose flour
1/2 c. unsweetened cocoa powder
2 TBS. instant espresso powder
3/4 tsp. baking soda
1/2 tsp. baking powder
1 tsp. salt
3/4 stick (6 TBS.) unsalted butter at room temperature
1 c. sugar
2 large eggs, lightly beaten
1 tsp. pure vanilla extract
1 c. chopped almonds, blanched or unblanched
4 oz. bittersweet chocolate, coarsely chopped, or 3/4 c. store-bought mini chocolate chips

Sugar for dusting

Getting Ready:
Center a rack in the oven and preheat the oven to 350º F. Line a baking sheet with parchment or a silicone mat.

Sift together the flour, cocoa, espresso powder, baking soda, baking powder and salt.

Working with a stand mixer, preferably fitted with a paddle attachment, or with a hand mixer in a large bowl, beat the butter and sugar together on medium speed until pale, about 2 minutes; the mixture may be crumbly. Scrape down the sides of the bowl, add the eggs and vanilla and beat for another 2 minutes; don't worry if the mixture looks curdled. Reduce the mixer speed to low and mix in the dry ingredients in 3 additions, mixing only until a dough forms. Scrape down the sides of the bowl. Mix in the chopped nuts and chocolate, then turn the dough out onto a work surface and knead in any dry ingredients that might have escaped mixing.

Divide the dough in half. Working with one half at a time, roll the dough into 12 inch long logs. Flatten both logs with the palm of your hand so that they are 1/2 to 1 inch high, about 2 inches across and sort of rectangular, then carefully lift the logs onto the baking sheet. Sprinkle each log with a little sugar.

Chocolate Biscotti ready to bake

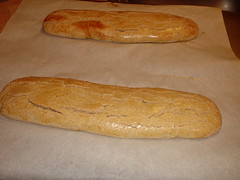
Bake the logs for about 25 minutes, or until they are just slightly firm. The logs will spread and crack - and that's just fine. Remove the baking sheet from the oven, put it on a cooling rack and cool the logs for about 20 minutes. (Leave the oven on.)

Chocolate Biscotti 1st bake

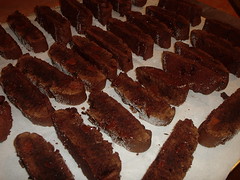
Working with one log at a time, using a long serrated knife, cut each log into slices between 1/2 and 3/4 inch thick. Stand the slices up on the baking sheet - you'll have an army of biscotti - and bake the cookies again, this time for just 10 minutes.

Chocolate Biscotti 2nd bake

Transfer the biscotti to a rack to cool.

Makes about 40 cookies.

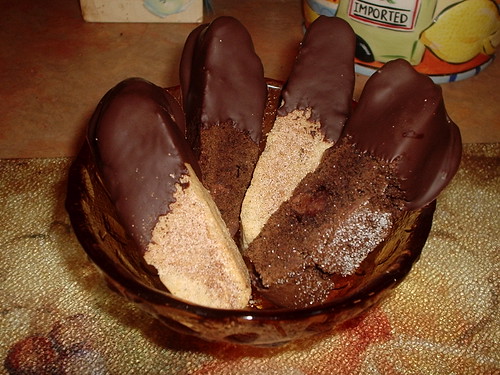
Chocolate Biscotti and Cinnamon Biscotti Dipped

Playing Around:
Chocolate-Cherry Biscotti: As impossible as it seems, these are even more irresistible than the original version. Add 1/3 co. of chopped dried cherries to the dough along with he almonds and chocolate.

White Chocolate Dipped Biscotti: Have a baking sheet lined with a silicone baking mat or a sheet of parchment or wax paper at hand. Gently melt 12 oz. finely chopped white chocolate or 2 c. store bought white chocolate chips in a heatproof bowl over a saucepan of simmering water, and scrape the chocolate into a narrow heatproof container. One by one, dip the biscotti into the chocolate, coating them to their midpoints. Lay the biscotti on the mat or paper, and when they are all dipped, slide them into the refrigerator for about 15 minutes to set the white chocolate.

My Notes:
I must have cut mine thicker than Dorie's as I only had 30 biscotti. Also pictured are cinnamon biscotti that I also made. They were equally delightful - with a big kick of cinnamon for you cinnamon lovers. Unfortunately, I'm about done tuckered out tonight, so I'll post the cinnamon biscotti recipe tomorrow morning. =)

Cinnamon Sugar Biscotti
Courtesy of Mollie and All Recipes

2 c. all-purpose flour
1 1/2 tsp. ground cinnamon
1 tsp. baking powder
1/4 tsp. salt
2/3 c. sugar
6 TBS. butter
1 egg
1 egg yolk
1 tsp. vanilla
1 egg, beaten

3 TBS. sugar
1 tsp. ground cinnamon

Preheat oven to 350º F. Line a baking sheet with parchment paper.

Sift together the flour, 1 1/2 tsp. cinnamon, baking powder and salt, set aside.

In a medium bowl, cream together the 2/3 c. sugar and butter. Beat in 1 egg, egg yolk and vanilla. Stir in the dry ingredients. (I used my stand mixer for all of this)

Divide the dough in half. Working with one half at a time (you'll need to knead this dough a bit to get the unmixed dry ingredients incorporated thoroughly), roll the dough into 9 inch long 1 1/2 inch wide logs. Flatten both logs with the palm of your hand slightly, then carefully lift the logs onto the baking sheet. Brush with beaten egg.

Bake for 20 to 25 minutes in the preheated oven, until golden and firm to the touch. Cool for 15 minutes.

Cinnamon Biscotti first bake

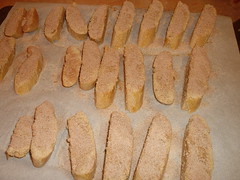
On a cutting board, slice each log crosswise at a diagional into 1/2 inch slices, using a serrated knife. *Note: see below for notes on slicing. Place back on baking sheet, cut side down and sprinkle with a mixture of the remaining cinnamon and sugar.

Cinnamon Biscotti 2nd bake

Return to the oven for an additional 10 minutes, until toasted. Cool on wire racks and store in an airtight container.

Makes 20 biscotti.

My Notes:
Thanks to advice from Alton Brown (I heart you AB!), I used my electric knife to cut both varieties of biscotti. I hardly had any crumbles at all. Also, if you don't have an electric knife, another tip I picked up was when cutting with a serrated knife, press down instead of sawing - helps to reduce crumbling.

Serving:
You can serve these with coffee - espresso, cappuccino, latte, or plain-old-poured-from-the-pot coffee - red wine, milk or ice cream. Or, if you stick them in a cookie jar and leave them onto he counter, they'll just about serve themselves.

Storing:
By their very nature, biscotti are good keepers. They'll keep in a cookie jar or an open basket for a week or more. Wrapped airtight, they can be frozen for up to 2 months.

Labels: , , , , ,