Malto Mario


Feast


The Lady & Sons


1,000 Italian Recipes

Saturday, September 27, 2008

Betty Please, Pick Up Your Crackers!

Holy cow.. it's another Daring Bakers challenge post!

Firstly, a huge huge THANK YOU! and WELL DONE! to our lovely hosts, Natalie of Gluten A Go Go and Shel of Musings From The Fishbowl. As you might tell from Natalie's blog title, she bakes gluten free and Shel bakes vegan - so this month we all had the opportunity to step outside our comfort zones and do the same if we wished. This was not mandatory, as us regular old wheat flour and butter lovin' people could bake this recipe without taking a walk on the wild gluten-free side. BUT we did have to come up with a vegan dip or spread to slather our crackers in as a bonus challenge.. which was very cool as well! There was so much we could do to personalize our crackers/dips and still stick to the recipe as written. I heart that. :)

But I can't say I was much of a Daring baker this month as I did end up choosing to play it safe and made the Lavash Crackers with your every day bread flour. Then again.. any day I'm in the kitchen baking - it's always ALWAYS a DARING experience.

9-21-08 (2)

First off let me say.. I need kneading lessons. Big time. I do not know the proper way to knead so I have no idea if I was doing good or doing really bad. The crackers turned out tasty, but I haven't the faintest if they turned out "Lavash" or not.. course even if I did know how to knead, I wouldn't know if my crackers turned out like they should as I've never had a Lavash cracker before a week ago! Go me!

The rolling of the dough was like a dream.. I suck at rolling too.. I couldn't roll out dough in a circle, square or rectangle to save my life. Even if I shape the shit first! Which I did - into a rectangle! But the minute I started rolling it started to look like fakkin' Sicily. Yanno.. boot shaped?? Jebus. So the "diamonds" I had intended to cut were uhh.. leaning and unsightly. Gah.

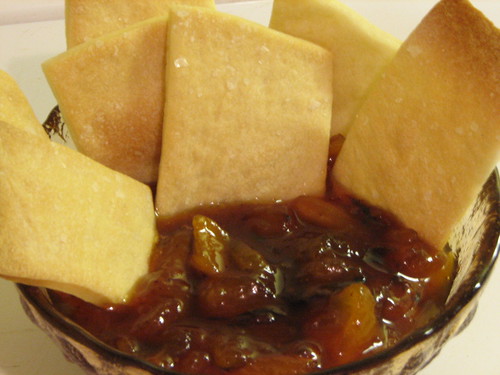
I rolled the dough super thin - you could see the counter top in areas underneath.. but they still poofed up a bit in the oven. So the center of the sheet of crackers was a bit chewy and the edges were hard. I didn't really get much of a cracker feel. Although we did find a few that were crisp. But all of it was very tasty - even considering I went all Plain Jane and just sprinkled some Maldon sea salt on top. :)

For my bonus vegan challenge, well.. I used this opportunity to do a test run in the making of homemade jam. You see, I've decided that not only will I be catering my own wedding reception with the help of my friends, but I'm also going to make my own wedding favors.. jam. Everyone will receive a wee jar of jam and a wee bag of shortbread cookies to go with. Actually that's pretty laughable considering how much I tend to set things afire. Uhh.. I might have to put the Creampuff in charge of the shortbread. :P

9-21-08

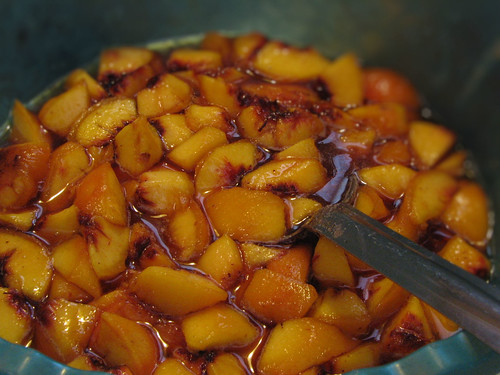
Anyhoo.. the jam. I went with a small recipe for peach jam. Basically peaches, sugar and lemon juice and that's it. The recipe said to only cook for approximately 25 to 30 minutes but at that point I still had syrup with chunks of half hard peaches in it. I ended up cooking the jam for well over an hour. The nice thing about it was that I could stir every few minutes and not worry about the peaches sticking to the pan.

9-21-08 (1)

Until...

About 5 minutes before that jam was done.. I turned my back on it for FIFTEEN SECONDS - TOPS! - and that mother hummer burnt on me. I swear, I turned my back to wring out the towel, turned right back and continued stirring, but all my peaches were stuck to the bottom and had turned a most appetizing shade of puke brown. Fakkers.

While this was happening, my 2nd sheet of crackers was in the oven. Mmm hmmm.. anyone care to guess where this is going?

To hell. That's where it's going, gone and went.

Burnt my 2nd sheet to a rock hard brown.

It was at this point that I started to laugh.. once again that familiar zing that starts deep down in my tummy and travels up until my cheeks burn a bright red and I question my sanity in thinking that I can bake. :P What got me giggling was this reminded me of two of my most favorite women on the face of this planet - Laverne DeFazio and Shirley Feeney. You know.. "One, two, three, four, five, six, seven, eight! Schlemiel! Schlimazel! Hasenpfeffer Incorporated!"

Ya'll remember the diner episode? Lenny inherits his uncle Lazlo's diner and Laverne & Shirley end up working in it - Laverne was the short order cook and Shirley was the waitress.. fakkin hysterical. Laverne calls Shirley "Betty" the whole episode and all you keep hearing over the PA system is Laverne saying "Betty Please.. Pick Up" At first it's going well and then they get really busy and both are lookin' a little worn, to say the least - Laverne's cooking is starting to look scary and at one point there is a table of biker chicks demanding their hashbrowns.. of course Laverne burns them and the next thing you hear is, "Betty Please.. Pick up your.. hashblacks." BAHAHAHAHAHAHAA! I am so Laverne!

Okay well you hadda be there.. but that's what popped into my mind when I saw my burnt crackers and burnt peach jam. It was classic. :)

9-21-08 (4)

Well to sum up the whole experience - the first batch of crackers were edible and tasty, but not very cracker like. The jam didn't look like peach jam, but there was no burnt taste to it so if you closed our eyes you'd know you were eating peach jam. heee! The two together were excellent because of the salty bread/cracker and the sweet fruit jam. And I learned more very valuable lessons - do not even breathe during the last 5 to 10 minutes of cooking your jam.. just stand there and stir. And do not attempt to bake crackers (or anything for that matter) while making jam. :P

Thanks for another fabulous challenge, gals! I never ever would have made crackers at home if it weren't for The Daring Bakers! You can make them too! Just go to Gluten A Go Go and Musings From The Fishbowl for the recipe - both the original and the gluten free recipes. :)

xoxo

Labels: , , , , , , ,

Sunday, September 16, 2007

Food To Live By...

Catchy title, isn't it? I didn't come up with it and I can't take the credit.

Food_to_Live_By_cover

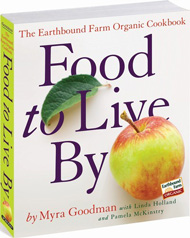
Food To Live By is the title of an awesome organic cookbook written by Myra Goodman (with Linda Holland and Pamela McKinstry) of Earthbound Farm. Earthbound Farm might ring a bell to many of you.. you might see their organic produce in your grocery stores, or if you are lucky, you might have visited their Farm Stand in Carmel Valley, California.

Myra and her husband Drew, started organic farming as a way to make ends meet. Selling the raspberries that grew on their land, eventually grew into a pretty huge organic salad business. As a matter of fact, did you know that Earthbound Farm is the first producer of bagged salads? Yep.. true story.

Drew and Myra, their family and employees are all very passionate about organic farming. There are no pesticides used in anything they grow and they continually strive to produce the healthiest fruits and vegetables possible. From a raspberry to lettuce business, Earthbound Farm is now the leading producer in over 100 different varieties of organic salads, vegetables and fruits. And this has all happened within the past 23 years.

Because the Goodman's use no chemicals on their crops, their fruits and vegetables are sold at the peak of freshness. Most within 24 hours of picking. Today, having an abundance of left over produce isn't a problem.. but back when they were first starting, there was always lots of left over fruit. What else could Myra do, but learn how to cook with these "leftovers" and over the years her passion for cooking with organic foods has led to the writing of this book, Food To Live By.

So why, dear friends, am I writing about the Goodman's and their organic farming? Well two reasons. The first reason came by chance about 2 months ago when a lovely woman, Lilli, decided to write to me about how she enjoyed my lil blog and had enjoyed reading a post I had just written regarding our garden this year. Lilli was working as an intern at Earthbound Farm this past summer and she offered to send me Myra's book. I couldn't have been more flattered. Of course, I accepted.. how could I not? Soon I'd have more veggies than I'd know what to do with it and a cookbook who's theme is fresh vegetables and fruits would be the perfect cookbook for finding just the right recipes to use up our harvests. And so Lilli sent me this book and I sat down with it that night and was pretty much delighted with what I was reading.

So before I go on with my 2nd reason, I want to thank you, Lilli. For introducing yourself to me, for your lovely comments, for this cookbook that I now treasure and for becoming a friend. I look forward to hearing all about your adventures at college! =)

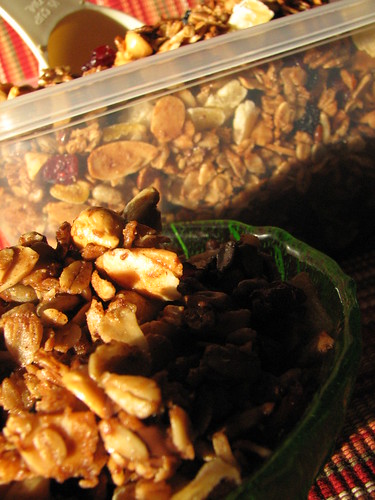
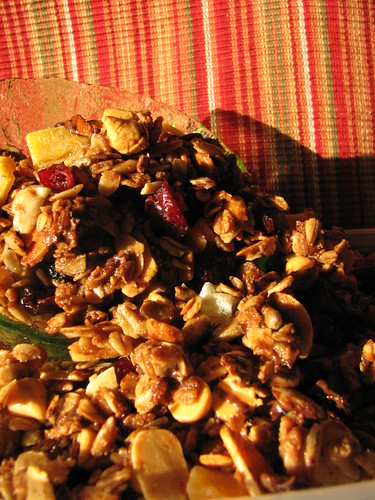
Maple Almond Granola

Now for my 2nd reason? Well hey it's time for Weekend Cookbook Challenge No. 20 - this time it's back in Sara's talented hands and this month she's chose the theme of "Show and Tell" which she describes as "Pick a cookbook from your collection that you think we should know about. Your favorite, your funniest, your strangest. Whatever. It's your choice."

So you see.. how could I not pick this book.. you guys SO NEED to KNOW ABOUT THIS BOOK! The recipes are completely droolworthy.. the photos? Amazing. Myra's writing? She makes you feel as if you're a close friend.. it's like she's speaking directly to you and sharing with you her experiences.. it is really one of those books that is entertaining because of both the yummy recipes and a good story to boot!

Maple Almond Granola

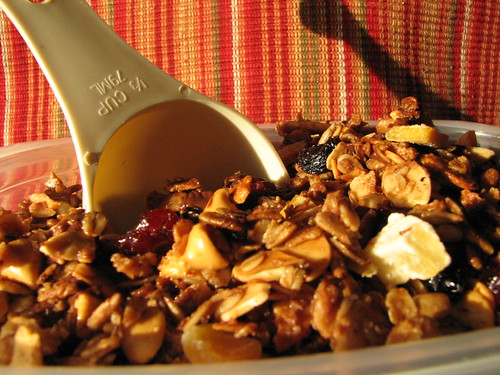
Although I have made a few recipes by now.. the Ziti with Ratatouille; the Garlicky String Beans; Provencal Tomato, Eggplant and Zucchini Tian; and Homemade Chai - all of which have blown us away.. SO GOOD!! I can not blog about them as per the publisher's instructions, but that's okay! Because I got to try another recipe that I've had my eye on from the night I read through the book, but haven't gotten around to making yet and that is Earthbound Farm's Famous Maple Almond Granola. This recipe is approved by the publisher's so I can share this totally addicting recipe with all of yous. :D

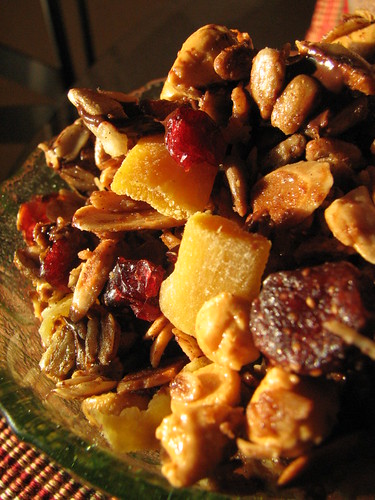
Firstly, I have to say.. I took this opportunity to play a little bit.. 2 reasons again. Firstly, I'm not a huge granola cereal lover. I like granola to snack on, as does Hubbs. Secondly, I've got a boatload of dried fruit in my pantry and a couple other odds and ends that I felt would be just way yummy in this granola. So, I followed Myra's instructions to a T.. but I added a lil extra of my own. :D

Maple Almond Granola

One word of advice if you decide to make this.. it makes about 8 cups of granola. Double it. Seriously. I just made it and we've already put quite a dent in it.. it won't last until the end of the week, I can guarantee it. heee!

Earthbound Farm's Famous Maple Almond Granola
Adapted from Food To Live By Myra Goodman
Workman Publishing, 2006

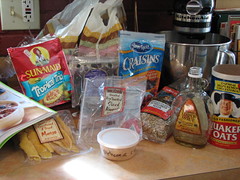
Maple Almond Granola Ingredients

4 1/2 c. (18 ounces) old-fashioned rolled oats (not instant)
1/4 c. (3 ounces) shelled, raw, unsalted sunflower seeds
1 1/2 c. slivered or coarsely chopped raw almonds
2 TBS. ground cinnamon
1 1/4 c. pure maple syrup, preferably Grade A Dark Amber
1/3 c. canola oil
1 c. raisins

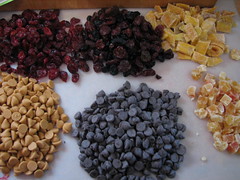
Maple Almond Granola Fixin's

My additions:
1 c. chopped dried mango
3/4 c. chopped dried pineapple and papaya
3/4 c. dried blueberries, cranberries and strawberries
3/4 c. dried Oceanspray orange scented cranberries
3/4 c. butterscotch chips
3/4 c. semi-sweet chocolate chips

Position a rack in the center of the oven and preheat the oven to 325º F.

Place the oats, sunflower seeds, almonds and cinnamon in a large bowl and stir to combine. Add the maple syrup and oil and stir until all the dry ingredients are moistened.

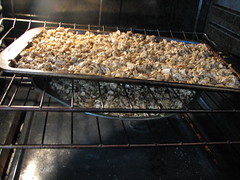
Spread the granola on a roughly 12 by 17-inch rimmed baking sheet. Bake the granola until it begins to brown, about 25 minutes, then stir with a flat spatula. Let the granola continue to bake until it is light golden brown, dry and fragrant, 15 to 20 minutes longer. Stir the granola at least once more as it bakes and watch it carefully during the final minutes because it can burn quickly.

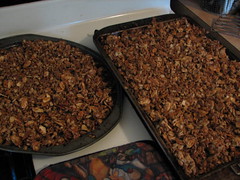
Maple Almond Granola Baking Maple Almond Granola

Place the baking sheet on a cooling rack, add the raisins (and other dried fruits & chips if using), and stir to combine. Let the granola cool completely. Transfer the granola to a airtight container. It can be stored at room temperature for up to 1 month or frozen for up to 6 months. You can serve the granola straight from the freezer. It doesn't get hard and it thaws almost instantly - just pour on some milk. Or if you are like me.. graze on it by the handful. *slurp*

I didn't go with the extra bowl, my kitchen is a fakkin disaster area thanks to Hubbs and his chili and stuffed pepper extravaganza last night.. so I just dumped all the ingredients on the baking sheet (and pizza pan) and mixed with my hands - was sticky but much quicker and 1 less bowl to clean! =)

Maple Almond Granola

Thanks again.. Lilli! Sara! Myra & Drew! Earthbound Farm!

Enjoy!
xoxo

Labels: , , , ,

Thursday, June 21, 2007

Beans! Beans! The Magical Fruit...

The more you eat.. the more you Hi! I just can't help myself from mentally singing that lil diddy everytime I think about beans. They are quite magical, aren't they?

Not that I'd really know, as not many beans pass these almost 40 year old lips. Yeah.. I'm not a big bean lover. Nope, not so much hip on the legumes. I know. I'm weird. I realize I'm in the minority here and that most really enjoy beans. I, personally, can't get past the texture.. kinda fibery & creamy at the same time. And they sometimes get stuck at the back of the roof of your mouth - you know, where the hard palate rolls into the soft palate right before you hit the uvula? heh heh Nay Sayers.. you didn't know I was so fakkin educated on areas in the human mouth, now didja? I'm not really.. I just looked it up - but I was pleasantly surprised when I realized I could use the word "Uvula" in a sentence. I love that word. Uvula. I don't use that word often enough, yanno?

Anyhooooo.. yeah the bean meat or whatever ya wanna call it.. the pasty stuff sometimes gets stuck in that area of the mouth and sometimes it's hard to get it off.. sometimes you find yourself chipping away at it with the tip of your tongue, or even worse, rubbing it with the base of your tongue in a way of trying to scrub it off.

Quit looking at me that way.

Are you trying to tell me that I'm the only person EVER to get the bean meat stuck on the roof of my mouth? The only one who could spend hours trying to chip away or scrub it off with her own tongue?? Whot. Evah. You've NEVER experienced that waxy, pasty, grainy, squicky feeling sometimes brought on by pasty bean meat? How about when it adheres to your two front teeth like little ill-fitting wool sweaters?

So, I'm guessing you get the idea why I'm not a huge bean loving gal, eh? BUT! I want this to change! I dooo!! I know I'm missing out on all kinds of delicious salsas, hummus, nachos, southwestern eggrolls, rice & beans, layer No. 1 of most Mexican 7 Layer dips.. I mean the list could go on and on.. And what's more, I've heard that beans are good for you. Can you imagine?

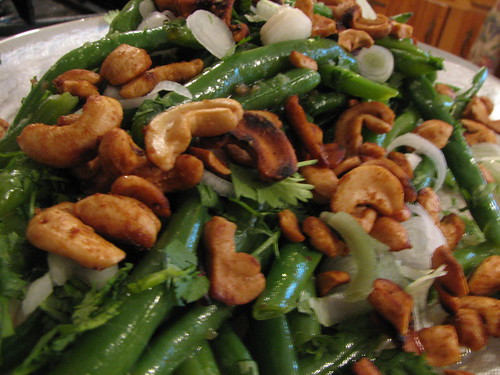
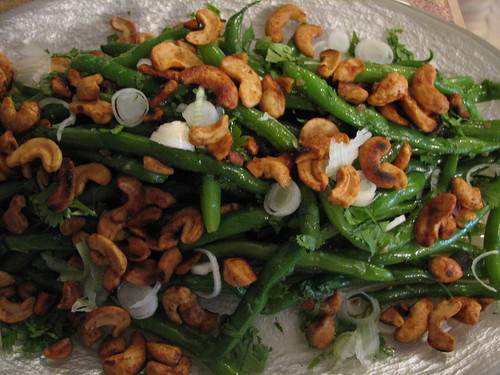
Well now, I gotta tell you how excited I've been for the past 48 hours. Squeeeeeeeeeeee! I made a bean dish - And - I LOVED IT! No, LOVE is not strong enough of a word.. I.. I.. I could make out with this bean salad. I could! Okay a lil background.. I'm going to spoil it for those of you who are waiting with bated breath (baited breath? like fish hook baited?) for the big Salad Stravaganza debut on July 1st, but I can't help it. Alanna of A Veggie Venture submitted a recipe for the Stravaganza that just made me NEED to run out for green beans and almonds. 'kay well, you know I gotta mess with everything.. so I opted for cashews in lieu of the almonds, BUT STILL! I RUSHED to get these ingredients and I RUSHED to get home to prepare this dish.. this amazing BEAN dish.

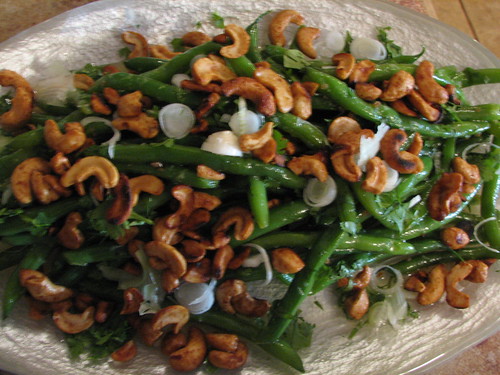
Fresh Green Bean Salad w/Asian Dressing

Ohh.. uhhmmm.. all that stuff you just read up there - yanno, about the hate hate relationship I have with beans? 'kay that really had nothing much to do with this post because I like green beans. I've always liked them. heh heh So yeah, no, I've never really been known for shootin' straight from the hip. Ya dig? I kinda liked takin ya'll on a wild bean hatin' rant before I got to the point of this here post. heeee!

So as I was saying, Alanna submitted this dish and I just fell in love with it, and honestly? I can't really say why. But I did and I tried it and it was the best bean salad I have ever had in my whole and entire life! The beans were crisp and flavorful, the dressing was tangy and zingy and was all about the Asian flavored love. And the icing on the cake was the Soy Glazed cashews that are sprinkled on top of the green beans. Those were so good on their own that Hubbs has informed me that no nut will pass his lips if they aren't soy glazed nuts.

That didn't sound exactly right...

If this description hasn't made you push yourself away from the screen in a mad dash to find yourself some green beans and the nut of your choice, then maybe this will help.. green beans are low in calories (only like 44 calories in 1 cup!), they are an excellent source of Vitamins C & K and something called manganese! And! And! They are really good for your heart and all the lil things attached to it! Dudes.. these green beans pack a major healthy punch!

Fresh Green Bean Salad w/Asian Dressing

Since I only changed the type of nut used in Alanna's recipe, I'm not going to give the recipe here - but I am going to give you a word to click on that will take you to the recipe.. but kids? Single file, okay? Don't be jammin' up Alanna's site. :D

Okay here's the word: --> UVULA <--

And because Alanna has already submitted a recipe to Ilva's and Joanna's Heart Of The Matter No. 4, and because The Heart Healthy gals prefer one-event submissions, I'm going to submit this recipe in Alanna's name just because I feel so strongly that it should be passed around and seen in events that are healthy eating related. So I'm hoping the gals won't see this as a recipe coming from another event as the Salad Stravaganza has yet to "debut". heee!

Fresh Green Bean Salad w/Asian Dressing

PS - You might notice that I labeled this dish as a starter, a side dish and the main dinner dish, because I feel it would work as all three. =)

xoxo

Labels: , , , ,

Saturday, May 12, 2007

WCC No. 16 - Something New!

When my friend, Sara of i like to cook, announced the theme for this month's Weekend Cookbook Challenge, "Something New" I knew exactly what I'd be submitting. I had actually made this recipe a few days before her announcement and have been saving it ever since.

Originally, what I was going for was kind of shady in my mind. I kept thinking of this concoction my father use to make - it was basically sliced peppers in olive oil with a bunch of spices. YUM. But I wanted something a little more substantial - something with lots of veggies. Something I could spread on crackers, use as a bruschetta topping or serve with crudités. Something that was savory and filling that would be the perfect nibbler during Boston Legal (Ohhh Alan & Denny - you make the best couple EVER) or served to friends who come over for cards or just to hang out.

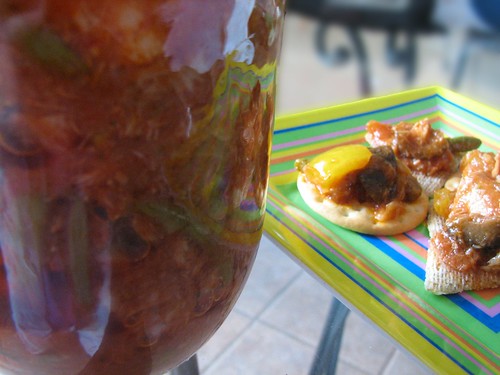
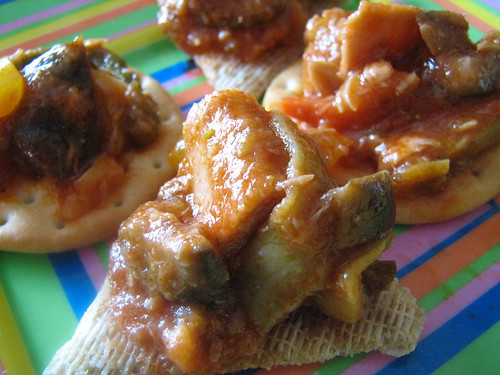
So this is a "new" recipe, something I've never had before and so far, something that my friends had never had either.. everyone of them has asked for the recipe. It's that good. Although this isn't an oil based antipasto like I had originally thought to make, it is as delicious as my dad's peppers and I just wish he was here to try it - he'd go crazy over this stuff! You've got tons of different veggies, Italian tuna and anchovies bathed in a light tomato sauce. Warm or cold, spread on crackers or a big slice of crusty bread - this antipasto is what I like to rate as "drool worthy" in the spirit of Elaine Benes' "sponge worthy". The flavors all work so well with each other and the tuna and anchovies give it just the right amount of salty goodness.

Antipasto

I'd say the only drawbacks of this recipe is that it's kind of expensive to make - but you do get a BOATLOAD of it. The original recipe made 15 pints. FIFTEEN. So it all evens out in the end. I halved this recipe, as the only other drawback is space. I don't can things, I'm afraid of it.. I tried tomatoes one time and it was just a disaster - especially 2 months later *shudder* - so I chose to freeze the bulk of this and even with 3 freezers, it's hard to find room for 8 bags of antipasto. hehe

And one other thing, before I share the recipe, is that if you decide to make this delicious antipasto, don't make the same mistake that I did by cutting the veggies too big. You definitely want to spend the extra time in dicing most of the vegetables. (you can get more on the cracker that way.. heehehe)

Antipasto
Antipasto
Courtesy of Derf and Recipezaar

Recipe makes 15 pints

2 large green peppers (I used yellow because they're my favorites)
4 large carrots
2 cans pitted black olives
1 (16 oz.) jar broken green olives
2 (12 oz.) jars pickling onions
2 (4 oz.) jars pimientos
1 (48 oz.) jar sweet pickles (I substituted these with asparagus tips)
1 large cauliflower
8 oz. olive oil
5 cloves garlic, smashed
2 (15 oz.) bottles ketchup
1 (15 oz.) bottle hot ketchup (I omitted this as well, didn't know what it was)
1 cup red wine
2 (5 1/2 oz.) cans tomato paste
1 TBS. dried oregano
2 (14 oz.) cans artichokes
2 (10 oz.) cans mushroom pieces
2 cans anchovies, chopped (Even when halving the recipe, I only used 1/2 of 1 jar)
3 (7 oz.) cans Italian tuna

Chop green peppers, cut carrots into julienne strips.

Chop ripe olives, green olives, pickled onions, pimiento, sweet pickle and set aside.
Break cauliflower into bite sized pieces.

Put 2 oz. of olive oil into frying pan and add 2 cloves garlic, add cauliflower and saute. Remove from heat and set aside.

In a large pot add remaining olive oil and saute the remaining 3 cloves of garlic, add ketchup, wine, tomato paste and oregano.

Add chopped vegetables, pickles, olives, artichokes, pimiento, cauliflower and mushrooms.

Simmer for 10 minutes, stirring frequently.

Add anchovies and tuna to mixture and bring to a boil, stirring constantly to prevent sticking.

Serve for use immediately, refrigerate for up to 2 weeks, place in containers for freezing or place immediately in hot sterilized jars.*

*Note: If you are going to can this recipe, I suggest you read the comments on the recipezaar site - it could be dangerous canning low acid foods such as olives and seafood. If you've got the room, I recommend freezing - this way you'll have no worries. =)

Labels: , , , , ,

Tuesday, April 10, 2007

Monthly Mingle No. 9 - Arabian Nights

MMApril2007

So life was a bit chaotic during Meeta's MM No. 8 and I didn't get a chance to participate.. but not this month - nothing was going to keep me from joining in on the fun! Not even having absolutely, positively no farkin' idea what to make. None. Nada. The big goose egg. Zilch.

This gal doesn't venture much past the Italian, Mexican, Asian, Southern regions of cuisine very often and hoooo baby! did it ever become blatantly apparent when Meeta announced the theme!

So.. well.. my offerings aren't very creative - actually she suggested both in her write up. And although I've made many versions of the one recipe, the other was very new to us and even after being more than a little apprehensive as to how it'd taste, we both really enjoyed it! So Yay! to trying something new and crawling a lil ways from our comfort zone. We rock. We are so worldly now. heeee!

And so without further ado.. I present to you -

Baba Ghanoush
Baba Ghanoush!!

And yeah, the ONLY reason I made it was not my love of eggplant.. it was only because I love saying it! Baba ghanoush!! Baba ghanoush!! It's hella cool!

Okay since I've never had this before I can't vouche if the recipe I found was authentic, but it sounded really good and ended up tasting really good too.. you be the judge:

1 large eggplant
1/4 c. tahini, plus more as needed
3 cloves garlic, minced
1/4 c. fresh lemon juice, plus more as needed
1 pinch ground cumin
Salt, to taste
1 TBS. extra-virgin olive oil
1 TBS. chopped, fresh, flat-leaf parsley
1/4 c. brine-cured black olives, such as kalamata

Prepare a medium-hot fire in a charcoal grill.*

Preheat an oven to 375°F.

Prick the eggplant with a fork in several places and place on the grill rack 4 to 5 inches from the fire. Grill, turning frequently, until the skin blackens and blisters and the flesh just begins to feel soft, 10 to 15 minutes.

Transfer the eggplant to a baking sheet and bake until very soft, 15 to 20 minutes.

Remove from the oven, let cool slightly, and peel off and discard the skin.

Place the eggplant flesh in a bowl. Using a fork, mash the eggplant to a paste.
Add the 1/4 cup tahini, the garlic, the 1/4 cup lemon juice and the cumin and mix well.

Season with salt, then taste and add more tahini and/or lemon juice, if needed.

Transfer the mixture to a serving bowl and spread with the back of a spoon to form a shallow well. Drizzle the olive oil over the top and sprinkle with the parsley. Place the olives around the sides. Serve at room temperature.

*My Notes: Okay so THAT's the way Mimi Bobeck prepares her Baba Ghanoush. Lisa, dead tired from her 8 in the dungeon prepares it this way:

Baba Ghanoush

Preheat oven to 375º F.

Peel the eggplant (although next time I'm going to skip this step as well) and cut into 1/2 inch disks. Place them, single layer, on a cookie sheet and salt them, then drizzle a lil olive oil over them. Bake for 20-25 minutes or until they are golden brown and soft.

While the eggplant is roasting in the oven, get out your trusty food processor and toss in all the rest of the ingredients (I cut the tahini down to 1/8 c. at first because a few of the reviews said it overpowered the eggplant, but I used a 1/4 c. in the end), including the kalamatas but excluding the olive oil. Once your eggplant is roasted, toss the disks right in with the rest and process until it all looks good and mashy.

Transfer to a pretty bowl and drizzle the olive oil over it. Serve with freshly baked pita chips. Ohhh and awwww over what you've been missing all these years. ;)

Secondly, I made kebabs! Partly because Meeta said they legally met all the requirements for this month's Mingle, but mostly because my friend, Laurie, of Laurie's Kitchen made these recently and they looked amazingly good (much better than mine looked!). Although I used a different marinade - and only because I had so much of it left from my Easter ham and I wanted to get rid of it.

Kebabs
Pork Tenderloin Kebab (or ham!) marinade/sauce/glaze

1 c. packed brown sugar
5 TBS. balsamic vinegar
1 TBS. dijon style mustard

Mix well and pour over your intended meat for a quick 30 min. marinade (can use the marinade for glazing after you remove the meat) or just as a super yummy glaze.

Thanks for a cool theme this month, Meeta!! I look forward to checking out the round-up - and ya'll should too! :D

xoxo

Labels: , , , ,

Friday, December 29, 2006

I Did It! I Finally Did It! Also.. Peabody Rocks!

For the past 3 (or is it 4?) years I've been trying, very unsucessfully, to recreate my Dad's Christmas Calamari Sauce. And lemme just tell yas.. this process has been very lonnnngggg, disasterous and heartbreaking. So let this lil post be a lesson to all you kids out there - Life is short! Do not take ANYTHING for granted! My Dad made this sauce every single Christmas Eve of his life (well his life with his family) and my Mother and I never, ever watched him do it. We never asked him to show us how to make our most favorite sauce in the world. And then he was gone.. and although we didn't even want to celebrate Christmas without him for a few years, when we were ready to bring back the traditions the way he would want us to.. we had no way of making the sauce. *sigh*

After last year's disaster, I decided that I would research any and all old Italian seafood sauces that I could get my hands on.. surely there is some Italian family out there that enjoys this sauce, eh?? By God, you'd think not after all of my failed attempts to find anything. And then one day, my Mom said to me, "You know, he cleaned squid for hours and when he boiled it, the water turned purple." Bingo! I had no idea he cleaned his own squid.. I had been buying it already cleaned and all I had to do was slice it. Duh! So this year, I bought whole squid and Hubbs and I spent an hour or more cleaning about 3 lbs. of it. Now THAT was an experience. If you've never cleaned squid before, you have no idea how many steps there are to it - as well as the ick factor. Nothin' like chopping heads off right below the eyeballs, my friends! heee!

Okay - without getting into more gorey details.. after we cleaned the squid, I managed to save a few very tiny ink sacs. We boiled the tubes and the tentacles with the ink sacks until we saw that the water was turning purple! Woo!! Frankly, I don't think the ink sacs had much to do with it though, as after I took the pieces out of the water, the sacs were pretty much still intact. I believe the color comes from the skin left on the tentacles. Anyhoo.. the rest of the process was quite easy.

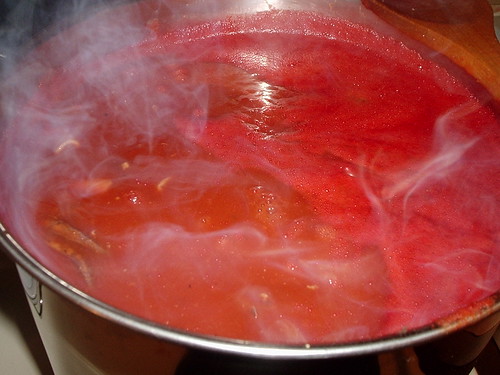
My family's marinara sauce calls for tomato puree and after you dump the puree into your pot, you fill each can up with water to dilute it a bit. So I did that with this sauce as well.. only I used the water that we boiled the squid in to fill up those cans. I know he didn't season it like he did our regular marinara so I only put in salt and pepper along with all the calamari pieces parts.. and after a good 5 hours of simmering.. I had my Dad's Calamari Sauce. Finally.

Dad's Calamari Sauce - FINALLY

This picture was taken only after an hour or two of simmering so the sauce was still bright red.. when it was finished it had turned a beautiful dark red and the calamari was melt in your mouth tender.

Rather than post this recipe here, because I realize not many people are going to be interested in a tomato sauce that features squid, hehehe, and because the steps are quite lengthy to type out - I will offer to type it all up for you and send through e-mail if you are interested, just drop me a line. This sauce really is magnificent :D

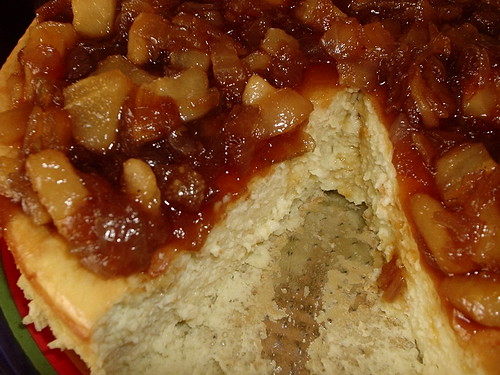
And now on to the appetizer and the dessert! Both recipes are from Peabody so I will just link you to her beautiful pictures and recipes.. but I just had to share how mine turned out.. both were a smashing success and both recipes were asked for by everyone who attended. Thank you, Peabody - I am now addicted to bread pudding (which I'd never had before) and that excellent bleu cheesey/oniony-peary jammy spread! Oh! I also took the remainder of the cheesecake to work so it wouldn't go to waste and everyone there loved it as well! =)

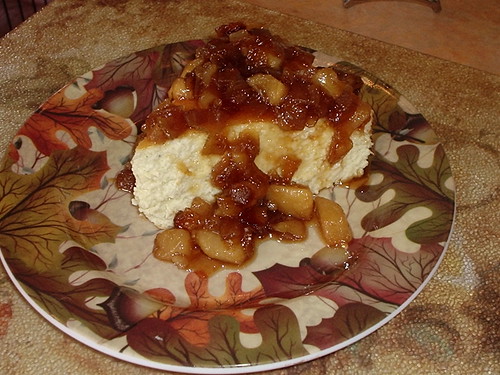
Bleu Cheese Cheesecake w/Onion Pear Jam

This large wedge was plenty for a crowd of 9 people, I served it with butter crackers and toasted slices of baguette..

Bleu Cheese Cheesecake slice
Peabody's Bleu Cheese Cheesecake with Onion-Pear Jam

1 3/4 lbs softened cream cheese
8 oz shredded Asiago cheese
8 oz blue cheese, crumbled
5 large eggs
1/3 cup heavy cream
1/4 tsp white pepper

Grease a 9-inch springform pan.
Preheat oven to 350F.
Cream cheeses together until smooth.
Add eggs one at a time.
Add cream and pepper. Combine.
Bake uncovered in a water bath until golden brown and center is set.About 45-50 minutes.
Cool Completely, remove sides of pan.

Onion Pear Jam

4 cups onions, diced
1 tsp olive oil
2 cups pears, peeled, chopped
2 TBSP fruit vinegar
1 cup brown sugar
1/4 tsp kosher salt
1 pinch cayenne pepper

Saute onions in oil until brown. Reduce heat and cook until glazed.
Add pears, vinegar, sugar, cayenne and salt. Cook till pears are crispy tender.
Remove mixture ans simmer juice utnil a thick glaze.
Mix pear onion mixture with glaze. Cool.
Cover cooled cheesecke with jam and serve with bread or crackers.

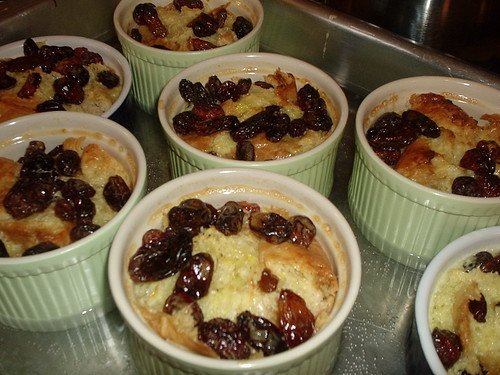
And here are the individual bread puddings.. when making this, I had to leave out the alcohol and the nuts. I subbed vanilla for the alcohol and MY GOD it was delicious! If making individuals like I did, the baking time was reduced by only 10 minutes or so.. just until the middles felt firm when inserting a thin knife.

Individual bread pudding

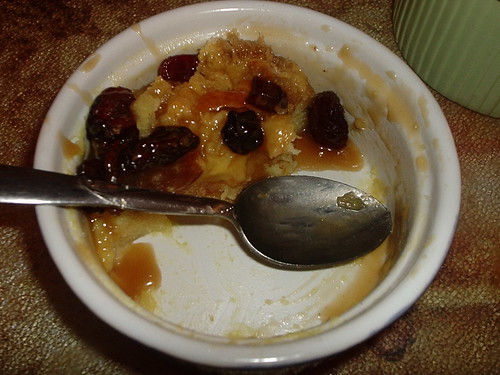
Half way through devouring mine I realized I forgot to take a picture with the dreamy toffee sauce drizzled over it.. so this is all ya get to see. hehee

Dear Sweet Jebus this was good!
Peabody's Croissant Bread Pudding with Pecan Toffee Sauce

4 large croissants or 6 small ones
1 pint heavy cream
4 egg yolks
½ cup of sugar
1 teaspoon nutmeg
1 cup raisins

Preheat oven to 350F.
1.Tear croissants into pieces and place int o baking dish. Sprinkle bread with the raisins.
2.Mix the egg yolks, sugar and nutmeg together in a bowl. Then stir in the heavy cream.
3.Pour the custard over the bread. Press down the bread pieces until the bread is soaked with the custard. You will most likely have extra custard depending on how stale your crossiants are. Don’t feel like you have to use all the custard.
4.Place pan into another pan that will hold a water bath. Bake the bread pudding for 45 minutes until golden on top. Cool 10 minutes and serve warm.

Pecan Toffee Sauce

3/4 cup packed brown sugar
1/3 cup unsalted butter
1/3 cup whipping cream
1 TBSP Amaretto
1/2 cup chopped pecans, toasted
1.Stir brown sugar and butter in heavy medium saucepan over medium heat until melted and smooth, about 2 minutes.
2. Add cream and Amaretto and bring to a simmer. Simmer for about 5 minutes and then add pecans.

To see gorgeous shots of these two recipes, check out the loverly Peabody's site for the Bleu Cheese Cheesecake with Onion-Pear Jam and the Croissant Bread Pudding with Pecan Toffee Sauce - I can't describe how good both of these were.. you have to try them for yourselves! :D

Labels: , , , , , , ,

Monday, December 04, 2006

A Gift From a Very Special Friend and WCC No. 12!

I have been just waiting for the perfect opportunity to share with yous this:

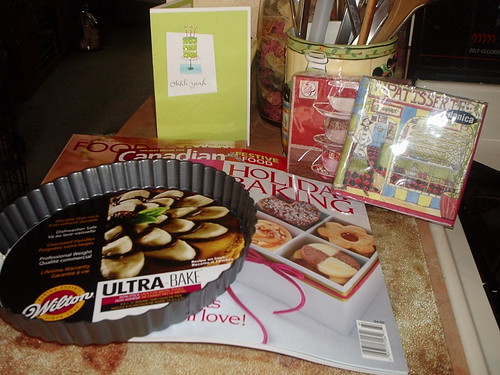
From Ivonne :D

This was a completely unexpected surprise that I received in my mailbox last month, around my birthday! My dear, sweet friend, Ivonne, sent me this package of some excellent Canadian cooking magazines, two adorably printed packages of cocktail napkins and a tart (or quiche) pan! I've wanted this pan for soooooo long and she knew I wanted one and she sent me one. I didn't know what to say.. I still can't find the exact words to express how special she has made me feel and how grateful I am to her for sending such a lovely present with a special message inside the cute, glittery card. Again, Ivonne, thank you! Thank you, so much! =)

And so, this perfect opportunity has arisen. The lovely Sara's WCC No. 12 - Party Foods! What better party food than a scrumptious tart, yes? There are sweet tarts and savory tarts, tarts made with mousse and tarts made with fresh berries and fruit. There are delectable tarts made of fresh veggies and tarts made of chocolate! The possibilities are endless and I think I've managed to link to most of the reasons why I've wanted a tart pan so badly! hee!

With an incredible craving for asparagus this past week, I decided that I needed to find a recipe for a savory tart that featured asparagus. I searched high and low through my cookbooks to no avail and then all over the interweb until I happened upon a new site to me, Food Down Under. A pretty cool site, featuring cuisine from all over the world. Catagorized by either country or type of dish, finding tart recipes was a breeze.. finding tart recipes featuring asparagus was even easier! There were a few to choose from, but I settled upon this one. I liked the idea of a crust made from phyllo dough and the cheeses included in the ingredient list were pretty mild, so I knew the asparagus would shine through. And that it did. =)

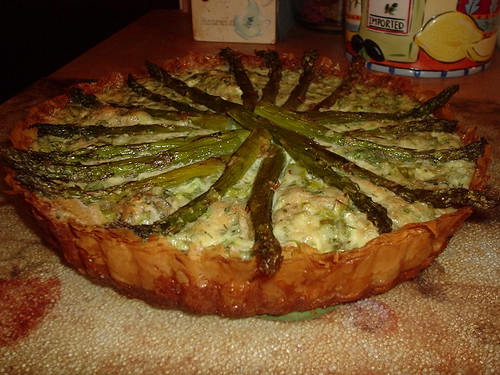
Asparagus Tart
Asparagus Tart No. 182
Courtesy of Food Down Under

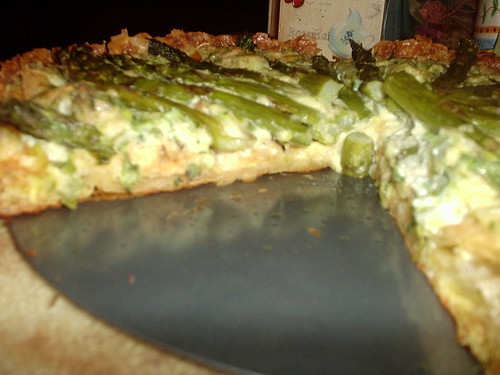
Asparagus Tart II


12 sheets phyllo pastry
2 TBS. butter
1 lb. asparagus
1/2 cup milk
1/2 cup marscarpone cheese
2 eggs
1/2 cup fresh grated Parmesan cheese
2 TBS. chives
2 TBS. parsley
1 TBS. chopped fresh tarragon
1/2 tsp salt
pepper to taste
1 TBS. bread crumbs - plain or seasoned

Preheat oven to 400º F.

Melt the butter and lightly brush a 9 inch deep pie plate or quiche tin. Set aside.

Open the phyllo pastry on a flat work surface and brush a little butter around the edges of 1 sheet, brushing a 'zigzag' of butter up and down the sheet of pastry. Place another sheet on top and butter as before. Fold these two sheets in half (so that you have a four sheet depth) then place this in the prepared tin, hanging over the edge slightly and covering part of the sides and base.

Repeat with the remaining sheets of pastry, buttering and folding as before and placing in the tin until the base and sides are totally covered. Bake in the oven for 10 minutes then allow to cool.

Reduce oven temperature to 350º F.

Trim the asparagus so that each spear is 3 inches long then slice all the remaining offcuts of asparagus finely. Cook the asparagus spears in a pot of boiling salted water until just crisp-tender, about 4 minutes then drain well on kitchen paper.

Mix together the milk, marscarpone cheese, eggs, cheese, chives, parsley, tarragon and salt in bowl then season with pepper. Add the finely sliced asparagus off-cuts and mix well.

Sprinkle a tablespoon of dry breadcrumbs over the base then pour the cheese custard into the tin. Arrange the asparagus spears in a circular fashion on top of the custard, tips towards the edge and ends meeting in center.

Bake until tart puffs well and the top browns, about 35 minutes. Cool slightly

This tart was delicious. It was creamy and had a great crunch thanks to the crispy phyllo dough. The taste of asparagus paired beautifully with the mascarpone and parmigiano reggiano cheeses. It was very easy to make and I had it done within an hour. This tart can be served warm or at room temperature. Perfect for parties! It's quite pretty too, isn't it? :D

The only thing I changed in this recipe was to roast the asparagus instead of boiling it. And the only thing I would change the next time I make the recipe is to omit the tarragon. I could do without it.

Now I would like to apologize to Sara for getting this recipe in so late! She's already got the round-up posted - go check it out, the submissions are fabulous! And I'd like to once again thank my friend, Ivonne, for much more than a wonderful birthday present, but for just being my friend. =)

Okay enough with the mooshiness.. I'm going to bed. :P

xoxo

Labels: , , ,

Sunday, November 19, 2006

Pretzels and a Cream Puff!

So one day I was talking with a friend through e-mail about baked goods, after I had left a comment on her blog, and I asked her if she'd ever (or was going to in her baking classes) made pretzels before. She hadn't, but she wanted to try them. So I suggested we find a recipe and each make a batch and then post about them on our blogs the same day. That friend is Ivonne. You might have heard of her? She's that extremely sweet and talented writer, baker and chef behind that lil blog some of you might be familiar with, Cream Puffs in Venice? Yeah.. that's the one!!

I was very excited about the prospect and off I went in search of a good pretzel recipe. Ivonne did the same and after we got back to each other with what we'd found, we both agreed to make the recipe from The King Arthur Flour Baker's Companion and we set a date of November 19th to try it.

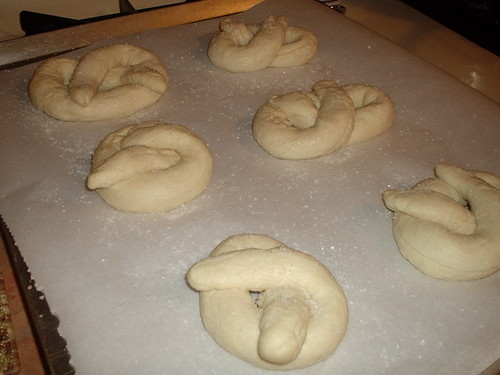
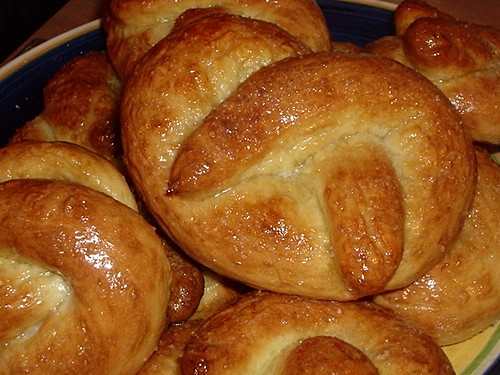
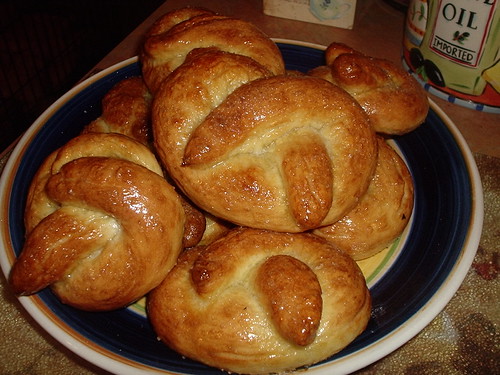
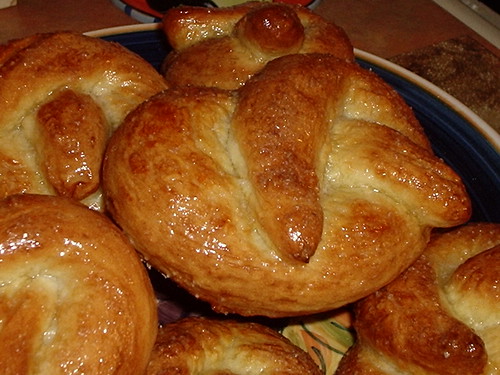
It's the 19th! We've both made our pretzels and now it's time to share with our friends. I haven't seen Ivonne's post yet, but from what we've discussed through e-mail it sounds as if we had different experiences, so say the least. As I was telling her, mine worked out beautifully from the start all the way up to the opening of the oven door after baking time was up. It was only then that I thought maybe something went wrong. My finished pretzels ended up looking like pretzel shaped dinner rolls. And they had that kind of taste as well. More bready than pretzely (it's my new word). They were good, especially after the butter soaked in.. but they weren't what I was hoping for. Now Ivonne said her's turned out the complete opposite where her dough didn't rise much and they were very pretzely. So go figger. I can't wait to see hers!

Here's mine along with the recipe. These were super easy to make and had my dear Hubbs allowed me to have just one more minute with them, I was planning on making a few with cinnamon/sugar - but he didn't give me that chance. I actually got 9 (yes some where bigger than others) pretzels out of my batch, there are 2 left. I had one. I'm grateful for that. I'm also grateful I still have my fingers. I'd say he liked them! =)

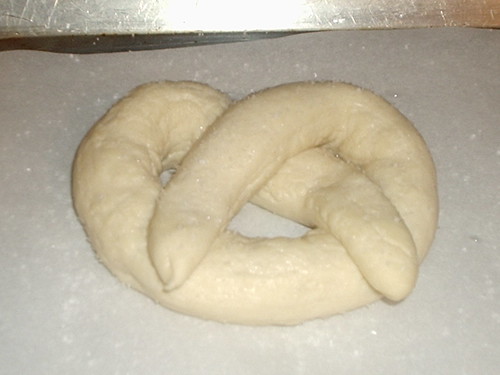
Unbaked Pretzels Best one!
All twisty and ready to go in!

Best one baked! ha!

Baked!

baked
They are pretty aren't they? But where are the holes?? hahaa =)

You can find the recipe here and also at Ivonne's
(Her pretzels are GORGEOUS! Well done, my friend! Well done! =))

Labels: , ,

Tuesday, November 07, 2006

Being Lazy is Sometimes a Good Thing!

Our Sunday plans somehow ended up not happening. Well, actually that "somehow" was because Hubbs woke up with terrible back pain and I insisted he put ice on it and take it easy. Poor guy. So in between doing mountains of laundry (Fakking Febreze - some dogs and Febreze DO NOT go well together, beware!!) all day, watching football games and squeezing in a movie when he was napping I had forgot about dinner.

Around 7ish, I made a quick run up to the grocery story and picked out items for an extremely easy and tasty dinner - and I'm talking, ya just can't get lazier easier than this!

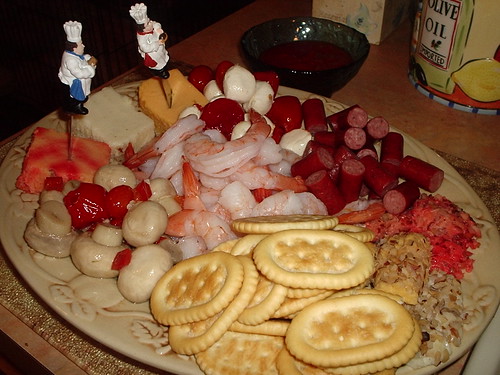
Sunday dinner!

Yeppers.. we dined on a pound of good sized cocktail shrimp, 3 hunks of cheese (port-wine, sharp cheddar and a garlic-herb infused swiss), those cute lil beef sausage bites, some mozzarella & tomatoes, picante peppers, crackers and italian marinated mushrooms. WOO! I was exhausted by the time I plated and presented his dinner to him. teeee!!

And lemme tell ya.. a quick prepared foods dinner like this is sometimes AWESOME! The different tastes and textures was really quite nice. It was filling and there was only ONE dish to wash - party on!

Labels:

Sunday, October 08, 2006

Ilva's Formaggio Fritto Con Uva Fragola

Dear sweet jebus I have just tasted heaven.. Oh My God.

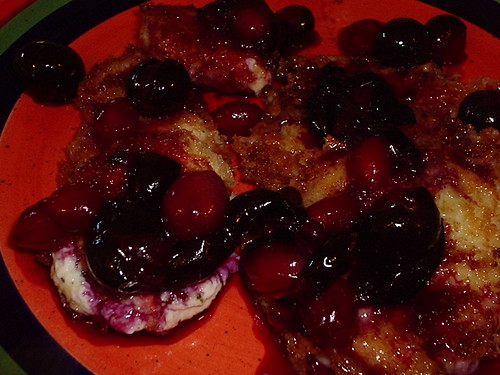
Being an avid fan of Ilva's, I read her blog each and every day equally for her breath taking pictures and her unique recipes. I lurve her. So.. back in September she posted a recipe for Formaggio Fritto Con Uva Fragola or Fried Cheese with Concord Grapes.. not necessarily two foods I'd ever think of combining together. But her pictures and her description were all it took for me to decide right then and there that I would make this recipe. I'm a big fan of the sweet/savory combination, so I knew that even though this dish looked a bit "foreign" to me, that it would be quite delicious.

I had no idea.

I had to stop myself from eating. I was already through almost half of a log of goat's cheese and was working on the slices of fontina when I realized that if I did not stop soon, there would be none for Hubbs. If he wasn't so interested in this "concoction", as he called it, then I wouldn't have given a damn and would have happily continued eating my weight in fried cheese with concord grapes - and lemme just tell you.. that's a whole hell of a lot of cheese and grapes. So, I guess, it's a good thing that he wanted some, eh?

I used both kinds of cheeses because he totally turned his nose up at the goat's cheese. But when I gave him a taste of the goat's cheese with the grapes first.. his eyes literally lit up and he got this hysterical grin on his face. It was quite funny.. quite funny for such a nay sayer! Then I gave him a slice of the fontina with grapes and asked which he liked better - he said the first one (goat's cheese) and I "Uh huh'd!" him and told him he DID like the goat's cheese better - for which he replied, "Oh no.. I meant the SECOND one!" liar.. liar.. liar!! teee!

I loved the goat cheese the best.. it's a bit more saltier and a whole lot creamier than the fontina so it paired much better with the sweet grapes for me. The fontina was good, the melt was more like mozzarella so it was chewy instead of melt in your mouth like the goat's cheese. But the grapes went equally well with it. I used Panko crumbs which gave all the cheese a terrific crunchy coating. This was bliss. I am so happy I tried my third in a long list of "must do's" of Ilva's recipes. So we are 3 for 3 in fabulous tasting unique recipes that came to me via a beautiful and talented woman all the way from Tuscany. Thank you, again, Ilva.. I can't wait to try number 4 (whatever it may be)!

Dear lord, I'm almost ashamed to include my horrible picture of this delectible dish.. actually, I am ashamed, but I feel the need to do it anyway.. PLEASE head over to Ilva's to see a beautiful picture that does justice to the taste of Ilva's Formaggio Fritto Con Uva Fragola! :D

Fried goat's milk cheese with concord grape sauce
Ilva's Formaggio Fritto Con Uva Fragola

Softish cheese like half soft goat's cheese or cow's milk cheese
Egg
Bread crumbs
Uva fragola or concord grapes
Honey
Olive oil

- Rinse the grapes and put them in a small pan together with a little oil (optional) and honey and heat it up slowly, stirring all the time. When they begin to soften, put the pan aside.

- Cut the cheese in finger thick slices, cut off the rind if you feel that it's needed.

- Turn one slice at a time in the whisked egg(s) and then you turn them in the breadcrumbs so that each slice is completely covered.

- Fry the cheese quickly in olive oil until golden and crisp.

- Serve the fried cheese together with the warm concord grapes.

Labels: , ,

Sunday, October 01, 2006

"Just Jack 2006"! or Cheesefest 2006!

Last night has got to be my most favorite lil soirée I've ever thrown. A friend in need just had to get away from it all before she went insane - she's the semi-new mother to twin 19 month old girls, she works full time for a lawyer who makes Scrooge look like a saint, her hubby is a decent man but he's the type who believes the child rearing, house cleaning, cooking and just about everything else should be taken care of by his wife AND she just got a new puppy.. so yeah she definitely needed a night away. I was happy to be able to provide such a night for her! Originally we just thought she'd come over and we'd play some games and have some nibblers.. but I thought our much needed night together should be a little more special than that. So I called a couple of our dearest friends, Greg, and his partner Bob (who truly is my soul sister) to see if they'd join us. They were happy for the invite and were just as excited as I was to get the old gang back together. We also invited her brother Tim - who came up from Columbus to join in on the festivities.

We dubbed the evening, "Just Jack 2006!", I jumped on Amazon.com and ordered a couple new games to play and got to thinking about what lil nibblers I would make. I knew I'd have to make those lil cheesy sausage snackers or they'd all end up shootin' me.. and I've fallen in love with homemade jalapeno poppers (yes you heard that right - jalapeno!) but what else? After searching through my books and my usual go-to site on the web, I decided on a Roasted Garlic and Olive Pate that I found on Recipezaar and an amazing Buffalo Wing dip (recipe from Bob) that tastes better than the real thing!

Every lil nibbler turned out beautifully.. but after it was all laid out for us to snack on throughout the night, we realized every single dish had cheese in it. Lots and lots of cheese. Sausage cups have chive & onion cream cheese, the poppers have cream cheese, the pate has brie and fontina, Greg and Bob brought two nibblers - a delicious cheese log made of feta and cheddar and a brick of cream cheese that Bob topped with homemade pepper jelly and finally, the Buffalo wing dip? Yep.. 2 pkgs. of cream cheese. Dear God. Oh wait! I almost forgot.. I made a couple of my pizzas.. yanno, loaded with cheese? har! Needless to say, "Just Jack 2006" quickly turned into Cheesefest 2006.

It was a fantastic night.. after sampling everything we decided to play a few drinking games (God) and then we retired to the living room and played the new games I had purchased.. and lemme just tell you - the Friends edition of Scene-it was fantastic (lots of Chandler Bing questions - yay!) but the highlight was The Price is Right hahahahhaaa! It was like actually standing in contestant's row, people!! The only thing missing was Bob Barker reminding us to spay and neuter our pets! Too funny!

Below are the recipes for the Pate and the Buffalo Wing dip along with pictures of the nibblers Greg and Bob brought to share. So if you're feelin' a lil mousey.. try these! Don't be put off by the looks of the pate.. it was fabulous. I added sun-dried tomatoes to the recipe (imagine that!) which really put it over the top. This is very similar to the olive tappenaude I frequently make, but the addition of the creamy brie and fontina cheeses takes it to a whole new level. And that wing dip? Seriously.. it's like eating excellent buffalo wings from your favorite dive - minus the annoying bones. ;) Perfect on crackers, Tostitos Scoops and/or toasted slices of baguette (my personal favorite). Try! Try!

Cream Cheese with Homemade Pepper Jelly Cheesy something or other
Cream cheese with homemade pepper jelly - Fantastic! and Feta/Cheddar log - Yum!

Roasted Garlic, Olive & Tomato Pate
Roasted Garlic, Olive and Tomato Pate

8 cloves garlic (skin on)
1/4 lb. Brie cheese, cut into small chunks
1/4 lb. Fontina cheese, cut into small chunks
1 c. Kalamata olives (pitted)
1/4 c. Extra-virgin olive oil
7 sun-dried tomatoes in oil

Preheat oven to 350º

Wrap the unskinned garlic cloves tightly in foil and place in oven to roast for 30-45 minutes. Let cool. Once cooled enough to handle, squeeze roasted garlic out of their skins and place in food processor.

In a double boiler, melt the Brie and Fontina.

Add the olives, sun-dried tomatoes and the olive oil to the garlic in the processor and process for 10-15 seconds. You want a very fine chop. Once the cheese has melted, add that to the ingredients in the processor and process for 5 seconds or until it's all mixed well.

Line a small bowl with plastic wrap and transfer the pate to the bowl, covering the top well. Let set up in the refrigerator for at least 4 hours. When you are ready to serve, position a serving plate over the bowl and invert, then take the plastic wrap off and serve with toasted, sliced baguette or crackers.

Buffalo Wing Dip
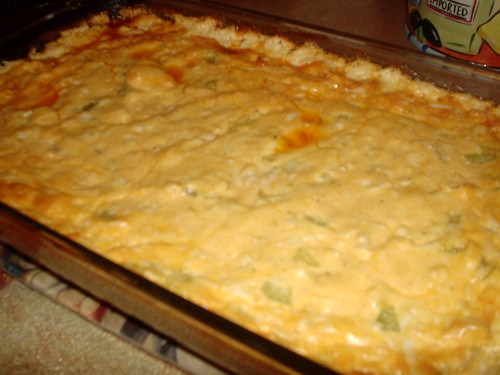
Buffalo Chicken Dip

3 chicken breasts, boiled and then shredded or chopped
1 (14-16 oz.) bottle of ranch dressing (I used Hidden Valley)
1 c. finely chopped celery
2 (8 oz.) pkgs. cream cheese, softened
1/3 c. of your favorite hot sauce (this measurement will be mild.. add more if you prefer a hotter dip)

Preheat oven to 350º F.

In a mixer, combine the cream cheese and ranch dressing until it's smooth. Add the chicken and celery and mix, then add the hot sauce and mix.

Transfer dip to a baking dish (I've made it in a 9" x 13" x 2" or a 8" x 11" x 2") and bake, uncovered, for 30 minutes or until lightly golden and bubbly.

Serve with crackers or tortilla chips

*Note: Forgive my pictures (as usual! hee!) the dip is a bit blurry because I was told to hurry the hell up so they could dig in. :D

Labels:

Tuesday, September 19, 2006

For Lack of Anything Better.. I'll Go With Lame!

Although I enjoy my little blog for really nothing more than the fun of usually makin an arse of myself on the internet, when I don't post often I kind of feel guilty. Not being able to cook much because of time constraints or when "life" takes over doesn't so much make me want to get back in the kitchen to nourish myself and Hubbs.. but because Holy Shit! I haven't blogged in like 5 days!! hehee Okay well no, not really - I cook because it's my passion and I get cranky when I don't get to relax in my kitchen (but my wee blog is always in the back of my mind).

So nothing has really changed here lately. Working long days and then visits up at the hospital to see Wayne's mom.. leaving me no time to do much in my kitchen other than heat up something previously frozen or firing up the grill before exhaustion takes over and I pass out on the loveseat while trying to catch up on my taped Project Runway episodes. The good news is, she's doing much better and they've moved her to a different hospital where she will have physical therapy for the next few weeks - yay! I'm so happy she pulled through this.. she gave us all quite a scare!

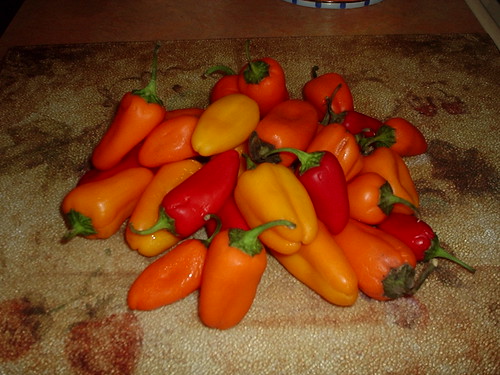
Itty Bitty lil bell peppers.. awww!

This particular post is regarding these adorable lil bell peppers I found at the supermarket.. teeny tiny versions of the normal bell peppers that are a staple at my house. Red, orange and yellow mini's that I could not pass up regardless of how many times I picked them up and put them back when I looked at the price tag - almost $4.00 for the package! Gah. But in the end, the cuteness won and I bought them. Now what the hell to do with them?? Not like they are going to feed us as a main dish, eh?

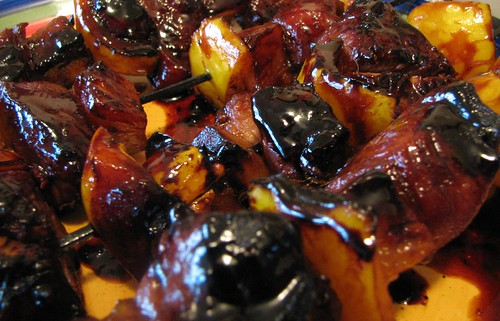
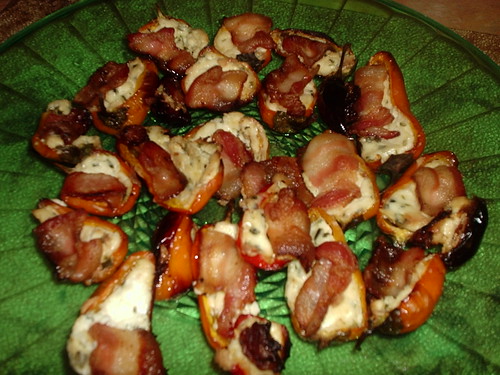
Itty Bitty lil pepper poppers!
Itty Bitty lil Pepper Poppers

har!! I went with stuffing them with onion & chive cream cheese then laying a piece of bacon on top before baking for 20 minutes in a 375º F. oven. What rule did I forget about bacon?? Yes.. yes indeedy I forgot that bacon will shrink when it's cooked. So what I thought were big slabs being laid on top ended up being well.. hardly there! Well regardless of how they looked (teee!), they turned out quite delicious and made a nice dinner of nibbles paired with some previously made and frozen Hand-Hacked Pot Stickers. Quick and easy and very tasty, indeed. :D

Labels:

Monday, July 17, 2006

Between the giggling...

We did have some fabulous food at our little slumber party and we did manage to nosh on it all night in between fits of giggles.

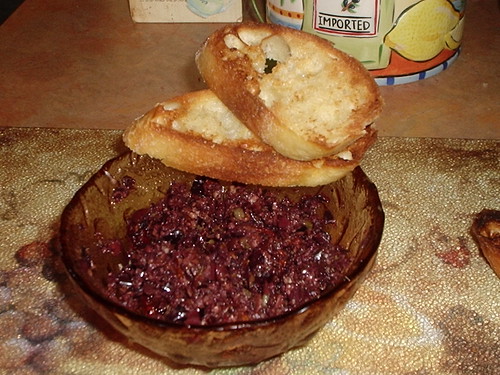
For the munchy portion of the evening, I made a tapenade with toasted garlic baguette along with a veggie platter. Mindy brought this most amazing Key Lime Cheese Ball that she served with cinnamon-sugar tortilla chips. Her cheese ball was made from a mix bought from a Tastefully Simple party that she attended recently. I've been to these parties before and bought some good items - but more not so good items. So I wasn't too jacked about this cheese ball.. that is until I tasted it. Wow! This is a great item to try if you know someone who is a Tastefully Simple representative. (also, they have a website where you can order products as well). It's a sweet cheese ball and is terrific served with the above mentioned tortilla chips or on graham crackers. Mindy said you can also pour the mixture into a pie shell for a quick and easy key lime cheesecake pie. Hmm.. sound familiar? And I spent all that time squeezing limes. Sheesh!

For dinner, we made a Paella. I didn't have an exact recipe. I read a few different recipes for the dish, but couldn't decide on which one I wanted to make - so I just winged it. It ended up being delicious and something that I hope I can recreate again. I'll post about it a little later as I'm running out of time this morning. Ugh.. back to the dungeon today. Vacation is over. *sob*

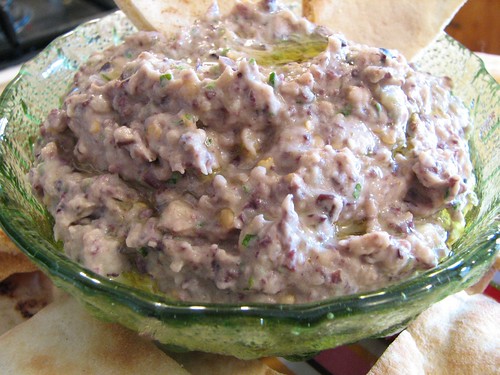
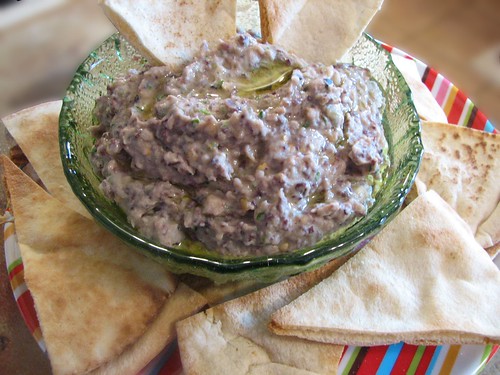
Tapenade
Tapenade

c. pitted kalamata olives
2 cloves garlic
1 TBS. capers, drained
5-7 sun-dried tomatoes
2 TBS. fresh parsley
2 anchovy fillets
olive oil

In a food processor, chop all ingredients finely, drizzling olive oil through top of processor until you get a paste like consistency. Do not process excessively, or you will get a puree like consistency. You want to be able to see bits of all ingredients.

Spread on toasted baguette slices that have been rubbed with garlic or simply buttered. Also good on crackers.. or hell, even by the spoonful. :D

*Note: You'll notice the bowl doesn't look very full.. this would be because I almost forgot to take a picture - after we tore into it. I blame the Mojitos.

Labels:

Wednesday, July 05, 2006

4th of July with a Lil Asian Twist

We had a loverly 4th of July this year, as I hope all of you did! This year we decided that because of work the next day (ugh) that dinner with the Cleavers would be the perfect way to celebrate the holiday. =) Yes.. the Cleavers. One of my closest friends in alla world, Mindy, has been dubbed June Cleaver. Her fabulous husband Dan, also known as Ward, and their beautiful little girl, Lily - better known as the "Beavette" are my Cleaver family. When Mindy and Dan first started dating they were so funny together as Mindy would ask Dan for a favor and Dan would always reply, "Yes, Dear." At first I thought it was for my benefit, but soon found out that this was Dan's (Ward's) constant reply to June, err, Mindy! They are the perfect couple ('kay they fight light cats and dogs, just like the rest of us) with the perfect child (she's 7, amazingly beautiful, and she's got a knack of getting herself in some predicaments, that end up being quite funny - such as, yesterday she accidentally slammed her finger in our slider door and howled as if she chopped the the damn thing off.. June took her to the bathroom for some first aid and when they made it back out to the kitchen Lily was still quite upset until she noticed me slicing the London Broil with my electric knife - she instantly stopped crying and in a very serious tone, commented that the knife was quite a nifty gadget.) So yes, we had dinner with the Cleavers and it was a fabulous day. =)

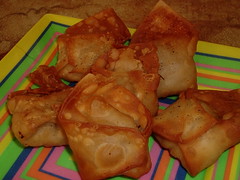
For munchies before dinner, I prepared Mindy's Guacamole which I served in hollowed out cherry tomato halves such as Ilva of Lucullian Delights created with her Avocados & Cucumbers Thanks Ilva! :D Along with melon wrapped in prosciutto and these fabulous little wonton snackers, that everyone enjoyed, even the very picky Beavette =) I found the recipe on Recipzaar a few weeks ago and thought they'd be a nice addition to my appetizer repertoire. They were easy to make and delicious served with both sweet & sour and plum sauces. I was a little nervous while frying them as the wonton browned quickly, too quickly I thought, for the pork filling to cook completely - but I left them in the hot oil and happily saw that the wonton only got a bit more goldeny brown while the pork filling cooked completely. I had intended to make a dipping sauce of rice wine vinegar, freshly grated ginger and soy sauce, but somehow ended up not making it.. guess I had too much fun chit chatting with June, eh? =) Regardless, these were the perfect little snackers for just about any occasion.

Wontons
Chinese Wontons
Courtesy of Cocoa and Recipezaar

1 lb. ground pork
3 cloves chopped garlic
1 teaspoon grated fresh ginger
1 tablespoon soy sauce
1 teaspoon sesame oil
3 carrots, finely diced
3 stalks celery, finely diced
6 green onions, finely diced
1 package wonton wrappers
water
oil (for deep frying)
your favorite sweet and sour sauce or plum sauce

Combine pork, garlic, ginger, soysauce, and vegetables in a bowl.

Separate wonton skins.

Place a heaping teaspoon of filling in the center of the wonton. Brush water on 2 borders of the skin, covering 1/4" from the edge. Fold skin over to form a triangle, sealing edges. Pinch the two long outside points together.

Heat oil to 350 degrees and fry 4 to 5 at a time until golden.

Drain and serve with sauce.

Labels: , ,

Saturday, June 03, 2006

Girls' Game Day Funfest

I originally wrote this back on May 5th and can't figure out why I didn't post this.. I just realized today when I came to post about the 2nd Girls' Game Day Funfest, or if you will.. Girls' Game Day Funfest II ;)

It was a grand day.. I finally got my arse outta the house and went to visit two of my closest girlie friends, Mindy & Cindy (and no, they aren't twins). I haven't seen Cindy in probably close to a year and although Mindy and I get together for dinners at each other's homes more often, the men tag along so we can't properly gossip. I hate when that happens. But many, many years ago.. wayyyyyyyyyyyy before Hubbs and wayyyyyyyyy before Mindy's daughter and Cindy's son were born, we would hold a game day every Sunday. Much fun was had by all, and by fun I mean alcohol. We played all kinds of games. Quarter Bounce, Chandeliers, Ace Two Three, Asshole, etc. Yep.. good times, good times. Well.. unfortunately, we all grew up. Some of us got married, some had kids, others decided it was high time to get a career going.. blah blah. So the Girls' Game Day Funfest kinda fizzled out. *sigh*

Well when Cindy and her son got themselves a brand new home, we decided it was high time to start up game day again. The "Gawd we got old & boring" game day, that is. Which means, we've substituted food for the alcohol. I admit, I was wondering if we could match the fun we had way back when and was a little anxious on my drive out to Cin's new house. But soon after arriving, I knew we were going to have just as much fun as we did back then.. water bottles and diet pepsi be damned! Turns out.. it really wasn't the buzz that made it so fun.. it was the gathering of good friends who really enjoy being with each other that is the ticket :)

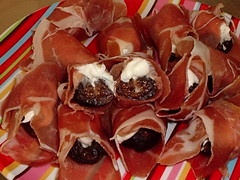
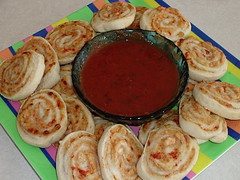
All three of us made a couple snackers to munch on. Mindy made this fantastic guacamole dip that knocked my socks off, even though it looked like something she found in a diaper. (ugh) I've never had guacamole before - I'm very glad Min's was the first I tried! She's going to send me the recipe so I can post it, although there won't be a picture because I forgot to snap one while there. Which, really? Might not be a bad thing. hehee Cindy made tomato & garlic bruschetta and soft pretzels.. yum!! I made Party Stuffed Pinwheels and Stuffed Mission Figs Wrapped in Prosciutto.. lusciously delightful :D We munched and got to gossip for the first couple hours and then we played several games of Scene-It. I had a blast even though my arse smarts after getting it beat repeatedly. =)

We decided we were going to do this once a month and try to get a few of the other gals we use to play with to join us. I'm so looking forward to the next new and improved Girls' Game Day Funfest! And what a bonus - no hangover the next day!

5-6-06 (1)
Mascarpone Stuffed Mission Figs wrapped in Prosciutto

I got this idea from Ivonne when she blogged about stuffing dates with mascarpone. Sounded delish, but I could not find one damn date (not even the dried kind) in both stores I went to. So I thought figs would be good.. again, no luck in the fresh fig hunt, but I did find dried mission figs. The sweetness of the figs paired with the saltiness of the Prosciutto was heavenly. Add the creaminess of the mascarpone and you've got a really wonderful little snacker.

1 bag of SunMaid dried Mission figs
1 pkg. (8 oz.) mascarpone cheese
1/4 to 1/2 lb. very thinly sliced Prosciutto DiParma

Slice each fig down the middle but don't slice completely in half. Stuff with about 1 tsp. of the mascarpone cheese and then wrap each fig in a slice of Prosciutto.

5-6-06
Party Stuffed Pinwheels

I found this recipe in my "Favorite Brand Name 100 Best Appetizer Recipes" book. This cookbook is relatively disappointing. There really isn't anything in it that you haven't seen a million times in other publications or on the net. But these pinwheels sounded kinda good and I had the ingredients on hand so I made them. These were quick and easy to make and with my addition of chopped sun-dried tomatoes, they were quite a smash with the gals.

1 envelope Lipton Recipe Secrets savory herb with garlic or Onion soup mix (I used Onion)
1 pkg. (8 oz.) cream cheese, softened
1 c. shredded mozzarella cheese (about 4 oz.)
2 TBS. milk
1 TBS. grated parmesan cheese
2 pkg. (10 oz. each) refrigerated pizza crust
6 sun-dried tomatoes, chopped (my addition - this is optional, of course)

Preheat oven to 425º F. In a medium bowl, combine all ingredients except pizza crusts; set aside.

Unroll pizza crusts, then top evenly with filling. Roll, starting at longest side, jelly-roll style. Cut into 32 rounds. I found that freezing the rolls for about 1 hour made cutting them so much easier.

On baking sheet sprayed with nonstick cooking spray, arrange rolls about 1 inch apart. Bake, uncovered, 13 minutes or until golden brown.

Although they are very good on their own, I decided to serve them with a small bowl of my marinara for dipping.

*Note: I did post Mindy's guacamole dip for WCC #5, which you can read about here

Labels:

Girls' Game Day Funfest II

Today was my turn to host the second Girls' Game Day FunFest at my house. I was so excited.. company! Yay! Someone to talk to that doesn't have 4 legs, bad breath and isn't covered in fur! WOO!

Before we started the festivities at my humble abode, we decided to go catch the Da Vinci Code at the local theater. I decided to jump on the bandwagon and see what all of the hullabaloo was about and purchased the book last week. Unfortunately, I only got through about 1/2 of it before the movie today. I'm not an extremely religious person, but I'm fascinated with religion in history. Although this is a tale of fiction, it does contain a lot of facts regarding mathematics, art and, of course, religion. For as far as I got into the book I was enjoying it because I had learned a few things I didn't know about.. Phi and some symbolism that I'd seen my whole life but didn't know what they meant. Da Vinci's art, although familiar with a couple paintings, I didn't know about the many others (my book is the illustrated copy) and I found them to be beautiful. The story was so-so, I'm not a big fan of how Mr. Brown jumps from one scene to the other.. I know it is suppose to make for good reading.. keeps the reader enthralled and all that, but that shit just frustrates me. lol Anyhoo.. the movie.. eh? It was okay.. nothing to write home about.. I was pissed about the ending. I won't spoil it for those of you who want to see it or want to read the book. Just suffice to say that for all that drama, I was expecting something else at the end.. I don't know exactly what, but something different for sure.

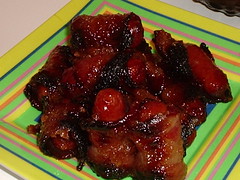
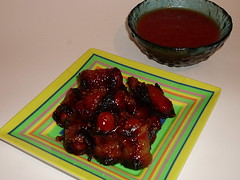
Okay.. enough with the movie/book review, on with the best part of the day! We came back to my house for food and more Scene-It (Mindy is addicted) along with much laughter and silliness. So fun. =) For this month's Funfest, I decided to make Brown Sugar Smokies - a lil muncher I wrote about when I first started this lil blog o'mine. I reposted it below, this time with crapcam pictures! How exciting is that? Mmm Hmm. I also made a tortellini salad, but I'm saving it for one of my entries for this month's WCC #6.

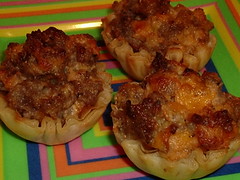
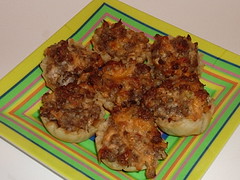
Finally, I made these lil cheesy sausage snackers that I concocted for my house warming party a couple years ago, they were a hit, so they've become one of my "go to" appetizer recipes. Savory, creamy and crunchy.. they are the perfect little snacker to serve at any kind of get together, be it a cocktail party or a Funfest with the gals. ;)

Sausage Snackers cu
Cheesy Sausage Snackers

1 lb. Bob Evans' original sausage, bulk package
4-5 green onions, sliced thinly
4 oz. cream cheese
1 c. grated sharp cheddar cheese
2 pkgs. Athens' Mini Fillo Cups (30 cups in all)

Preheat oven to 375º F.

In a large skillet, brown sausage. Add onion and cream cheese, stirring constantly until cheese has melted. Add cheddar cheese and continue to heat through until the cheddar has just melted.

Spoon 1 TBS. of the sausage mixture into a mini fillo cup, arranging filled cups on a baking sheet. Bake for 15 minutes.

Sausage Snackers

Labels:

Brown Sugar Smokies Revisited

Way back when, I posted a couple appetizer recipes before I got the hang of including pictures.. Well, I made one of them today for our 2nd "Girls Game Day" funfest so I thought I'd repost with loverly crapcam pictures this time :D

Brown Sugar Smokies
Brown Sugar Smokies

1 (16 oz.) package of little smokies (I find that the all beef kind don't work so well in this recipe)
1 pound bacon
1 c. brown sugar (or to taste)

Dipping sauce:
1/4 c. mayo
1/4 c. red chili sauce
1/2 c. brown sugar
hot sauce to taste *optional*

Cut bacon into thirds and dredge in brown sugar, then wrap each strip around a lil smokie.
*Note: Here's where you choose.. you can place them as they are (individually) in a large ziplock bag and refrigerate overnight, they will turn syrupy. OR After you've rolled 8 to 9 smokies, skewer them on long kabob skewers and then store all the skewers in a large ziplock bag in the refigerator overnight making sure to not puncture the bag as the syrup that forms will (believe me) run all over your fridge shelves and you'll spend hours trying to clean it up. Reasoning for skewering them is when you go to broil them, it's a lot easier turning over a skewer full of them rather than trying to turn over each lil smoking because the sugar will make them sticky and the bacon might fall off.

Arrange on a foil wrapped broiling pan (foil the top and bottom of the pan for easy clean up) and sprinkle them liberally with more brown sugar.
Broil for 10 to 12 minutes, turning and re-sugaring once halfway through. They should turn out brown and crispy.

Brown Sugar Smokies w/dipping sauce

Dipping sauce:
Combine all ingredients well and refrigerate for at least 8 hours (or overnight) so flavors can meld.

Labels: