Malto Mario


Feast


The Lady & Sons


1,000 Italian Recipes

Sunday, September 16, 2007

Food To Live By...

Catchy title, isn't it? I didn't come up with it and I can't take the credit.

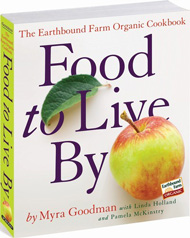
Food_to_Live_By_cover

Food To Live By is the title of an awesome organic cookbook written by Myra Goodman (with Linda Holland and Pamela McKinstry) of Earthbound Farm. Earthbound Farm might ring a bell to many of you.. you might see their organic produce in your grocery stores, or if you are lucky, you might have visited their Farm Stand in Carmel Valley, California.

Myra and her husband Drew, started organic farming as a way to make ends meet. Selling the raspberries that grew on their land, eventually grew into a pretty huge organic salad business. As a matter of fact, did you know that Earthbound Farm is the first producer of bagged salads? Yep.. true story.

Drew and Myra, their family and employees are all very passionate about organic farming. There are no pesticides used in anything they grow and they continually strive to produce the healthiest fruits and vegetables possible. From a raspberry to lettuce business, Earthbound Farm is now the leading producer in over 100 different varieties of organic salads, vegetables and fruits. And this has all happened within the past 23 years.

Because the Goodman's use no chemicals on their crops, their fruits and vegetables are sold at the peak of freshness. Most within 24 hours of picking. Today, having an abundance of left over produce isn't a problem.. but back when they were first starting, there was always lots of left over fruit. What else could Myra do, but learn how to cook with these "leftovers" and over the years her passion for cooking with organic foods has led to the writing of this book, Food To Live By.

So why, dear friends, am I writing about the Goodman's and their organic farming? Well two reasons. The first reason came by chance about 2 months ago when a lovely woman, Lilli, decided to write to me about how she enjoyed my lil blog and had enjoyed reading a post I had just written regarding our garden this year. Lilli was working as an intern at Earthbound Farm this past summer and she offered to send me Myra's book. I couldn't have been more flattered. Of course, I accepted.. how could I not? Soon I'd have more veggies than I'd know what to do with it and a cookbook who's theme is fresh vegetables and fruits would be the perfect cookbook for finding just the right recipes to use up our harvests. And so Lilli sent me this book and I sat down with it that night and was pretty much delighted with what I was reading.

So before I go on with my 2nd reason, I want to thank you, Lilli. For introducing yourself to me, for your lovely comments, for this cookbook that I now treasure and for becoming a friend. I look forward to hearing all about your adventures at college! =)

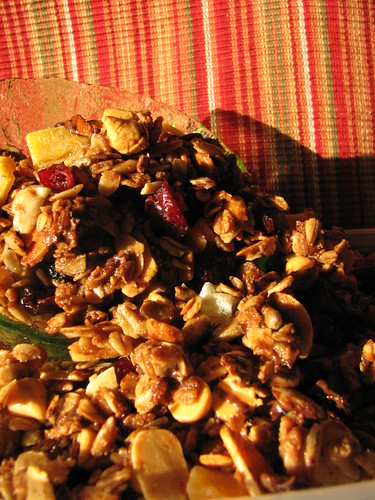
Maple Almond Granola

Now for my 2nd reason? Well hey it's time for Weekend Cookbook Challenge No. 20 - this time it's back in Sara's talented hands and this month she's chose the theme of "Show and Tell" which she describes as "Pick a cookbook from your collection that you think we should know about. Your favorite, your funniest, your strangest. Whatever. It's your choice."

So you see.. how could I not pick this book.. you guys SO NEED to KNOW ABOUT THIS BOOK! The recipes are completely droolworthy.. the photos? Amazing. Myra's writing? She makes you feel as if you're a close friend.. it's like she's speaking directly to you and sharing with you her experiences.. it is really one of those books that is entertaining because of both the yummy recipes and a good story to boot!

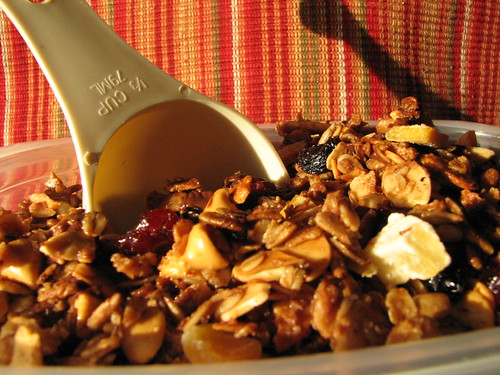
Maple Almond Granola

Although I have made a few recipes by now.. the Ziti with Ratatouille; the Garlicky String Beans; Provencal Tomato, Eggplant and Zucchini Tian; and Homemade Chai - all of which have blown us away.. SO GOOD!! I can not blog about them as per the publisher's instructions, but that's okay! Because I got to try another recipe that I've had my eye on from the night I read through the book, but haven't gotten around to making yet and that is Earthbound Farm's Famous Maple Almond Granola. This recipe is approved by the publisher's so I can share this totally addicting recipe with all of yous. :D

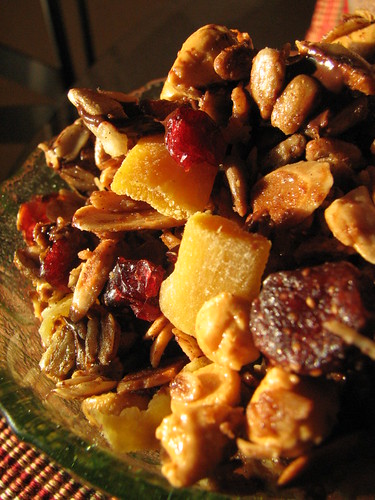
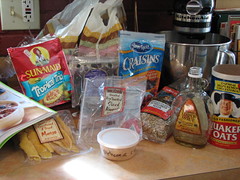
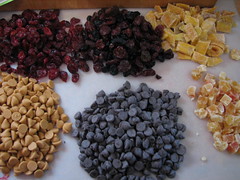
Firstly, I have to say.. I took this opportunity to play a little bit.. 2 reasons again. Firstly, I'm not a huge granola cereal lover. I like granola to snack on, as does Hubbs. Secondly, I've got a boatload of dried fruit in my pantry and a couple other odds and ends that I felt would be just way yummy in this granola. So, I followed Myra's instructions to a T.. but I added a lil extra of my own. :D

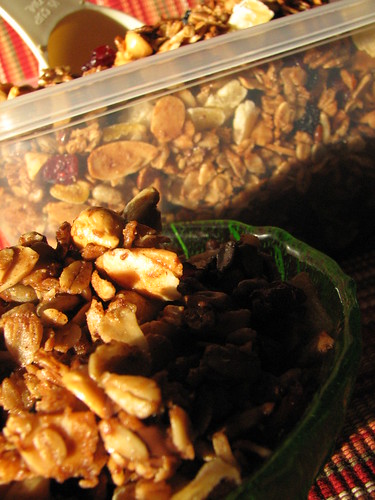
Maple Almond Granola

One word of advice if you decide to make this.. it makes about 8 cups of granola. Double it. Seriously. I just made it and we've already put quite a dent in it.. it won't last until the end of the week, I can guarantee it. heee!

Earthbound Farm's Famous Maple Almond Granola
Adapted from Food To Live By Myra Goodman
Workman Publishing, 2006

Maple Almond Granola Ingredients

4 1/2 c. (18 ounces) old-fashioned rolled oats (not instant)
1/4 c. (3 ounces) shelled, raw, unsalted sunflower seeds
1 1/2 c. slivered or coarsely chopped raw almonds
2 TBS. ground cinnamon
1 1/4 c. pure maple syrup, preferably Grade A Dark Amber
1/3 c. canola oil
1 c. raisins

Maple Almond Granola Fixin's

My additions:
1 c. chopped dried mango
3/4 c. chopped dried pineapple and papaya
3/4 c. dried blueberries, cranberries and strawberries
3/4 c. dried Oceanspray orange scented cranberries
3/4 c. butterscotch chips
3/4 c. semi-sweet chocolate chips

Position a rack in the center of the oven and preheat the oven to 325º F.

Place the oats, sunflower seeds, almonds and cinnamon in a large bowl and stir to combine. Add the maple syrup and oil and stir until all the dry ingredients are moistened.

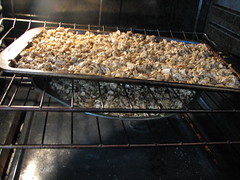
Spread the granola on a roughly 12 by 17-inch rimmed baking sheet. Bake the granola until it begins to brown, about 25 minutes, then stir with a flat spatula. Let the granola continue to bake until it is light golden brown, dry and fragrant, 15 to 20 minutes longer. Stir the granola at least once more as it bakes and watch it carefully during the final minutes because it can burn quickly.

Maple Almond Granola Baking Maple Almond Granola

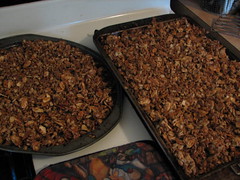
Place the baking sheet on a cooling rack, add the raisins (and other dried fruits & chips if using), and stir to combine. Let the granola cool completely. Transfer the granola to a airtight container. It can be stored at room temperature for up to 1 month or frozen for up to 6 months. You can serve the granola straight from the freezer. It doesn't get hard and it thaws almost instantly - just pour on some milk. Or if you are like me.. graze on it by the handful. *slurp*

I didn't go with the extra bowl, my kitchen is a fakkin disaster area thanks to Hubbs and his chili and stuffed pepper extravaganza last night.. so I just dumped all the ingredients on the baking sheet (and pizza pan) and mixed with my hands - was sticky but much quicker and 1 less bowl to clean! =)

Maple Almond Granola

Thanks again.. Lilli! Sara! Myra & Drew! Earthbound Farm!

Enjoy!
xoxo

Labels: , , , ,

Thursday, July 06, 2006

I've Been Mocked.. Again.

I've been made fun of. I've been mocked. It was a slightly traumatic experience for me. And this isn't the first time I've been mocked. Hubbs quite enjoys mocking me. Especially in front of guests. He thinks he's a funny guy. Okay well, he is a funny guy and I like the word "mock".

After dinner on the 4th, the four of us could barely move because we were more than slightly stuffed. The Beavette, on the other hand, was just full of energy and was doing her best to make sure the dogs would sleep like babies later that night. While she was dancing around, hopping around, running around, throwing the balls for Nig & Chloe, teaching Nig to drop the ball on command, searching for frogs near our pond, rolling in the wet grass with the dogs, and anything else she could think of to make me completely exhausted just watching her, our conversation turned to my packed to the brim freezers, pantries and refrigerators. He just had to tell them how he built the second pantry because the first one was so jam packed that when he opened the door to it, something would inevitably fall out and smash his toes. Ward was looking on with a knowing expression on his face and June looked as if this was a completely normal scenario in their household as well. Hey - when butter goes on sale, I'm stocking up people! The same for canned goods, flour, meats, baking supplies and spices! One day something horrible will happen and we will be fine because I've got every imaginable food item on the planet well stocked in our house! He won't be mocking me then, will he??

Okay so yeah, I've got a problem. Instead of using up what we have, I tend to shop for ingredients I don't have for a certain recipe. I should skip that recipe for another time and find one that contains what I have on my shelves, but I don't do it. I admit I need food procurement therapy. Hi, my name is Lisa and I'm a obscure ingredient horder. I wonder if there is a 12 step program out there that will help me control my bingeing? My 2 pantries are on the verge of imploding, my freezers can not hold another item and my fridge is so packed that it's impossible to see what we have at times. I don't even want to talk about my spice drawer(s) and cupboard(s). *sigh*

So, to save myself from future mocking, I've decided to NOT shop this weekend. I will use what I have in the house and will continue this "therapy" until I've cleared out some space. Most likely I will rush to fill that space soon after.. but hey.. baby steps! I am on vacation next week.. so I will have plenty of time to figure out what I'll make for dinner each night with already bought ingredients. I can do this! Right??

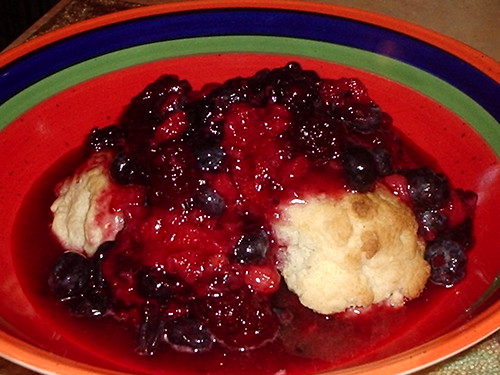
Which brings me to last night's dinner. I had a lot of London Broil left over (imagine that.. 4.5 people over for dinner and I cook for 20. Shocking, eh? - it's the damn restaurant life.. I'll never cook for a small group, no matter how hard I try - I've got too many years of cooking for huge groups in my system.) and I thought I'd make a stroganoff or a pepper steak, but noooooooo he had his fill of steak the night before and would it be too much trouble to find something else to make? Gah. All other meat was frozen and I hate, hate, hate defrosting in the microwave.. so I checked the fridge and continued on making quite a gourmet meal of hot dogs on the grill. Woo. In searching for the hot dogs, I found 2 quarts of strawberries that I had forgotten to use *blush* so I decided that I'd better get on that before they turned furry. Checking my freezer, I found a nice big bag of blackberries and blueberries that I had picked last summer and froze. In the pantry I found a big box of Bisquick and decided that I should make shortcakes to go with all my berries. Hey, what a fantastic summer dessert and all my ingredients were on hand! Party on! The berries thawed by the time the hot dogs were done, so I chopped up the strawberries, mixed in the other 2 berries and macerated with sugar and a little Grand Marnier. About an hour later, I took my potato masher to the mix and ended up with some tasty berries swimming in their kicked up juices.. yum! The "shortcakes" are a breeze to put together and really this Bisquick recipe is the only kind of shortcake I like. What it really is is a slightly sweet biscuit that holds up well to the fruit.

Three Berry Shortcakes
Three Berry Shortcake

2 quarts fresh strawberries, hulled & chopped
2 pints fresh or frozen blackberries
1 pint fresh or frozen blueberries
1/2 c. granulated sugar
1/4 c. Grand Marnier (orange juice would work just as well)
For the "shortcakes":
2 1/3 c. Original Bisquick mix
1/2 c. milk
3 TBS. sugar
3 TBS. butter or margarine, melted

Preheat the oven to 425º F.

Mix all the berries together with the 1/2 c. sugar and Grand Marnier, set aside for an hour or so.

Stir the Bisquick mix, milk, 3 TBS. sugar and butter until a soft dough forms. Drop by 6 spoonfuls onto ungreased cookie sheet.

Bake 10-12 minutes or until golden brown.

Mash berries to give more juice and spoon them over the warm "shortcakes".

Makes 6 shortcakes.

Labels: ,

Sunday, May 21, 2006

Macerated Berries & Mascarpone in Puff Pastry

So here is the story about last night.. I'll try to keep it short. =)

I made quite an big dinner, not just for myself, but because I was having a dinner guest. Unfortunately, that dinner guest could not make it at the last minute. I was bummed. Not only because I was looking forward to it and had put a good amount of time in thinking about what I was going to prepare and then the actual prep of the dinner.. but wtf am I going to do with all this food? har! I usually take these dinners I've been making while Hubbs is gone to my mom, but she can't eat beef.. so I have a boatload of delicious Italian stuffed flank steak if anyone is interested?? heeee!

I also have quite a nice summery desert left over as well. I had a hankerin' for strawberry shortcake but realized at the last minute that I had no Bisquick. Yep folks, I use Bisquick for my shortcakes. So what to do? I don't really like sponge cake all that much, so that was out. Searching pantry and freezer.. a package of frozen puff pastry jumped out at me. Perfect! I rolled it out, cut it into 12 squares and molded each square into the cups of a muffin tin. Although I docked the bottoms of the cups, they still puffed up but they worked and it was a nice compliment to the berries and cheese.

This desert is not too sweet and on the light side, which is truly nice for something after a heavy dinner of stuffed beef or just something nice to nibble on after a long, hot summer day.

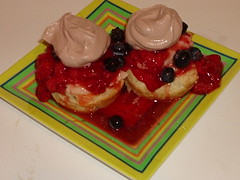
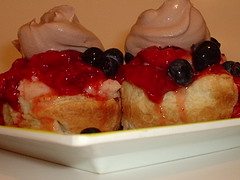
Macerated Berries with Mascarpone in Puff Pastry
Macerated Berries and Mascarpone in Puff Pastry

For the berries:
1 container of strawberries
1 container of blueberries
3 TBS. white granulated sugar
1/4 c. orange juice

For the filling:
1 (8 oz.) pkg. mascarpone cheese, softened (You can substitute with cream cheese)
1 c. confectioners' sugar
1 tsp. pure vanilla extract

1/2 pkg. (1 sheet) puff pastry

Allow the sheet of puff pastry to thaw on the counter for about 40 minutes.

Either slice or chunk your strawberries and put them into a medium sized bowl. Using a potato masher, mash the strawberries a bit, to bring some juice out. Add the blue berries, sugar and orange juice, mix well. Set aside for at least 30 minutes. You can make this up to a day ahead if you wish, store in refrigerator.

Preheat oven to 400º F.

On a lightly floured surface, roll the pastry out into a 12" x 9" rectangle. Cut out squares, roughly 3" x 3" - you should be able to get 12 squares. Mold each square into the cups of a muffin tin. Bake in preheated oven for 10 to 12 minutes or until they are golden brown and puffed. You can also do this ahead, storing them in an airtight ziplock bag.

Combine mascarpone with confectioners' sugar and vanilla. Again, this can be done the day before, store in refrigerator.

To assemble your cups:
Take 2 of the puff pastry cups and fill each cup with 1 TBS. of the mascarpone mixture then spoon the macerated berries on top. I hadda get a lil bit of chocolate in the mix (surprising, eh?) and I had a container of chocolate Cool Whip in my freezer so I said what the hey.. a dollop on top added quite a nice finish to the not too sweet berries.

Macerated Berries with Mascarpone in Puff Pastry cu

Labels: ,