Malto Mario


Feast


The Lady & Sons


1,000 Italian Recipes

Saturday, February 09, 2008

Time to Make the... Fritters!

So in my last post I wrote about two of my most favoritest people on the face of this planet. Well this post is all about two more of my most favoritest people on the planet, Helene and Gracie.

I am so going to get yelled at, but...

Helene called today, like she does often - bless her cute lil cotton socks. :) It was a very uneventful conversation as both of our lives have been pretty tame this past week. She's been busy with her mom who is visiting from France and I have been busy with work. So why am I even mentioning this phone call? Because I'm wicked. But in a good way? MUAHAHAHA Anyhoo, at the end of the conversation I mentioned that I had taken out ingredients to do some baking this weekend and before I could tell her what I was baking, she interrupts with, "You'll be making doughnuts, right?" I didn't say much to that, other than I had hoped that I would be able to get the doughnuts made and that we'd see. She then told me that she wouldn't be mad if I couldn't squeeze the doughnuts in and I said that I knew she wouldn't be. The whole time not one giggle escaped my lips. But they wanted to!!

donutday

As! If! I would not be contributing to this awesome event called, Time to Make the Doughnuts! Gracie and Helene came up with the idea of holding an event chock full of doughy delights known as the doughnut - and every variation thereof. :) I've never made a doughnut before, but as my ass & hips can attest, I've eaten my fair share. I've always wanted to make doughnuts - the kind that are fluffy and airy on the inside, with a soft crust that is enrobed in a sugary glaze. But I figured that doughnut will most likely be made by someone else, so I spent a week searching recipes and doing a lil research until I decided that I wanted to go the fritter route.

There use to be this lil doughnut shop on my way to work which was owned by a friend. So every morning, I'd stop in and grab a cup of her coffee and her deeeee-licious apple fritters. Oh my God they were so good! The fritter was the big puffy and airy doughnut that I described earlier, but there were chunks of apples and raisins throughout the dough. The whole thing was covered in a crispy glaze that was actually more buttery than sweet. And they were HUGE! Seriously huge. One of those and I'd be good until late in the afternoon. Unfortch, my friend decided to get out of the business, so she sold it to someone else who only makes wedding cakes. What Evah.

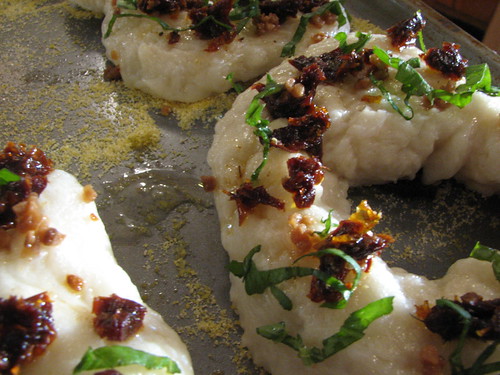
Pan Fried Apple Fritters

Okay now here's where this post stops making any sense.. I found a recipe that I knew was going to produce big fat apple fritters like the kind I ate at my friend's shop. They are a Dutch fritter called Olie Bollen, traditionally served on New Years Day. I saved the recipe and I printed the recipe, but ultimately, I didn't make them (yet). No.. because I never know when to stop browsing recipes. Hours, I could spend HOURS looking through cookbooks, mags and websites and never get bored. So that's what happened here. I found another recipe that I decided to go with because there was a sauce that went with them, and who am I to pass up a delectable sweet sauce?

The recipe I went with is called Pan-fried Apple Fritters with Apple/Honey Dipping Sauce. I came across this recipe on a new website to me called, Care2. It's a great site focusing on living green, healthy living and human rights. I found this recipe in their Green Living area.

Pan Fried Apple Fritters

These fritters are really easy to make, and can be residing happily in your tummy in under an hour. They are crispy on the outside and so tender and moist on the inside. These fritters are made with grated apples, which really lends to the moistness of the dough even though you squeeze all of the juice out for the sauce. I will be making these over and over again, of this you can be assured.

Pan Fried Apple Fritters

The dipping sauce is delish, but these fritters don't necessarily need dipping. They are just sweet enough and again, very moist on their own. But, never one to pass up a chance to gild the lily, I decided to spoon the sauce over a couple of them. Heavenly. But very, very sweet. Hubbs ate his plain and demanded these be breakfast every Saturday morning from now on. Which is shocking because he's such an eggs, sausage, hashbrown kinda guy, yanno? heee!

The only change I made to this recipe was to add the raisins and I used cardamom instead of ginger. And the only other change I'll make to this recipe in the future, is to cut the honey in the sauce from 1/2 cup to 1/4 cup so that the apple juice stands out more. Speaking of that sauce, it gave me another idea which I plan on trying in the very near future. A syrup made from reduced apple juice and a couple tablespoons of honey and then used as a sweetener in my tea. I'm thinking the combination of the apple fritters with a hot cup of apple induced tea is going to be THE BOMB, baby!

Pan Fried Apple Fritters

I urge each and every one of you to make these lil fritters, I highly doubt you'll be disappointed. :)

Thanks Gracie!! Thanks Helene!! Love yous guys!

xoxo

Labels: , , ,

Monday, February 04, 2008

Two of My Favorite People and Their Yumminesses!

Yeah.. it's my new word. Problem with that? :P

Yumminess.. and adjective that describes both Kelly and Ivonne as well as their cooking! :)

Reading Kelly's blog is just a sheer delight.. this woman can cook! She always seems to cook food that I'd love to eat and believe it or not, I am kinda picky when it comes to what trips my food trigger. True story!

Kelly's Blueberry Mascarpone Pancakes

So when I saw her Blueberry and Mascarpone pancakes.. kids, my trigger had done tripped. I could not wait to try them for myself. And I did, that very weekend. Hubbs and I agreed, unarguably, that Kel's pancakes were the BEST blueberry pancakes we've! ever! had! Hands down, game over.. I will not eat another blueberry pancake ever! again!

Seriously.

Kelly's Blueberry & Mascarpone Pancakes

The pancakes are kind of on the sweet side - or maybe they seem that way because of the tart blueberries. I dunno. But it was the perfect balance between tart and sweet for me. Of course I doused them in real maple syrup, but I tried a bite of the very last one that neither of us could manage to finsh, sans the maple-y goodness, and I'll be damned if it wasn't spectacular all on it's own. Oh no.. no syrup needed, my friends. This pancake is all inclusive! It's the whole package without the frilly wrappings and accoutrements!

If you've never taken my advice before, and I can't say that I blame you if you haven't.. but TRUST ME on this.. try these pancakes. Like right now. GO.

Kelly's Blueberry Mascarpone Pancakes
Kel's Blueberry Mascarpone Pancakes
or
The! Best! Blueberry! Pancakes! Ever!

1 1/2 c. flour
3 TBS. sugar
2 tsp. baking powder
1 1/2 tsp. kosher salt
1/2 c. mascarpone at room temperature
3/4 c. + 1 TBS. whole milk (I used 2% - it's all I had)
2 large eggs, slightly beaten
1 tsp. vanilla
1 tsp. lemon zest
1 c. blueberries (fresh or fresh frozen -- without juice) I used fresh frozen

Preheat oven to 200º F. and then turn oven off. (Give yourself enough time to preheat the oven right before you start making your pancakes, so that you can turn it off right before the pancakes hit the griddle or frying pan. Heat a griddle or cast iron frying pan over medium-low heat.

In a medium sized bowl, sift dry ingredients together. In another bowl, whisk mascarpone, milk, eggs, vanilla, and lemon zest until well combined. Pour into dry ingredients and mix just until incorporated. Add blueberries and stir carefully into mixture.

Kelly's Blueberry & Mascarpone Pancakes

Ladle mixture onto hot griddle or frying pan that's been greased with a lil butter or non-stick spray and cook until bubbles surface and the bottom is goldeny brown. Carefully flip pancakes over and cook until goldeny brown and delicious. Place pancakes on a dish and cover with aluminum foil. Keep dish in warmed oven until ready to serve. Serve with butter and real maple syrup or eat plain (so good!).

And then there's Ivonne.. my partner in crime. The apple of my eye.. the cream in my coffee.. the ying to my yang, if you will. :) There's been many recipes of hers that I've made myself and documented on this blog and I'm sure there will be many more in the future.

She had decided to submit something to this month's HHDD - Pizza. And in true Ivonne style, she did not disappoint in either taste or presentation. She made sweet pizza sticks.. fluffy dough, with dimples full of brown sugar and butter. She hooked me with the brown sugar, but she had me at butter. *swoon* I made them the very night I read about it on her blog. I simply couldn't wait!

Ivonne's Sweet "Pizza" Sticks

Basically, I thawed some of my pizza dough - you could use any plain pizza dough, make a sweet dough or use the dough recipe given on 80 Breakfasts. Flatten it out on a cookie sheet and use your finger tips, or knuckles if you have long nails, to dimple the dough. You can either brush melted butter on the doughy dimples or pour it on - but if you pour, be careful not to use too much. Then you simply sprinkle the brown sugar on top in an even layer. I also added 1/2 tsp. of cinnamon and 1 tsp. of cardamom to my brown sugar before sprinkling. I baked at 400º F. for about 15 - 20 minutes, when I noticed the crust was getting goldeny brown and the butter sugar topping was bubbly. (Is this the way you made it, Ivonne?) :)

Ivonne's Sweet "Pizza" Sticks

This is a great snack for movie watching or game playing. It's quite easy to eat and you can keep your fingers from getting greasy from the butter by hanging on the sides of the stick - yanno, so you don't butter up your Monopoly money or Wii controller. :P I also melted some left over ganache I had in my freezer for dipping purposes, and the dark chocolate ganache was a great match to the sweet dough. YUM! My only suggestion would be.. if there are only one or two of you enjoying this snack, I'd halve the recipe because these lil guys are pretty filling. :)

Thanks for such delicious yumminesses, gals! Hugs and smoochies!

xoxo

Labels: , , , , ,

Sunday, September 16, 2007

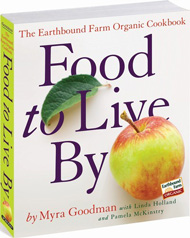
Food To Live By...

Catchy title, isn't it? I didn't come up with it and I can't take the credit.

Food_to_Live_By_cover

Food To Live By is the title of an awesome organic cookbook written by Myra Goodman (with Linda Holland and Pamela McKinstry) of Earthbound Farm. Earthbound Farm might ring a bell to many of you.. you might see their organic produce in your grocery stores, or if you are lucky, you might have visited their Farm Stand in Carmel Valley, California.

Myra and her husband Drew, started organic farming as a way to make ends meet. Selling the raspberries that grew on their land, eventually grew into a pretty huge organic salad business. As a matter of fact, did you know that Earthbound Farm is the first producer of bagged salads? Yep.. true story.

Drew and Myra, their family and employees are all very passionate about organic farming. There are no pesticides used in anything they grow and they continually strive to produce the healthiest fruits and vegetables possible. From a raspberry to lettuce business, Earthbound Farm is now the leading producer in over 100 different varieties of organic salads, vegetables and fruits. And this has all happened within the past 23 years.

Because the Goodman's use no chemicals on their crops, their fruits and vegetables are sold at the peak of freshness. Most within 24 hours of picking. Today, having an abundance of left over produce isn't a problem.. but back when they were first starting, there was always lots of left over fruit. What else could Myra do, but learn how to cook with these "leftovers" and over the years her passion for cooking with organic foods has led to the writing of this book, Food To Live By.

So why, dear friends, am I writing about the Goodman's and their organic farming? Well two reasons. The first reason came by chance about 2 months ago when a lovely woman, Lilli, decided to write to me about how she enjoyed my lil blog and had enjoyed reading a post I had just written regarding our garden this year. Lilli was working as an intern at Earthbound Farm this past summer and she offered to send me Myra's book. I couldn't have been more flattered. Of course, I accepted.. how could I not? Soon I'd have more veggies than I'd know what to do with it and a cookbook who's theme is fresh vegetables and fruits would be the perfect cookbook for finding just the right recipes to use up our harvests. And so Lilli sent me this book and I sat down with it that night and was pretty much delighted with what I was reading.

So before I go on with my 2nd reason, I want to thank you, Lilli. For introducing yourself to me, for your lovely comments, for this cookbook that I now treasure and for becoming a friend. I look forward to hearing all about your adventures at college! =)

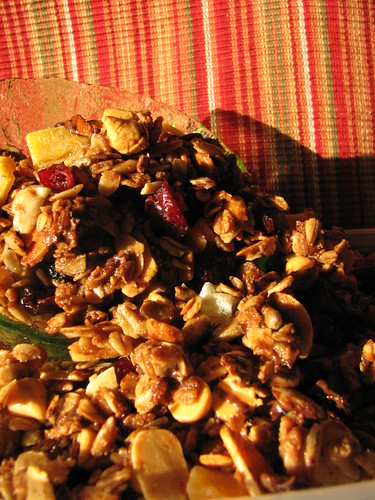
Maple Almond Granola

Now for my 2nd reason? Well hey it's time for Weekend Cookbook Challenge No. 20 - this time it's back in Sara's talented hands and this month she's chose the theme of "Show and Tell" which she describes as "Pick a cookbook from your collection that you think we should know about. Your favorite, your funniest, your strangest. Whatever. It's your choice."

So you see.. how could I not pick this book.. you guys SO NEED to KNOW ABOUT THIS BOOK! The recipes are completely droolworthy.. the photos? Amazing. Myra's writing? She makes you feel as if you're a close friend.. it's like she's speaking directly to you and sharing with you her experiences.. it is really one of those books that is entertaining because of both the yummy recipes and a good story to boot!

Maple Almond Granola

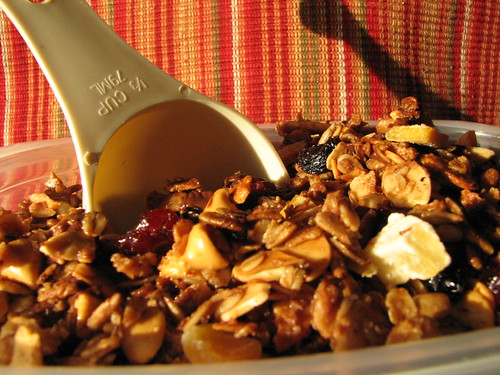
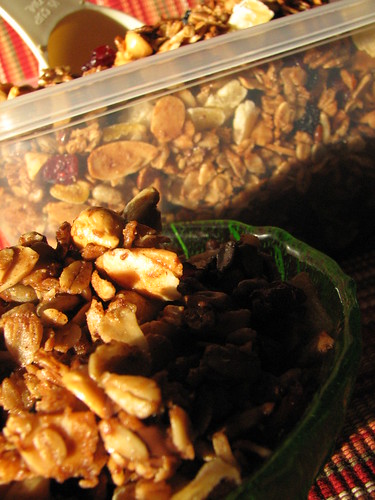
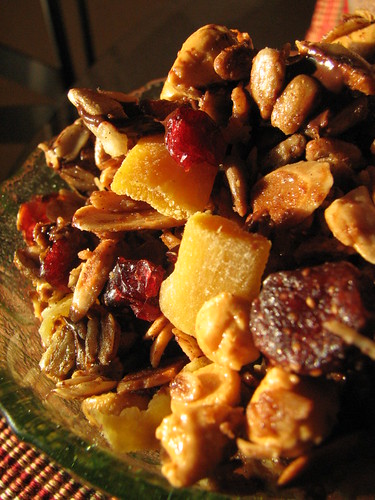
Although I have made a few recipes by now.. the Ziti with Ratatouille; the Garlicky String Beans; Provencal Tomato, Eggplant and Zucchini Tian; and Homemade Chai - all of which have blown us away.. SO GOOD!! I can not blog about them as per the publisher's instructions, but that's okay! Because I got to try another recipe that I've had my eye on from the night I read through the book, but haven't gotten around to making yet and that is Earthbound Farm's Famous Maple Almond Granola. This recipe is approved by the publisher's so I can share this totally addicting recipe with all of yous. :D

Firstly, I have to say.. I took this opportunity to play a little bit.. 2 reasons again. Firstly, I'm not a huge granola cereal lover. I like granola to snack on, as does Hubbs. Secondly, I've got a boatload of dried fruit in my pantry and a couple other odds and ends that I felt would be just way yummy in this granola. So, I followed Myra's instructions to a T.. but I added a lil extra of my own. :D

Maple Almond Granola

One word of advice if you decide to make this.. it makes about 8 cups of granola. Double it. Seriously. I just made it and we've already put quite a dent in it.. it won't last until the end of the week, I can guarantee it. heee!

Earthbound Farm's Famous Maple Almond Granola
Adapted from Food To Live By Myra Goodman
Workman Publishing, 2006

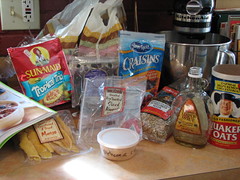
Maple Almond Granola Ingredients

4 1/2 c. (18 ounces) old-fashioned rolled oats (not instant)
1/4 c. (3 ounces) shelled, raw, unsalted sunflower seeds
1 1/2 c. slivered or coarsely chopped raw almonds
2 TBS. ground cinnamon
1 1/4 c. pure maple syrup, preferably Grade A Dark Amber
1/3 c. canola oil
1 c. raisins

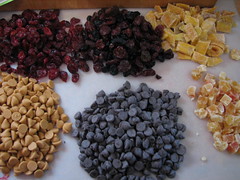
Maple Almond Granola Fixin's

My additions:
1 c. chopped dried mango
3/4 c. chopped dried pineapple and papaya
3/4 c. dried blueberries, cranberries and strawberries
3/4 c. dried Oceanspray orange scented cranberries
3/4 c. butterscotch chips
3/4 c. semi-sweet chocolate chips

Position a rack in the center of the oven and preheat the oven to 325º F.

Place the oats, sunflower seeds, almonds and cinnamon in a large bowl and stir to combine. Add the maple syrup and oil and stir until all the dry ingredients are moistened.

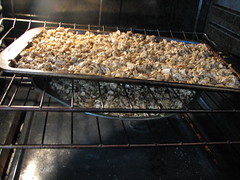
Spread the granola on a roughly 12 by 17-inch rimmed baking sheet. Bake the granola until it begins to brown, about 25 minutes, then stir with a flat spatula. Let the granola continue to bake until it is light golden brown, dry and fragrant, 15 to 20 minutes longer. Stir the granola at least once more as it bakes and watch it carefully during the final minutes because it can burn quickly.

Maple Almond Granola Baking Maple Almond Granola

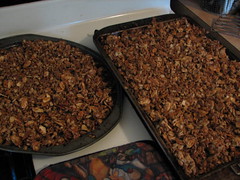
Place the baking sheet on a cooling rack, add the raisins (and other dried fruits & chips if using), and stir to combine. Let the granola cool completely. Transfer the granola to a airtight container. It can be stored at room temperature for up to 1 month or frozen for up to 6 months. You can serve the granola straight from the freezer. It doesn't get hard and it thaws almost instantly - just pour on some milk. Or if you are like me.. graze on it by the handful. *slurp*

I didn't go with the extra bowl, my kitchen is a fakkin disaster area thanks to Hubbs and his chili and stuffed pepper extravaganza last night.. so I just dumped all the ingredients on the baking sheet (and pizza pan) and mixed with my hands - was sticky but much quicker and 1 less bowl to clean! =)

Maple Almond Granola

Thanks again.. Lilli! Sara! Myra & Drew! Earthbound Farm!

Enjoy!
xoxo

Labels: , , , ,

Thursday, July 26, 2007

SHF No. 33 - Tropical Paradise

To be honest, when I saw that my fellow Daring Baker and sweet friend, Mary of Alpineberry was hosting this month's Sugar High Friday with the theme of Tropical Paradise, I was kinda bummed. I'm not so much a tropical kinda gal. Show me a dessert menu that has all but one tropical flavored dessert and I can almost 100% guarantee you that I will pick whatever that one lonely non-tropical treat may be.

This doesn't really make good sense as I adore tropical fruits and to a gal from Ohio, The Armpit of the Midwest, that means mangos, papaya, pineapple and coconut. I love them all.. and I'd probably love those fruits deemed tropical that I've never had or heard of. So go figger, eh?

But I really wanted to show support to Mary so I went in search of a tropical-like dessert. What I came up with might not SCREAM tropical, but for me - it was a walk on the wild tropical side. Staring at my fridge, which is jam packed with HUGE zucchini from our garden, I needed to use some up as the next round was ready to be picked. Of course, my first thought was zucchini bread because you can use up a lot of zucchini that way. But zucchini bread isn't exactly a tropical statement, now is it?

Yeah, not so much.

But.. whatsay you add a lil coconut to the mix? Or hell.. be adventurous and add a LOT of coconut to the mix! Still probably not a dessert I'd see on any given menu in say, Hawaii, but for Ohio - holy hell, we're visiting white beaches, palm trees and sipping a fruity beverage complete with lil paper umbrella via my kitchen! Wooo! (Pathetic, I know)

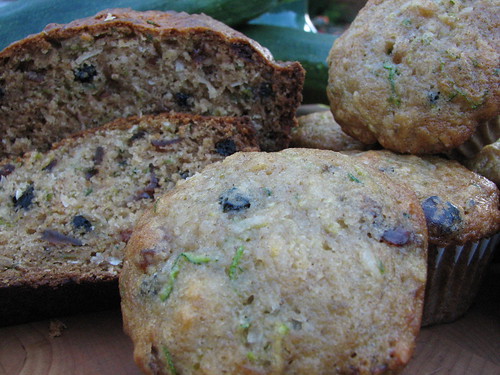
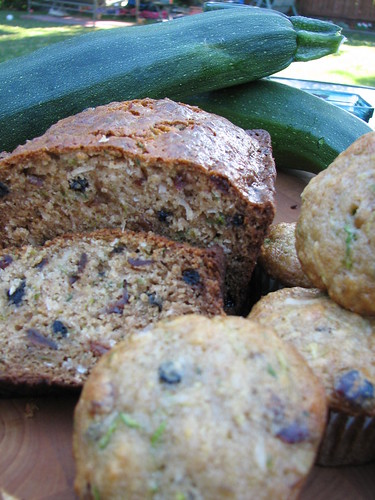
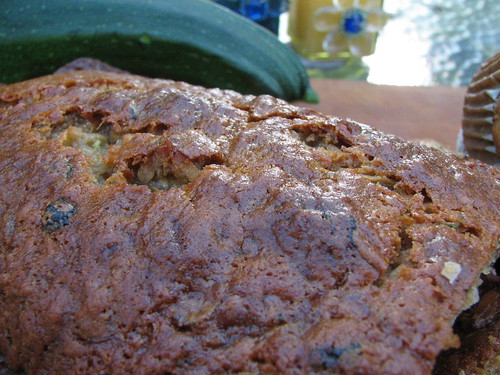
What I simply adore about this bread is that I screwed with the ingredients and it still came out as THE BEST zucchini bread I've ever had. Who knew coconut could jazz up your run of the mill zucchini bread? I originally found this recipe on allrecipes.com and after reading the first 15 or so reviews, I figured I'd give it a shot.

Coconut Zucchini Bread & Muffins

Well as we all know, I'm trying desperately to drop a few 1000 pounds. Okay so mebbe not so "desperately", but I'm really trying to change the way I eat and the way I think about food. So when looking at this recipe I see the ingredients call for 1 c. sugar and 1/2 c. veg oil. I decided to try to lighten that up. I cut the sugar down to 1/4 c. and added 1/2 c. of Equal. I cut the oil down to 1/4 c. and add 1/4 c. of pearsauce. Yes, pearsauce. It's like applesauce only it's made with sausage. HAHAHAHAHAAAA!! No, really it's made with pears. Duh.

Fanfarkintabulous, kids! I also increased the coconut to 3/4 c. and replaced the currants with a mix of raisins, golden raisins, dried cranberries and blueberries (from Trader Joes *swoon*). This loaf of moist and fruity deliciousness is just tropically enough for me to submit it to this month's Sugar High Friday. Thanks for hosting Mary! And I hope your back feels MUCH MUCH BETTER!!

Coconut Zucchini Bread & Muffins
Coconut Zucchini Loaf
Courtesy of Carol and All Recipes

Makes 1 loaf

1 egg
1/2 c. vegetable oil (1/4 c. canola oil + 1/4 c. pear (or apple) sauce)
1 c. white sugar (1/4 c. sugar 1/2 c. Equal)
1 c. grated zucchini (2 c. grated zucchini (skins on))
1/2 tsp. vanilla extract
1 1/2 c. all-purpose flour
1/2 tsp. baking powder
1 tsp. baking soda
1/2 tsp. salt
3/4 tsp. ground cinnamon
1/2 tsp. ground nutmeg
1/2 c. flaked coconut (3/4 c. coconut)
1/2 c. chopped walnuts (I omitted them)
1/2 c. currants (3/4 c. raisin, golden raisin, dried cranberry & blueberry mix)

Preheat oven to 350 degrees F (175 degrees C). Grease one 9" x 5" x 3" inch loaf pan.

In small pan boil one cup water. Add currants or raisins, and boil for two minutes. Drain.

In mixing bowl beat egg, oil, and sugar. Stir in zucchini and vanilla.

In another bowl, measure flour, baking powder, soda, salt, cinnamon, nutmeg, coconut, walnuts, and currants or raisins. Stir to combine thoroughly. Pour all at once over batter in mixing bowl. Stir to moisten. Turn into greased 9x5x3 inch loaf pan.

Bake at 350 degrees F (175 degrees C) for 1 hour until an inserted toothpick comes out clean. Cool in pan 10 minutes. Turn out on rack. Cool and wrap.

Coconut Zucchini Bread & Muffins

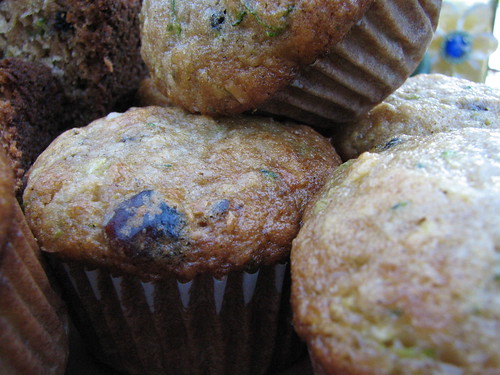
My Notes: At 40 min. my bread was getting pretty brown, so I capped the loaf pan with aluminum foil. At 50 minutes this bread was done, so check often after 40 min. I made another batch and got 12 muffins from it. I baked the muffins for 18 - 20 min. at same temp.

Keep an eye out if you are a zucchini bread fan.. because my garden is chock full of zucchini with no signs of stopping any time soon, I'll be experimenting with different flavors of bread to try and use most of it up. :)

Coconut Zucchini Bread & Muffins

xoxo

Labels: , , , , , ,

Wednesday, June 27, 2007

Bagels... Bageljacks... Bagelcakes.. Bageldiscs..

Hey Hey! It's that time of the month again.. The Daring Baker June Challenge post! WOO! Have you missed us??

Ya'll might guess from the subject of this post, that this month's DB challenge didn't go so swell for me. Imagine that, eh?

Before I get into this kitchen disaster, I want to stress to ya'll that this was NOT the recipe's fault (meaning this recipe is NOT possessed by Beelzebub).. this recipe, when executed properly, will give you big beautiful bagels. And the best tasting bagels you've ever had. Even when you totally screw up, your bagels will still be so flavorful! Flat as pancakes.. but still wayyyyy yummy! ;)

This particular kitchen disaster did not come with exploding batter, aliens invading my kitchen, or a need to start drinking heavily half way through.. I believe this is a good recipe - an excellent recipe actually.. especially if you are a more advanced baker with lots of experience in using yeast and working with dough. BUT, for someone like myself who is not at all familiar with making bread or other yeast doughs, I believe it's a recipe that you really need to make twice. Once to make all your mistakes and take notes.. and the second time to produce amazing bagels. I'd call this recipe and excellent "teaching" recipe. Seriously, I learned A LOT about yeast and dough this month. And that's what it's all about, eh? =) I haven't made my 2nd batch yet - but I will, you can be assured. And I am confident that my next batch will be perfect.

This month's challenge was hosted by our lovely, Jenny of All Things Edible, and the beautiful Freya of Writing At The Kitchen Table. They decided that June would be a month we step away from the sugar and dive right into the savory. Real Honest Jewish Purist's Bagels is the recipe they chose and a fine recipe and choice it was. I was tickled when I saw what we'd be making because I am so afraid of working with yeast. My only experience with it is my Auntie's pizza dough, which I make a few times a year. So badly I want to be the kind of gal who makes her own bread items every week. There is NOTHING like fresh bread, is there? So yeah, the thought of working with yeast and having all the support the wonderful Daring Bakers give backing me up - I knew I'd at least get a lil closer to feeling comfortable working with yeast & dough.

And they did not disappoint! The support was amazing - thank you everyone!

Plain flat bagel
A plain Bageljack

No, my bagels did not turn out well in the looks department. They ended up being flat as pancakes and/or flapjacks and/or compact discs, etc. But like I said, they were the best tasting bagels I've ever had - and I've had a lot of bagels. I feel I know why mine did not turn out though.. and it's much more than my just being a moron. ha!

The recipe says and I'll quote here:

"Soon you should have a nice stiff dough. It will be quite elastic, but heavy and stiffer than a normal bread dough. Do not make it too dry, however... it should still give easily and stretch easily without tearing."

I obviously don't know what a normal bread dough feels like, so I kinda guessed.. meaning I stopped adding flour once the dough stopped being sticky.

Mistake No. 1

I should have kept incorporating the flour until I used up the whole 8 cups the recipe called for. Instead I think I stopped at around 6.5 - 7 cups. Ohhh it was flexible alright.. but not very heavy or stiff. In fact it was quite soft.

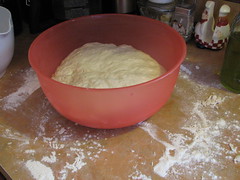
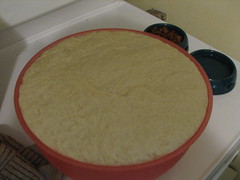
After you knead the dough you put it into a lightly greased bowl and allow it to double in size.. my pizza dough takes about an hour to double.. therefore I didn't even check my bagel dough until an hour had passed. Ooops! I should have realized that the FOUR TABLESPOONS of yeast might quicken that rise time just a tad.. as you can see, she not only doubled - but I believe she tripled and/or quadrupled. hahaha!

Mistake No. 2

Bagel dough Bagel dough doubled? tripled?
Yes that is cat food/water bowls you see.. No she did not jump up on the dryer while the dough was rising - covered - because I was running the dryer, which scares the bejebus out of her. MUAHAHAA!

Check your dough after 20-30 minutes - don't let it rise too much.

After your dough doubles in size, you are to punch it down.. and where this recipe says "punch" it's not kidding. You really need to punch most of the air out of it.. this step was great in relieving some tension from a chaotic week at work. ;) After you punch it down, you divide it up into 15 (I got way more than 15) hunks o'dough, to which you will shape into bagels. There are two methods to shaping.. the first being the "dough-centric" method.. where you make a long cylindrical "snake" of dough and wrap it around your hand into a loop and then mash the ends together. The other is the "hole-centric" method, where you shape the dough into a rough sphere, then poke a hole through the middle with a finger and then pull at the dough around the hole to make the bagel.

I went with the "hole-centric" method. Although I do not feel this is a mistake, as it obviously works for many people, I think I would have been better off going the "snake" route as it would have helped to push out even more air.

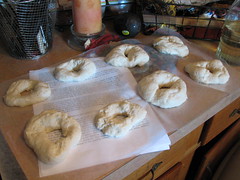
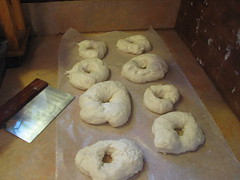
'kay once that's done, you let them sit for about 10 minutes. They will begin to rise slightly. Ideally, they will rise by about one-fourth volume... a technique called "half-proofing" the dough. By the time I had finished shaping my last bagel, my first bagels had sat for closer to 15 minutes. They did not rise by 1/4th volume. They easily doubled in size.

bagels formed, rising and looking under the weather bagels formed and rising
Just shaped / On their way to raw bagel balloons

Mistake No. 3

The next time I make these bagels, and I will, I will work with sections of the dough, keeping the unused dough in my fridge. I will only work with enough dough for about 4 bagels and I will shape them, let them sit for a few minutes and then throw them into their water "bath" to cook. I will not even touch the rest of the dough until those boiled bagels have been set on a clean towel to cool. Which brings me to -

Mistake No. 3A

Work in small batches (especially if you are baking these on a high humidity day) from the shaping to the boiling steps. Not only did my bagels "half proof" way longer than they should before hitting the boiling water, but they proofed MUCH TOO LONG after that as they were sitting there getting bigger and bigger on my counter waiting for their turn in the water.. Small batches, kids.. small batches.

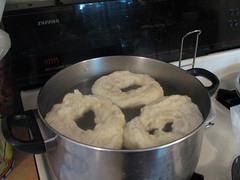
Another thing to keep in mind is - once your bagels hit the boiling water, they should drop to the bottom of the pot and then slowly and "gracefully" (hee!) rise to the top. The recipe says if they do not sink and only float, you will get a more "bready" bagel. Mine were all floaters - and I don't know why that is.. maybe it's because I didn't get out enough air? I have no idea. But my bagels did not turn out more "bready" regardless. hehee

bagels drowning (or wishing they were) Sad sad mf'in bagel like blobs
Wrinkly prune-like floaters / Sad, sad mf'in bagel like blobs

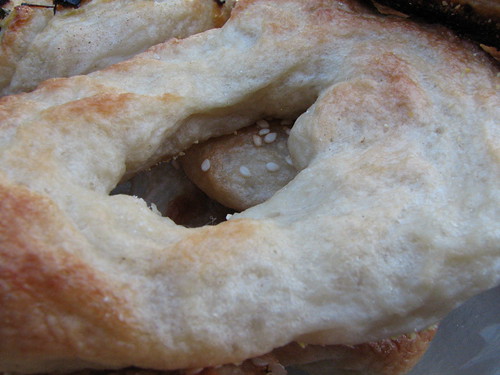
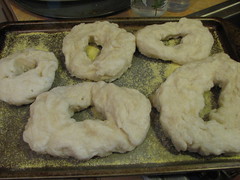
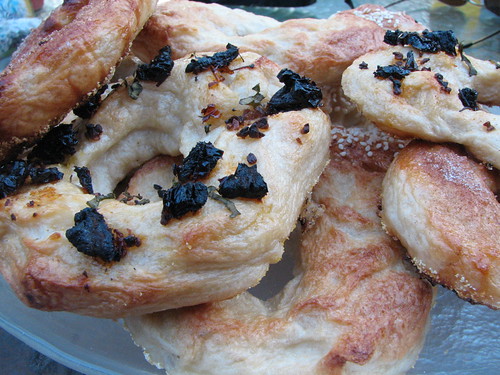
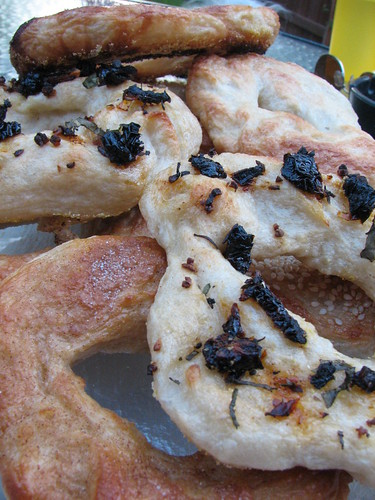
From the boiling water, you set them on clean towels and once they are cool enough to handle you transfer them to a cookie sheet that has been dusted with corn meal. It's at this point where you can add your toppings if you so desire. I desired. I made 1/2 doz. plain, then 3 sesame, 6 with sun-dried tomato, roasted garlic and fresh basil and 6 brushed with a pear/cinnamon jelly that I melted and topped with cinnamon sugar. (as if I could go all savory!)

Befores of tasty sundried tomato, roasted garlic & basil bagels

Mistake No. 4

Baked & burnt sundried tomato/garlic/basil

Only use toppings that won't burn to lil charcoal crisps. Sun-dried tomatoes and fresh basil will turn into charred pieces of squickiness when baked on top of a bagel - next time, they'll go in the dough! (we weren't allowed to add anything to the bagel dough on our first batch, to keep them in check with the Real Honest Jewish Purist people, but we could go crazy on subsequent batches that I just didn't get to yet)

Baked bagels!
Behold! My bevy of Bageljacks! All crispy on the outside, chewy and warm on the inside - fresh from the oven.. SO GOOD.

Unfortunately, the next day they were so rubbery that I couldn't even pull a piece off to gnaw on. So I had to chuck them. Hubbs, the omniscient baking God (he can barely toast bread) said it was because I stored them in ziplock plastic bags over night and that I should have just left them out. I dunno, maybe he was right.. course I won't be admitting that to him anytime soon. *evil gril*

And so it is with mucho grande thanks to Jenny and Freya for hosting a fabulous challenge! And to all my fellow DB friends - your unwaning support is the ONLY THING that gets me through some of these challenges.. I thank you kindly. =)

'kay.. git! Go check out everyone else's posts! There are plenty to see - we keep growing bigger and better with each and every passing month!

xoxo

Labels: , , , ,

Sunday, April 23, 2006

I made breakfast!

Normally, I'm not a big breakfast eater. Well not traditional breakfast, anyway. I'm one to grab a cup of coffee and croissant or bring yogurt and a banana to work. I have the time each morning to make breakfast as I get up at the crack of dawn (ugh!) but I'm usually not hungry until later in the morning - which is at work and there's no making eggs and bacon there!

Remember those 3 recipes from Cuisine at Home that I wanted to make this week? I didn't think I'd be able to make all 3 because of my pooches and their unfortunate tummy problems, but everyone seems to be on the mend today! Yay! I'm not going to get too excited, as I thought I was done with all the nastiness on Friday night. No nastiness meant cooking sounded good again! But Saturday morning brought more nastiness, with Chloe catching whatever it was Nigel had. *sigh* Luckily, I called the Vet straight away and got her on antibiotics within an hour, so I'm thinking we may have nipped her tummy problems in the bud =) KEEP YOUR FINGERS CROSSED PUH-LEASE!

Okay, so this morning breakfast sounded damn good and since Ali wouldn't send me any of her pancakes. :P I had to make my own. These are not your ordinary pancakes as they are made with ham and cornmeal, but let me just tell ya.. they are divine! The flavors of salty ham and the sweet syrup with pineapple went so well together. The texture of the cornmeal in the pancakes and the flavor of the corn was perfect. My addition to the syrup was right on as well. I definitely knocked one out of the park with this find and I'm so happy my favorite magazine gave me another great recipe to add to my repertoire. =)

Cornmeal Hamcakes2
Cornmeal "Hamcakes" with Pineapple Maple Syrup


2 TBS. unsalted butter, divided
1 c. ham, cubed
1 c. fresh pineapple, chopped *I didn't have fresh, so I used canned
1/4 tsp. ground cinnamon
1 c. pure maple syrup *See note below
1/2 c. yellow cornmeal
1/2 c. all-purpose flour
2 TBS. sugar
1/2 tsp. baking powder
1/4 tsp. baking soda
Pinch of salt
1 c. buttermilk *I had it on my shopping list and forgot it! Subbed with 1 c. sour cream *dork*
2 eggs
3 TBS. unsalted butter, melted
1 tsp. vanilla extract
1/2 c. pecans, toasted and chopped (optional)

Melt 1 TBS. butter in a nonstick skillet over medium-high heat. Add ham, saute until lightly browned, then remove.

Add 1 TBS. butter, pineapple and cinnamon to the pan. Saute until fruit is lightly browned. Off heat, stir in syrup; set aside. *Note: I only had 3/4 c. of pure maple syrup, so I added 1/4 c. of the sauce that went with the apple cake I made last week - buttery and cinnamony (word?) it was a perfect addition*

Preheat pancake griddle to 400º F. or a large nonstick skillet over medium high heat. Lightly coat with nonstick spray. Bleh, I used butter :D

Combine cornmeal, flour, sugar, baking powder, baking soda and salt in a bowl.

Blend buttermilk, eggs, melted butter and vanilla in another bowl. Add wet ingredients to dry, stirring until just evenly moistened. Fold sauteed ham into batter.

Pour 1/4 c. batter onto hot griddle for each pancake. Cook until brown on the bottom and bubbles form around the edges, then carefully flip and cook until done, 1-2 minutes.

Serve with pineapple syrup and optional toasted pecans.

Labels: , ,

Monday, March 27, 2006

Send off...

Sunday was Wayne's last day home before having to head back to Arkansas. We had a great weekend, though =) Friday we lounged and were generally lazy. Saturday we checked out Trader Joe's and went to one of our favorite markets. Trader Joe's was a bit of a disappointment. After reading about it on so many blogs, I was really excited to see this place. Maybe ours is a smaller store? I'm not sure.. but there wasn't too much of a variety of uncommon items. I did score some vanilla beans and a tiny bottle of saffron though! So that was cool. I've learned about so many products from reading all of these blogs, things that make me drool.. so when we hit Miles Farm Market and I really looked through all of their gourmet items, I was surprised and tickled pink to find quite a few items I've been reading about! Mainly, a nice selection of Stonewall Kitchen goodies, Valrhona chocolate (party on!) and San Marzano tomatoes (which no grocery store near me carries) - so it was a great day of foodie treasure finds =)

Sunday morning was spent scouring the city for the best buy on a Dyson "Animal" vacuum. Yep we finally broke down and paid the big bucks for a freakin vacuum. Chloe, although Mommie's girl, has blown me away with the hair she sheds. My gawd. I've never owned a larger breed dog.. that sheds. And. Sheds. My lil Bissel would literally use it's attachment hose to hold on to the inside of the closet making me force it out to try and keep up with Chloe's shedding. Poor lil guy. So we decided to retire him and buy the big gun. Now.. I'd like to say right off the bat that it was money well spent, as it picked up hordes and hordes of hair like a charm.. but still, for that kinda money? It really should make me dinner and do my laundry as well.

I wanted to make Wayne one more home cooked meal before he had to go to the airport and I wanted it to be something he could take and snack on during his trip annnddd it didn't hurt if it was a brunch type meal, because I want to contribute something to Weekend Cookbook Challenge and I figured I wouldn't have an opportunity for Easter brunch this year.

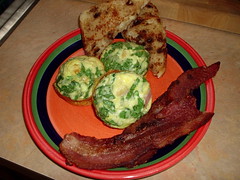
Although I find Giada De Laurentiis' mouth freakishly huge - almost to the point where I can't watch her - I do like her cooking =) I chose to make her Mini Fritattas with a side of Miles Farm Market's honey cured bacon and Great Harvest's Apple Pie bread, lightly spread with butter and cinnamon sugar and then grilled.

The frittatas were fabulous. They puffed up beautifully, were perfectly seasoned and had a really creamy texture. The bacon was a nice compliment as it was both savory and sweet and the apple pie bread was warm and gooey, yet crispy from the cinnamon sugar coating. Yum!

Brunch

Mini Frittatas courtesy of Giada De Laurentiis

Recipe can be found here Mini Frittatas

My only changes were I halved the recipe, used a regular size muffin tin, diced the ham into little cubes and subbed baby spinach in lieu of the parsley.

Labels: ,