Malto Mario


Feast


The Lady & Sons


1,000 Italian Recipes

Tuesday, October 31, 2006

Beef and Vegetable Potpie

So one day, I'm browsing Cooking Light Magazine's website - and got suckered into signing up for their offer of 3 free magazines to try before buying a year's subscription. As some of you might remember, I ordered their "Cooking Light's Annual Recipes 2006" cookbook a few months ago and simply fell in love with it. The book is chock full of good for you recipes that taste amazing. I had high expectations for the magazine and looked forward to receiving my first free copy.

Much to my chagrin, their magazine, in my humble opinion, is not worth the cover price of $4.50 per issue. Where it does include some awesome looking recipes, it's mostly a magazine full of advertising and lifestyle articles (but mostly advertising). There's nothing wrong with lifestyle articles - when I'm looking at a lifestyle magazine. And did I mention the advertising? Sheesh. I'll be cancelling the subscription and just keep buying their annual cookbooks.

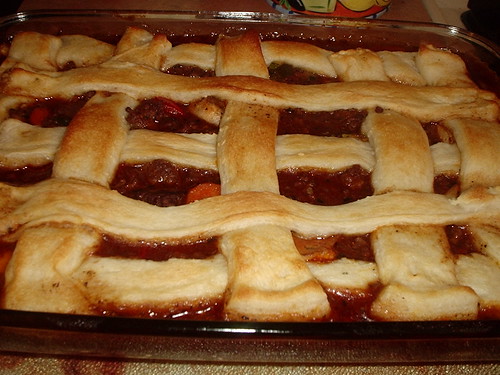
But not all was lost with this first issue! From the smattering of featured recipes, I found several that I'd like to try including this recipe for Beef and Vegetable Potpie that I made for dinner last night. I think the picture is what caught my attention first. This potpie is not covered with a whole crust, but with a lattice of interwoven bread sticks found in the refrigerator section of your grocery store. It was quite pretty! The second thing that caught my eye was their use of zucchini in the potpie. I had 2 lil zucchini's in my fridge just waiting to be used up, so this was perfect.

This recipe turned out mighty tasty. Hearty and rustic, and right up Hubbs' alley. Although mine did not turn out as picture perfect as the magazine's picture, it was still quite lovely and something I'd like to make for company. Their recipe said that the potpie would fit into an 11" x 7" baking dish. Just by looking at the measurements for the ingredients I had my doubts.. after browning the ground sirloin and sauteing the vegetables I figure the author of the recipe might be a crack smoker. There was no way all of this was going to fit into such a small baking dish, so I took out the trusty 9" x 13" baking dish and it was filled almost to the top. I did double the sauce ingredients, as Hubbs really wanted me to make some elbow macaroni that he could stir into his, but even so - had I stayed with the original recipe it still would not have fit the baking dish called for. Just so's ya know if you decide to make this. ;) Another thing to keep in mind, before I share the recipe is this.. if you don't like cooking with wine do not pass this recipe up. Although the wine flavor was quite bold while it was simmering on my stovetop, after it had baked in the oven the wine melded with the beef stock and other ingredients and only lent a richness that was fabulous.

Hubbs' request for the elbow macaroni was actually quite good when I tasted his. So I think I'll switch this recipe up here and there and leave the bread sticks off and add the macaroni right to the potpie. Both variations were quite excellent.

Beef Vegetable Pot Pie
Beef and Vegetable Potpie
Courtesy of Cooking Light Magazine

1 TBS. olive oil, divided
1 lb. ground sirloin
2 c. chopped zucchini
1 c. onion, chopped
1 c. chopped carrot
1 tsp. dried basil
1/2 tsp. dried thyme (I used 3 small sprigs of fresh)
1 (8 oz.) package of presliced mushrooms (I used whole and gave them a rough chop)
3 garlic cloves, minced
1/2 c. dry red wine
1/4 c. tomato paste
1 1/2 tsp. Worcestershire sauce
1/2 tsp. freshly ground black pepper
1 (14 oz.) can fat-free, less-sodium beef broth (I used regular beef stock, because it's what I had on hand)
2 TBS. cornstarch
2 TBS. water
Cooking spray
1 (11 oz.) can refrigerated soft breadstick dough

Preheat oven to 400º F.

Heat 1 1/2 tsp. oil in a large non-stick skillet over medium high heat. Add beef, cook 3 minutes or until browned (more like 7 minutes), stirring to crumble. Drain. Wipe drippings from pan with a paper towel. Heat remaining 1 1/2 tsp. oil in pan. Add zucchini and next 6 ingredients (through garlic); saute for 7 minutes or until vegetables are tender. Return beef to pan. Stir in wine, tomato paste, Worcestershire sauce, pepper and broth. Bring to a boil, cook 3 minutes. Combine cornstarch and 2 TBS water in a small bowl, stir with a whisk. Add the cornstarch mixture to the pan, cook 1 minute, stirring constantly.

Spoon the beef mixture into an 11 x 7-inch (seriously - 9 x 13 inch!) coated with cooking spray. Separate breadstick dough into strips. Arrange strips in a lattice fashion over beef mixture. Bake at 400º for 12 minutes or until browned.

Yield: 6 servings (serving size: 1 1/2 c.)

*Note: This may be just me, but while tasting for seasoning while on my stovetop this needed salt. And my beef stock was not less-sodium. I added about 1 tsp. of kosher salt. Also the recipe above is the original recipe, not doubled.

Labels: , ,

Monday, October 30, 2006

A Rare Evening Post...

Good evening!

I'm usually in la-la land right about now, but I just got done watching a scary movie (I just love Halloween, don't you?) so therefore I must think happy thoughts for at least a half hour before I'll be able to sleep! ha!

Nothing makes me happier than chocolate! Okay well yeah, some other things do.. but tonight - it's chocolate! And my first post of a recipe I've made from Dorie Greenspan's new cook book, Baking: From My Home To Yours.

When the very sweet Sara of i like to cook asked me if I'd like to participate in another Cookbook Spotlight event, I was just tickled pink, as I really enjoyed participating in the first Cookbook Spotlight featuring Kitchen Sense by Mitchell Davis. And then I read a lil more of her e-mail and saw that Dorie Greenspan's new book was being featured - I was more than excited! Before I discovered food blogs I had never heard of Dorie. I had never even heard of Pierre Herme. I know!! Where the hell had I been? Ahh well, I'm use to being the last to know about a lot of things.. such as life.

So back to my excitement. I couldn't type YES! fast enough. I sat in front of my PC just waiting to hear back from Sara letting me know my e-mail got to her. And Sara? It's probably a good thing you are way up north, cuz if you were any where within reaching distance you would have gotten a great big smooch from moi for thinking of me! :D It wasn't too long after that night that I received what I thought was a nice sized slab of marble inside a cardboard box, sitting on my door step. Holy crap is this book heavy! Practically tripping over the kids when I rushed into my house to tear the box off, I could not wait to flip through the pages and commence in drooling. And ohh.. did I drool. Seriously? I need to have that looked at. Anyhoo.. deciding on two recipes to try was pretty damn close to impossible. So I went with 4 *blush* - keeping in mind I finally decided on 4 after making a list of at least 20. :P

The first two recipes I tried, I'm not going to share the recipes for, since I am really only allowed to blog about 2. But I will tell you the Korova or "World Peace" Cookies are fanfarkingtastic. And my first batch didn't even turn out right! Completely my fault though. I had a very hard time cutting the dough so they turned out "rustic" looking, to say the very least. I saved the 2nd half of the dough for another day, but wrote to Anita of Dessert First (bless her!) and asked her if she'd mind telling me what I was doing wrong. Her diagnosis? I might have cut them too thin and I didn't let my dough sit out long enough to soften properly before cutting. Thank you so much, Anita! My go at the 2nd log of dough turned out beautifully. But that is just aesthetics - the taste of these cookies is truly the main attraction. A deep, deep chocolate flavor with hits of salt throughout. I'm kind of thinking that these cookies should be renamed yet again.. "A Girl's Best Friend" cookie is more like it. ;) I'll be making these quite often!

The 2nd recipe I tried was my very first attempt at tarte Tatin. It was simply beautiful and tasted even better. My apples were fanned out perfectly, my puff pastry was puffy in all the right places and I did not burn myself while inverting it onto a plate! 'kay well, that would be because Hubbs did it for me. But he didn't burn himself either. ha! I thought this dessert was complicated to make when I first heard of it, but was nicely surprised that it's very simple and easy - especially with Dorie's instructions to guide me. I didn't even mind peeling and slicing all those apples! The only difference in my tarte Tatin and Dorie's was that I sliced my apples and fanned them out in the skillet, where she quartered hers. Something tells me though, that she wouldn't mind. =)

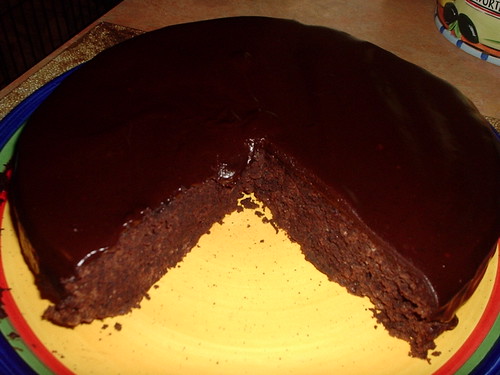
Now this brings me to the third recipe.. Almost Fudge Gâteau. A flourless (almost!) chocolate cake that will send shivers down your spine. Dorie's recipe was quite different from the other flourless chocolate cake that I've made as it calls for meringue to be folded into the chocolate batter. That was my one and only problem with making this cake. The chocolate "batter" is quite stiff and dense and when I tried to gently fold in the light meringue it took quite a bit of effort to incorporate it. The batter did get nice and fluffy, but I'm not quite sure if I depleted most of the air that was whipped into the egg whites in my "folding" as the cake did not raise too much. Actually, I'm not sure it was suppose to raise much. I've only got the other cake I previously mentioned to compare it to, and that cake was very dense and probably about as thick as a single layer cake. So I'm not sure if this cake turned out correct or not. But! As for taste.. wow. Just.. wow. The bittersweet chocolate made a not very sweet cake, which I adore. The chocolate is very intense in flavor and in scent. My kitchen smelled heavenly. Or at least, what I'd like to imagine heaven smelling like. The texture was slightly dry, but still quite fudgy. I am guessing that my oven runs hot, as I took the cake out at the minimal time recommended for baking, which might have caused it to over bake a bit. Regardless though, the pure chocolate rush along with the melt in your mouth texture would take much more than a few moments of over baking in a too hot oven to ruin this cake. By the by, I did opt for the bittersweet chocolate ganache poured over top.. I'm a firm believer in there can never be too much chocolate! A beautiful and decadent treat for the serious chocolate lover, for sure!

Almost Fudge Gateau
Almost-Fudge Gâteau
Adapted from Baking: From My Home To Yours by Dorie Greenspan, Houghton Mifflin Company, November 2006

5 large eggs
9 ounces bittersweet chocolate, coarsely chopped
1 c. sugar
5 TBS. unsalted butter, cut into chunks
2 TBS. coffee or water (I used coffee)
1/3 c. all-purpose flour
Pinch of salt

For the Glaze (optional)
4 ounces bittersweet chocolate, coarsely chopped
1/2 c. heavy cream
2 tsp. light corn syrup

Getting Ready:
Center a rack in the oven and preheat the oven to 350º F. Butter a 9-inch springform pan, line the bottom with parchment paper, butter the paper, dust the inside of the pan with flour and tap out the excess. Place the pan on a baking sheet lined with parchment or a silicone mat.

Separate the eggs, putting the whites in a mixer bowl or other large bowl and the yolks in a small bowl.

Set a heatproof bowl over a saucepan of simmering water and add the chocolate, sugar, butter and coffee. Stir occasionally until the chocolate and butter are melted; the sugar may still be grainy, and that's fine. Transfer the bowl to the counter and let the mixture sit for 3 minutes.

Using a rubber spatula, stir in the yolks one by one, then fold in the flour.

Working with the whisk attachment of the mixer or a hand mixer, beat the egg whites with the pinch of salt until they hold firm but glossy peaks. Using the spatula, stir about one quarter of the beaten whites into the batter, then gently fold in the rest. Scrape the batter into the pan and jiggle the pan from side to side a couple of times to even the batter.

Bake for 35 to 45 minutes, or until the cake has risen evenly (it might rise around the edges and you'll think it's done, but give it a few minutes more, and the center will puff too) and the top has firmed (it will probably be cracked) and doesn't shimmy when tapped; a thin knife inserted into the center should come out just slightly streaked with chocolate. Transfer the pan to a cooling rack and let the cake rest for 5 to 10 minutes.

Run a blunt knife gently around the edges of the cake and remove the sides of the pan. Carefully turn the cake over onto a rack and remove the pan bottom and the parchment paper. Invert the cake onto another rack and cool to room temperature right side up. As the cake cools, it may sink.

To make the optional glaze:
First, turn the cooled cake over onto another rack so you'll be glazing the flat bottom, and place the rack over a baking sheet lined with parchment or wax paper to catch any drips.

Put the chocolate in a small heatproof bowl.

Melt the chocolate over a pan of simmering water or in a microwave oven - the chocolate should be just melted and only warm, not hot. Meanwhile, bring the cream to a boil in a small saucepan. Pour the hot cream over the chocolate and stir very gently with a rubber spatula until the mixture is smooth and shiny. Stir in the corn syrup.

Pour the glaze over the cake and smooth the top with a long metal icing spatula. Don't worry if the glaze drips unevenly down the sides of the cake - it will just add to it's charms. Allow the glaze to set at room temperature or, if you're impatient, slip the cake into the refrigerator for about 20 minutes. If the glaze dulls in the fridge, just give it a gentle heat from a hairdryer.

Labels: , , ,

Michelle's Roasted Pork Tenderloin with Apple Cider Jus

Michelle? I heart you!

This is the first, of which I hope to be many, of Michelle's Je Mange la Ville recipes that I've tried. Yesterday, I spent the whole day baking from Dorie Greenspan's new book: BAKING: From My House To Yours (reviews coming soon!) and watching scary/Halloweenie type movies and then preparing this amazing dinner for the two of us.. all the while the house rocked to some severe winds. Which was quite mild to Saturday's weather in which we encountered gray skies, wicked winds, hail, freezing rain and even a smattering of snow while we both cowered under the blankets all day. Gah. Yesterday was definitely a fantastic day in comparison. =)

I only changed one part of her recipe (imagine that!) in which I did not roast my tenderloin with the rosemary, only because Hubbs isn't a fan. But the rest of the recipe was followed to the T and it was fanfarkintabulous! I was a little shocked when I first tasted the jus for seasoning as it was very concentrated after it had reduced - it was pretty sweet but also very tart (and my cheeks are puckerin' as I type this). But when paired with the tender and salty pork it was amazing! Apples and pork go so well together, but I rarely cook with apples so we don't get this flavor combo often. I've cooked a pork tenderloin in a pear/port wine/mustard sauce before and that was fantastic as well, but nothing like this jus that I agree with Michelle, could be drank with a freakin' straw it's so good.

I'll include my picture of last night's wonderful dinner.. but will direct you to Michelle's site for the recipe and to see her step by step instructions (including photos!) on how to make this meal. It's the perfect Autumn dinner and I really recommend trying it. =)

Pork Tenderloin with Apple Cider Jus
Michelle's Roasted Pork Tenderloin with Apple Cider Jus

Copied verbatim from Michelle's Je Mange la Ville

2 cups apple cider
1 cup low-salt chicken broth
3/4 cup chopped onion
6 whole allspice
3 large fresh thyme sprigs (or a big rosemary sprig, which is what I used)
2 cinnamon sticks
2 teaspoons apple cider vinegar
1 bay leaf
1 tbsp unsalted butter
1 12-ounce pork tenderloins, well trimmed
Olive oil
2 Rosemary sprigs
2 cloves garlic, minced
salt & pepper

Mix first eight ingredients in medium saucepan. Boil until mixture is reduced to 1 1/2 cups, about 30-40 minutes. Strain, pressing on solids to extract liquid. Discard solids. Return liquid to saucepan and boil until reduced to 1/2 cup, about 10 minutes. Whisk in the butter and season with salt and pepper, if needed.

Meanwhile, preheat oven to 375 degrees. Slather pork with olive oil, salt and pepper generously and coat with the minced garlic and rosemary.

Brown on all sides in a oven-proof pan. Finish roasting in the preheated oven, 20-22 minutes or until the pork reaches 145 degrees.

Cover with foil and let rest for 5-10 minutes. Pour any pork drippings from the rested meat into the cider sauce. Then slice and serve with the sauce drizzled over the top. Deee-licious.


He wasn't in the mood for any other veggies I had on hand, so we just went with carmelized roasted sweet potatoes - simply made by tossing the diced potatoes with a little kosher salt and olive oil, then roasting alongside the tenderloin. I flipped them half way through, and when the tenderloin was done and sitting on my counter for 10 minutes to rest, I sprinkled the potatoes with a little brown sugar and put them back in the oven until the sugar melted (about 10 min.).. yum! :D

Labels: , ,

Sunday, October 29, 2006

Blog of the Week October 29, 2006

I have no idea how I found Michelle, but I couldn't be happier that I did. Her Je Mange la Ville blog is an outstanding read and an amazing place to find mouth watering photos and recipes.

Michelle and her boyfriend, jwa, live in Portland, Oregon and she started her blog to document their visits to a long list of restuarants in their area. She also wanted to share her adventures in the kitchen and although I dig the restaurant reviews, it's for those adventures in her kitchen that keeps me coming back for more. Dear God does this woman know how to cook. Every single recipe she shares is a recipe that I can not wait to try myself. For example, tonight I am going to attempt her Roasted Pork Tenderloin with Apple Cider Jus. *swoon* Just recently she posted her entry for this month's SHF with mini grapefruit cakes. Grapefruit cakes! I have never heard of such a cake and I am so ticked off that she's practically on the other side of the planet from me, preventing me from tasting RIGHT NOW! Delving into her archives I've drooled heavily over her Buckwheat Galettes with Ham and Gruyere, Chicken, Apple and Gorgonzola Strudel not to mention her, Double Chocolate Orange Tart with Amaretto Whipped Cream!

The two things I love most about this blog (aside from her style of writing that I seem to relate to so well), is that Michelle seems to always cook dishes that are comforting and cozy. Everything I look at gives me that warm and fuzzy feeling inside that goes with foods that are neither to fancy nor too "blah". Foods that make you want to sink in and enjoy your surroundings as much as what's been placed before you. Feel good foods, that's what I'm trying to get at! The other thing I love is that she photographs each step of the cooking process. God how I love seeing how each step should look so that I can get an idea if I'm preparing her recipe properly.

All in all, this is a site for everyone. Great stories, gorgeous pictures, fantabulous recipes, informative restaurant critiques, a guest post by her boyfriend (hysterical) and eleventy zillion ways to be inspired in your own kitchen. Kids, add Je Mange la Ville to your blogroll immediately, if not sooner. =)

xoxo

Labels:

Wednesday, October 25, 2006

Chicken Kiev with a Twist

I haven't made chicken breasts in a while and normally I'll marinate them and either grill them or chunk them up for tempura. But I wanted to stuff them this time. I had to think about this and search high and low for a recipe, as most stuffed chicken uses cheese, which Hubbs doesn't like.

I remember seeing The Martha make Chicken Kiev once and thought it looked interesting. I liked the idea of the hidden pat of herbed butter infusing the chicken with it's flavor while also keeping the meat moist. The only thing I didn't like was the deep frying. Yes, me. I KNOW! But I don't really like fried chicken breast, go figure.

This recipe is taken from bits and pieces of a few recipes I read - because not one single recipe tripped my trigger, if ya know what I mean. I also decided to give it a bit of a twist by lightly dredging the rolled breasts in ranch dressing in lieu of beaten eggs and also to use Panko instead of traditional bread crumbs. And finally, I decided to try to bake them instead of deep frying.

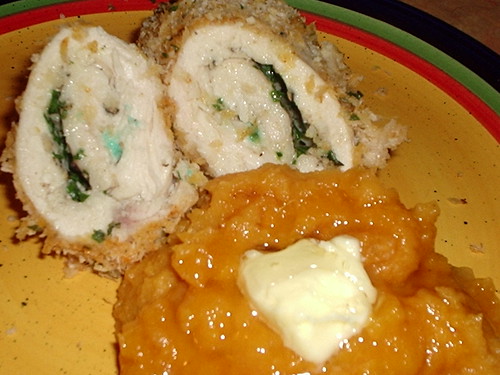
This is a keeper for sure. The breasts were extremely moist and super flavorful due to the herbed butter and ranch dressing. The Panko baked up crunchy and took on a nice golden color. By placing the breasts on a rack over the baking dish, they did not cook in their own juices so the bottoms were just as crunchy as the tops. My only faux pas was forgetting to add the lemon juice to the herbed butter. Next time I'll do that as I think the lemon will brighten the flavors of the chives and parsley nicely. Oh yeah.. and might I suggest, when you make this recipe do NOT use the pretty colored tooth pics to help seal the rolls. As you'll see in the picture, although they did work in keeping the butter inside the rolls, they left a loverly dot of blue dye on the chicken. How attractive is that? heee! I served these with smashed sweet potatoes and steamed green beans.

Chicken Kiev
Chicken Kiev with a Twist

4 chicken breasts, pounded to about an 1/8th inch thick
4 TBS butter, softened
1 TBS. fresh, snipped chives
1 TBS. fresh, chopped parsley
1/4 tsp. garlic powder
2 tsp. fresh lemon juice
2 cups Panko crumbs
1/2 tsp. garlic powder
1/2 tsp. paprika (I used sweet spanish paprika)
1/2 tsp. salt
2 TBS. fresh, chopped parsley
1 c. ranch dressing

Preheat oven to 375º F.

In a small bowl, combine the softened butter, chives, parsley, lemon juice and garlic powder. Transfer to a small piece of plastic wrap and shape into a small log. Place in freezer while working on the breasts.

In a shallow dish or bowl, combine the Panko with the garlic powder, paprika, salt and parsley - mix well with your finger tips.

In another shallow dish or bowl add the ranch dressing.

Take the butter out of the freezer (it should have been in there for at least 10 minutes, allowing it to harden - but would be better if you made the butter ahead of time so that the flavors could meld even more.) Cut into either 4 disks width wise or 4 slices length wise. I went with the long slices.

Season pounded breasts on both sides with salt and pepper. Lay 1 breast flat in front of you and place a slice of the herbed butter in the middle of the breast. Roll the edge closest to you towards the other end, bringing up the sides half way through the roll. Use toothpics to secure.

Dredge the rolls lightly through the ranch dressing and then through the bread crumbs. Place the rolls on a rack that has been placed in a baking dish. I used a small rack over a 8" square baking dish as I only baked 2 rolls and froze the other 2 for a quickie dinner another night. Continue on in this fashion for the rest of the chicken breasts.

Bake them in the preheated oven for 30 minutes or until the juices run clear when poked with the tip of a knife.

Labels: , ,

Monday, October 23, 2006

Happy Birthday to Our Favorite Cream Puff!

Today, October 23rd, is Ivonne's birthday! Happy Birthday Sweet Cream Puff!

May your birthday be full of surprises and fun!

Hugs!
xoxo

Labels:

Creole Shrimp And Pasta Meuniere

Here's another one of those recipes that I really shouldn't even bother blogging about, but I feel the recipe is a good base to add your own personal touch to create something delicious.

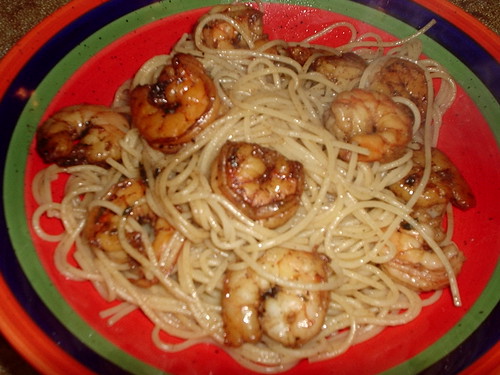
I wanted to try a new shrimp dish and found this one at All Recipes. It was given 4.5 stars and in reading the comments, most people said it was really good but only because they made many changes due to it being so bland. I read their changes and made my notes and then, apparently, didn't make enough changes to my version. Because the pasta was still very bland. The shrimp, though, was not bland but quite tasty and is the reason I'm sharing my experience with Betty Pritchard's recipe.

You start out with a lot of butter. Imagine that. A big butter post on La Mia Cucina - who woulda thunk it? And as much as I lurve me my butter - I don't particularly like a lot of it with my pasta. Much to Hubbs' chagrin. I hate a greasy pasta, it just doesn't sit well with me. After reading the recipe, I thought maybe the butter was just a base for a nice creamy sauce, but alas, it wasn't. Although by browning the butter and adding the worchestershire, hot sauce and herbs, it really did give the shrimp a delectible taste. The changes I made, were as follows: I did not have "fines herbs" - quite frankly, I had no fakkin' idea what "fines herbs" was until I checked it out on Wikipedia and realized that I didn't have those herbs even in a dried version. So I substituted with Herbes de Provence. Another change was I just added the hot sauce but omitted the jalapeno pepper sauce because as we all know, I'm a spice chicken. And finally, I added 3 cloves of garlic, finely minced and 2 TBS. of white wine. Two ingredients I seem to always add to a shrimp/pasta dish.

This brown butter sauce clung well to the shrimp, and quite frankly, if I ever wanted to make a snacker out of shrimp this is how I'd prepare them again - but the butter sauce didn't do much for the pasta. Maybe this dish would have been better suited to rice? I'm not sure. I even went with the old standby of adding some of the pasta water and parmigiano but it still didn't perk the pasta up at all.

So.. try this recipe for shrimp, but either omit the pasta and try rice, maybe? Or just make the shrimp. For the 7 TBS of butter, it was just enough to coat the 1 lb. of medium sized shrimp perfectly, so you wouldn't be wasting a bunch of sauce if you were to omit pasta or rice completely.

Creole Shrimp And Pasta Meuniere
Creole Shrimp and Pasta Meuniere

I'm not bothering with typing out the recipe, but you can find it here.

Labels: , , , ,

Sunday, October 22, 2006

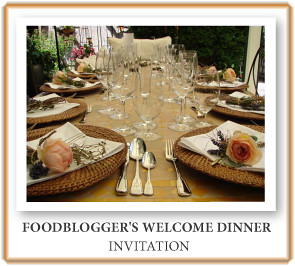
Foodbloggers Welcome Dinner Meme

*UPDATED BELOW*

dinnerinvite

My apologies to my lovely Ellie for taking so long to write up this delightful meme created by the equally lovely Angelika of The Flying Apple. This is such a charming idea to bring food bloggers together for a virtual celebration.

The premise of this meme is to describe how you would entertain your food blogging friends if they could join you in your home for a lovely evening of good food, drinks, conversation and laughter. And to me, there is no specific occasion that wouldn't be a smashing success if these four requirements are met.

I don't throw formal parties. When you visit our home you are a "guest" for the first 10 minutes and then after that you are part of the family. Did you need an extra spoon or fork? They are located in the drawer next to the sink, help yourself! Prefer a different type of glass for your drink? Absolutely! You can find them in the cupboard above the utensil drawer! Need something from the fridge? Be my guest - feel free to rummage through it until you've found what you like, I don't mind at all - you're family! My house is your house, please relax and enjoy yourself. =)

Now that we have that established and you are feeling as comfortable as being in your own home, walk out to the back yard with me. Lighted lanters will shine the way, both hanging and placed randomly throughout the yard. Two large white tents will be set up in case the weather decides to change. You'll find my large rectangular table adorned with place settings - most likely my favorite dishes, bowls and glassware. None will match exactly as I love mixing patterns with similar earth toned colors. On each setting you'll find a little something made especially for you to take home. Be it a homemade candle, a small bag of fruits and nuts or the latest chocolate or candy I have fallen in love with. Candles will be twinkling and greens will swirl between the centerpieces. If there's one thing you'll learn about me upon entering my house, is my love of plants and all that is fresh and green. Depending on my mood for the evening you'll hear soft classical or jazz or even some rockin' 80's music wafting through the open windows of my house.

On our deck will be two long tables where the appetizers, and later, desserts will be laid buffet style. On the first will be platters of nibblers such as my cheesy sausage snackers, slices of garden fresh cucumber with a dollop of my favorite crab salad on top, different dips with accompanying crackers, toasts and veggies, my favorite cracked crystal bowl filled to the top with my tapenade, a large bowl of fresh seasonal fruit marinating in a citrus/honey sauce, prosciutto wrapped melon and figs stuffed with creamy mascarpone and finally, a platter of antipasti laden with hams, salami, cheeses, olives and grapes. Dig in!! Feel free to walk around and mingle! We've always got the bocci area in the back of the yard, and there are ALWAYS tables set up in the "gaming tent" with decks of cards, dice and other games. This is where you will find me once all of my guests have arrived. There is nothing I enjoy more than the laughter and giggles heard around our game tables.

Once I've seen that everyone has picked on the appetizers and has had a few drinks of their choice (you'll also always find a stocked bar and buckets full of ice cold beer, sodas and water) I'll sneak off, most likely snagging a couple of you with me, to my kitchen to make last minutes touches to our dinner. Soon there will be heaping platters and bowls placed down the middle of the dining table. And ohhh the food that will appear! From my years of entertaining in combination with my years working in our family's restuarant, you will wonder what army will joining us. Along with a glazed ham, standing rib roast crusted in garlic and herbs, and either deep fried or roasted chicken you'll find a large salad simply dressed in olive oil and balsamic, bowls of both yukon and sweet smashed potatoes, there will be corn on the cob, steamed cauliflower perfumed with garlic and thyme. A large plate of home made cheese ravioli swimming in our marinara, carmelized brussel sprouts and candied carrot coins. Another platter will be filled with creamy mushroom and zucchini risotto. And don't be surprised if you find yet another heaping bowl filled with macaroni and cheese - made with a combination of creamy fontina, gruyere and parmigiano. Placed in wicker baskets the length of the table will be fresh warm Italian bread and rolls with small bowls of my favorite Amish made butter. Platters and bowls will be passed and plates will be filled. Conversation will lighten as tummies and tastebuds are being satisfied. Welcome to my "country-fied" Italian table. =)

When everyone has been sated, Hubbs will refresh your drink and we can either sit or move back to the gaming tent to enjoy each other's company. I'll set the desserts I've prepared on the second table on the deck - if you've got the room, you'll find a carmelized brown sugar cheesecake, my favorite apple crisp, fresh berry and custard parfaits, warm and gooey outrageous triple chocolate chip cookies and a platter of cheeses and fresh fruit. Dive in at your own risk. ;) Just can't pass another morsel through your lips tonight? That's fine, I'll have set plastic containers and tops at the end of the table - take your dessert to go and enjoy it once your tummy has settled (you know, in the middle of the night when you wake up and are dying for a big glass of milk and something sweet?).

Throughout the rest of the evening, the drinks will flow and the music might get a little louder.. we'll dance and laugh and feel happy to be with each other. And hopefully if I've done everything right, when you have decided it's time to go home you'll leave with the desire to come back as soon and as often as possible - as that's the way I'd prefer it. Come visit me often, please, there is nothing I would like better. =)

I forgot to tag a few of my favorite people! So if you'd like to participate, I'd love to tag:
Callipygia of FOODChair
Laura Rebecca of Laura Rebecca's Kitchen
and Meeta of What's for Lunch Honey?

Labels:

Friday, October 20, 2006

Update

Just so's ya know.. getting up at the crack of dawn can sometimes be useful. The recipe archive's are now updated. =)

Have a great weekend everyone!

xoxo

Labels:

Sunday, October 15, 2006

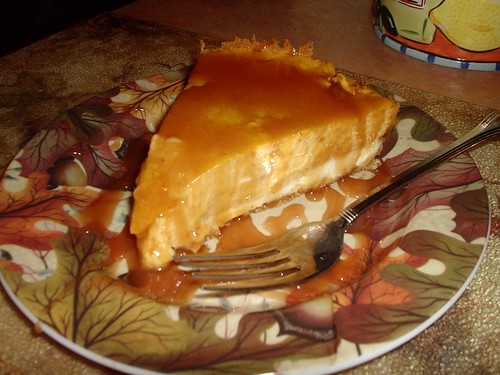
Double Layer Pumpkin Cheesecake with Salted Caramel Sauce

This has been quite an uneventful week in the kitchen. Well, what I should say is uneventful for my blog as I've already blogged about pretty much everything I've made this week. With the change in weather temperatures (holy crap it snowed here - it's only October for crissakes! Have I mentioned how much I love Cleveland winters? No? Yeah well cuz it SUCKS. Okay.. well it doesn't suck as much as New York winters.. sorry to complain about our dusting of snow when some of you NY'ers got a COUPLE FEET of the nasty stuff) we've both been craving comfort foods. Cooking in your kitchen when your teeth are chattering and you are bone weary from working in the cold (Hubbs) doesn't make for easily coming up with new and exciting dishes. All we've wanted is the stuff that makes you feel cozy, warm and happy to have a working furnace. ha!

Hubbs did make one request yesterday morning. He'd really like cheesecake. Who am I to say no to such a request? I was torn between a peanut butter and chocolate cheesecake or a pumpkin cheesecake. My sis, who is up from Toledo for a 5 day visit, helped me decide. She wants to go to the Cheesecake Factory today for lunch, and I KNOW after perusing and drooling over all their different cheesecakes, I will still end up ordering my favorite peanut butter slice of heaven. Therefore, I went with the pumpkin variety. I've made many pumpkin cheesecakes in my life and do have a couple favorites, but decided to go with one I've never made before.

This double layer cheesecake is so easy to make. It's quite pretty once you've sliced it and see the creamy white layer below the pumpkin layer. The original recipe did not call for a crust, which I found odd.. so I just made a simple graham cracker and cinnamon crust that went really well. This cake is not very sweet although it is very creamy and delicious. But that was a good thing because I had decided to pair the cake with a caramel sauce. I've never made caramel before but after watching an episode featuring sugar on Alton Brown's Good Eats the night before, I really wanted to try my hand at it. Where Alton gave me the push I needed to finally try this sauce, I went with a recipe from Gale Gand. Gale is an accomplished pastry chef, who is quite popular in America. She has her own show on the Food TV channel called Sweet Dreams and she's fun to watch.

After finding her recipe for caramel sauce I was a little worried. Her ratio of sugar to water was much different from the other caramel sauce recipes I had looked at. Ultimately though, I believe my first caramel experience was quite hairy because I think I chose too small of a saucepan. Where the cheesecake was a breeze to put together, the caramel was another story all together. Hee!

Alton, if you are reading this.. please avert your eyes.

Right off the bat, I threw out all that I had learned from the guru of science meets food. Gale's recipe called for 2 1/2 cups of sugar and after I piled all of that in my too small of a saucepan there was no way the sugar wasn't going to touch the sides. Did I get out a bigger saucepan and just dump the sugar in like any other sane home cook would do?? Nooo... I just poured the water in around the sides and figured I knew more than Gale and Alton and hoped for the best. Sometimes my stubborness and ignorance amazes me. As soon as the sugar mixture came to a boil a thin layer of crystals formed on top. Well duh. But I just let it go until it turned amber in color. I took it off the heat and added the heavy cream and kept stirring while watching in terror as the bubbles got vicious and threatened to overflow that small saucepan. I stirred faster and then faster and finally it stopped boiling, but there were HUGE lumps of crystalized sugar floating all through the pretty sauce. Before adding the butter and the fleur de sel, I switched my spoon for a whisk and soon most of the lumps dissolved. Most. I ended up just straining the sauce into a glass bowl and discarding the lumpy lumps. Alton would have stroked out had he seen what went on. I don't think Gale would have been too pleased either. hehee

The remaining unlumped sauce did turn out fabulous and although I was embarrassed for being such a nard, I was quite impressed with it. It was of a perfect consistency, not too thin and not too thick. The salt addition produced exactly the taste I was hoping for. It was creamy and 90% perfection. And really.. what's a few lumps between us? For those wondering about the salt. Thanks to Haagen Dazs, I no longer can tolerate your basic sweet caramel sauce. The caramel they use in their ice creams is quite salty and divine. And with my love of all that is salty/sweet and sweet/savory, I can not go back to your plain jane caramel. If the thought of a salty caramel turns you off, simply omit the fleur de sel from this recipe and you will end up with a beautiful caramel sauce (hopefully less lumpier than mine).

Double Layer Pumpkin Cheesecake with Caramel Sauce
Double Layer Pumpkin Cheesecake with Salted Caramel Sauce

For the cheesecake:
2 (8 oz.) packages cream cheese, softened
1/2 cup white sugar
1/2 teaspoon vanilla extract
2 eggs
1 (15 oz.) can of pumpkin puree (NOT pumpkin pie filling)
1 teaspoon cinnamon
1/4 tsp. nutmeg (freshly grated if you can)
1 recipe for graham cracker crust (See below)

For the crust:
1 package of graham crackers (1/3 of a regular sized box of graham crackers)
2 TBS. sugar
1 tsp. cinnamon
3 TBS. melted butter

For the salted caramel sauce:
2 1/2 c. white granulated sugar
1/2 c. water
1 c. heavy cream
2 TBS. unsalted butter, room temp
1 1/2 tsp. fleur de sel (or a good quality sea salt)

Preheat oven to 325º F.

For the crust:
Ground the graham crackers in a food processor until all medium to large pieces are gone.
Dump the crumbs into the bottom of a 9" springform pan, add the sugar and cinnamon and mix well with a spoon. Add the melted butter and mix well. Pat the crumbs down so they are even and come up the sides of the pan by one inch. Bake in preheated oven for 10 minutes or until starting to brown.

For the cheesecake:
In a large bowl, combine cream cheese, sugar and vanilla. Beat until smooth. (If you are using a stand alone mixer, use the paddle) Blend in eggs one at a time. Remove 1 cup of batter and spread into bottom of crust; set aside.

Add pumpkin, cinnamon and nutmeg to the remaining batter and stir gently until well blended. Carefully spread over the batter in the crust.

Bake in preheated oven for 35 to 40 minutes, or until center is almost set. Allow to cool, then refrigerate for 3 hours or overnight.

For the salted caramel sauce:
In a LARGE heavy sauce pan over medium heat, pour the sugar into the middle of the pan being VERY CAREFUL not to allow the sugar to touch the sides of the pan. CAREFULLY add the water around the pile of sugar MAKING SURE the sugar does not touch the sides of the pan. Do not stir; gently draw your finger through the center of the sugar to moisten it. Over medium heat, bring to a boil without stirring. Cook until light caramel in color (This took about 15 minutes for me. I do not have a candy thermometer so I went by sight. If you have a candy thermometer you want the mixture to reach 350º F.) and immediately remove from the heat. Carefully (it will bubble up and may splatter) stir in the cream with a wooden spoon until smooth. Add the butter and fleur de sel and continue stirring until butter melts and salt dissolves.

Labels: , ,

Blog of the Week October 15, 2006

When I was paired with Helene of Tartelette for the last BBM event, I was more than a little nervous. I didn't really know her. And then I took a look at her blog and was firstly blown away by her beautiful pastries and baking skills and then secondly even more nervous than before knowing anything about her. She's a pastry chef and a personal trainer. I panicked.. I mean, seriously, what could I make in my little kitchen that a FRENCH PASTRY CHEF would like?? And do I go with something sweet because, obviously, she must like sweets - she's a pastry chef for crying out loud - or do I go with something "healthy" because she's a personal trainer and might not eat what she bakes?? God. After much thought and the realization that there is probably nothing too different to send her from Ohio that she can't already get in South Carolina, I decided to send her locally made items and as for that something personal that came from my kitchen? Well.. I went with the hopes that if she didn't partake in all of her baking, then her husband must surely reap those rewards so I went with simple little candies called "Buckeyes" because they represent Ohio so well. THANKFULLY she liked what she received! I was SOOOOOO relieved! ha!

Since being introduced to Helene by the BBM, I have visited her site regularly - daily as a matter of fact. I've gotten to know a little more about her and I now look back and wonder why I was so nervous. Although we really can't get to know each other too well from just reading our blogs, as most of us concentrate on what we bake/cook rather than lots of personal information, from what I have learned I can confidently say that I would be proud to be Helene's friend. She's such a warm soul who is very giving and makes you feel comfortable when entering her "virtual" kitchen. Her skills are amazing but grounded, in my humble opinion. She's very creative and innovative in her baking but she doesn't share recipes and techniques that a less skilled home baker would feel nervous about trying. Her instructions are easy to follow and her recipes range from the very naughty, rich and decadent desserts to more lighter and figure friendly delights. Her pictures will make your mouth water and her background stories are always a pleasure to read.

Whether you are a novice baker, a more experienced baker or just someone who prefers to bake once in a blue moon you can not go wrong in adding Tartelette to your blogroll. There is something for everyone to enjoy with the added bonus of getting to know an accomplished pastry chef and very sweet woman.

xoxo

Labels:

Tuesday, October 10, 2006

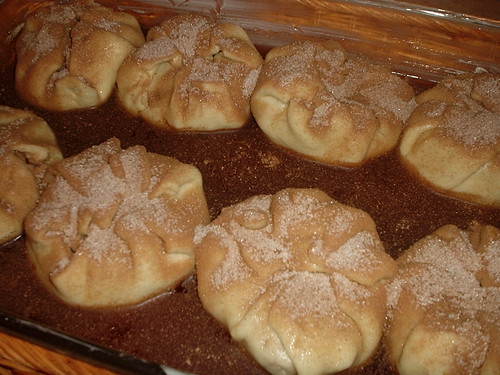
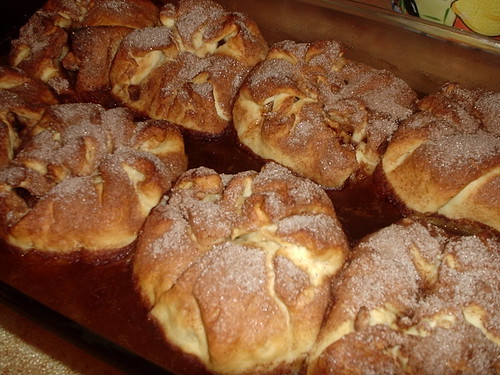
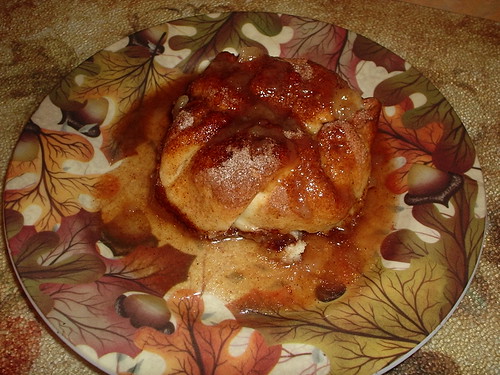
King Arthur's Apple Dumplings

My sister is coming up from Toledo this weekend to spend 5 days with us - I'm so excited! I spoke with my Mom yesterday to see how we wanted to spend our time and she suggested that while I'm at work on Monday that she and my sister should take a drive out to our hometown and visit my lovely Auntie (who just celebrated her 80th birthday yesterday - Love You Auntie!) and that we should all meet back at my Mom's place for dinner Monday night. Sounded good to me.. Mommie's home cookin' Woo!! Then she asked if I'd make the dessert.. not a problem, I'd be happy to! She wants The Crisp. My infamous Apple Crisp that is so fakkin' addicting that it is hard not to eat the whole damn thing within 24 hours (I usually lose that battle). I couldn't not agree to do it as I always make what my Mom wants.. but I had plans to make it last night, so I had to find something else to make as there are too many apples in a 1/2 peck for even The Crisp and I didn't want them rotting on my dining room table. Okay so that's a big fat lie. Hubbs says those apples will last a good 2 weeks and we didn't have anything sweet in the house and I hadda have something, dammit. Hee!

I keep hearing how the King Arthur flour company puts out some amazing recipes, so I went to their website yesterday to find something to bake. There is a long list of items made with apples, but as soon as I saw Apple Dumplings and checked out the recipe to see how involved it was, I knew I had to make them. I've only had 1 apple dumpling in my life - it was many, many moons ago and I remember how flaky the dough was and how delish the apples that were tucked inside were. The recipe was not very involved at all and I could have 8 fresh apple dumplings within an hour & a 1/2. Perfect!

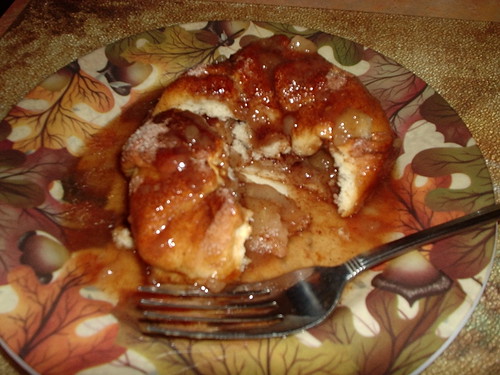
I've been using King Arthur flour for about a year now and I really do notice a difference, especially in my baking. Unfortunately though, no good flour was going to help this recipe. Hubbs was already sleeping by the time the dumplings were cooled off enough to eat, but I saw that some time during the night he got up and ate one - although I haven't had a chance to ask him yet this morning if he liked it or not. Just a sec... Okay he liked them. Huh. I thought for sure he would tell me he didn't. 'kay maybe this is all about me and my off taste buds. Well I can't even really say that, as they tasted really good.. but the dough was cakey and not flaky at all. I was hoping for more of a flaky pie crust dough. I hate a cakey dough - it's too heavy IMHO.

I'm not bothering to type out the recipe but here is the link if you would like to try them. Again, flavor was delish.. and they are quite the lil stunners appearance wise. I was quite pleased with how they looked. The recipe was super easy - the only bitch I had was coring the apples, because I don't have a corer. The dough came together in just seconds in my processor and was easy to roll out and play with. The recipe suggested just cutting the apples in half, but I decided to slice each half into 4 slices per bundle because I thought it might help with cooking time. I was afraid the dumplings would burn by the time the apples cooked through. I don't know if it was because of cutting them or not, but the dumplings baked to a beautiful golden brown and the apples were tender. I'm going to try apple dumplings again - but next time I'm going to try a more flaky dough.

Pictures below:

Apple Dumplings before
The "before" picture.. aren't they adorable? :)

Apple Dumplings after
The "after" picture.. goldeny brown and gorgeous!

Apple Dumpling
All plated and sauced up!

Inside Apple Dumpling
Lil apples peeking out.. but look at that dough - cakey! Gah.

Does anyone have a good flakey dough recipe for apple dumplings, by chance?

Labels: , ,

Monday, October 09, 2006

Meeta's Monthly Mingle No. 4

I was getting a little worried about this month's Monthly Mingle.. as coming up with something that included zucchini and sage was posing a problem for me. I could think of a zillion zucchini recipes, but I don't use sage that often in my cooking. I did not want to disappoint the very lovely Meeta so I really needed to come up with something!

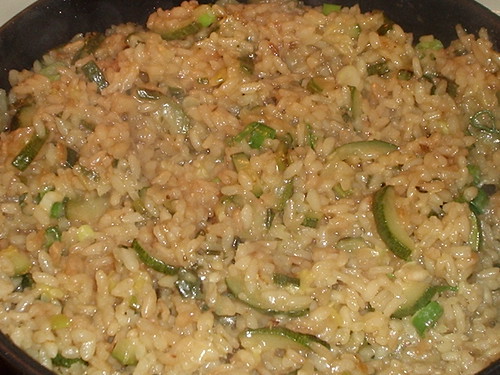
After a lot of recipe research in cookbooks and online, nothing really sounded very inspiring. Bummer. BUT! When I decided to cook a big meal for Hubbs and I yesterday afternoon, I decided that instead of serving potatoes with the roast, I'd like some creamy risotto. As you know, risotto is very versatile and many different ingredients work well in it. I wondered how zucchini and sage with maybe a little hit of mild onion would taste in a basic risotto recipe? Ha! It was fabulous! And now, I've created a risotto recipe that I will use again and again - I lurve when that happens!

So if you aren't familiar.. this month's Monthly Mingle is called "Take Two". Meeta gave us all the challenge of coming up with a dish that included zucchini and sage. Here is my submission, I hope you try it and I hope you check out all the rest of the creative dishes when she posts the roundup this coming weekend. There is still time to get in your creative sage and zucchini dish as well! The deadline is Oct. 12 - so get cookin' kids! :D

Sage, Zucchini & Green Onion Risotto
Lisa's Sage, Zucchini and Green Onion Risotto


2 small to medium zucchini, cut into coins and then quartered
3-4 green onions, sliced thin
1 TBS. fresh, chopped sage
1 TBS. butter
1 1/4 c. Arborio rice
3 - 3 1/2 c. chicken stock
1 generous pinch of sea salt
Ground black pepper, to taste

In a large skillet, melt the butter and then saute the zucchini and onions (reserve about 1 TBS. of the sliced onions) until translucent. Add the rice and saute until it just begins to brown. Season with salt and pepper. Add 1/2 c. of the stock and stir rice until it soaks up most of the stock - then continue on in this fashion, 1/2 c. of stock at a time, until you've used all the stock - this should take between 20 and 30 minutes and the rice should be very creamy. Add the fresh sage with the last 1/2 c. of stock. Once the rice has absorbed the last of the stock, sprinkle the reserved onions on top and serve.

*Note: When I make risotto, I normally add a good handful of Parmigiano or Pecorino. I did not do that this time as I wanted the other flavors to shine through, but I can't imagine it not being just as delicious with the addition of the cheese if you so desire. :D

Labels: , , , ,

Autumn's First Dinner

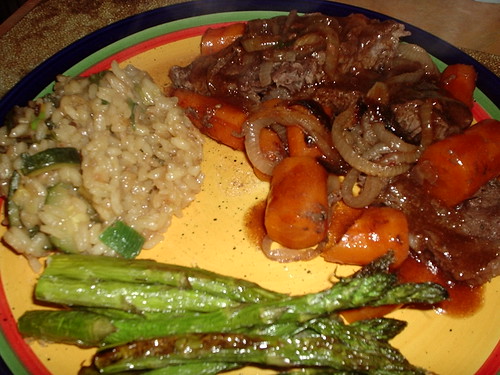
Okay so it's not officially Autumn yet.. but thanks to our drive to the orchard and all of the gorgeous changing leaf colors and the crisp feel of the chilly air - it's Autumn to me! The chill in the air usually makes me want to haul out the crockpot on Sunday mornings, but I thought that since I was going to make an appetizer of Ilva's fried cheese and grapes that I might as well go for it and make a big dinner as well. I had recently bought a beautiful looking chuck roast, some very pretty green and purple asparagus and I also needed to figure out something to make with sage and zucchini for this month's Monthly Mingle No. 4, so I decided on a creamy risotto to take care of that problem (more on that later).

I didn't feel like preparing the chuck roast as I was taught by my mother because I've recently become interesting in braising. A preparation that I'm not too familiar with. I browsed a few of my cookbooks and decided the recipe I liked best was the one found in my Cooking Light Annual Recipes 2006. I've been like 10 for 10 now with this book's recipes and had hopes this would be another success. It was.. and I learned a lot about braising, which was the goal.

The meat turned out to be quite tender. My addition of carrots and onions weren't carmelized as they are when I make a roast the traditional way, but they were quite tasty after soaking up the stock nonetheless. The risotto was fabulous, creamy and rich. I roasted the aparagus with a sprinkling of sea salt and they turned out crunchy on the outside and creamy on the inside.. they were addicting. And finally, I did something I NEVER do.. I made a gravy. I am so not a gravy gal. But I had all this lovely smelling broth combined with the meat's juices and just couldn't waste it.. so I added some fresh thyme and a slurry of soy sauce and cornstarch and it turned out more like a thick au jus than traditional gravy. Seriously? It had such a wonderful taste that I could make a meal dunking good crusty bread in it! hee!

Autumn's First Sunday Dinner
Slow Braised Chuck Roast
Courtesy of Cooking Light's Annual Recipes 2006

This recipe includes my changes

3 lb. chuck roast, english cut
6 c. beef broth (I used 4 c. beef stock, which was plenty)
2 c. water (I used 1 c.)
Salt & pepper to taste
5 large carrots, peeled and cut into chunks
1/2 lg. vidalia onion, sliced thick

Preheat oven to 400º F.

Lay chuck roast in a 9" x 13" x 2" roasting pan or baking dish and season well with salt & pepper. Arrange onions and carrots over meat and pour stock and water over it all. Place a jellyroll (or something similar) under the roasting pan to catch boiling over juices. Braise in pre-heated oven for 2 hours or until roast is fork tender. It took mine about 2.5 hours.

Au jus
3 cups of the roast's stock and juices
1 TBS. of fresh thyme leaves
1/4 c. soy sauce
2 TBS. cornstarch

Take beef and veggies out of roasting pan and cover to keep warm. Line a large measuring cup or bowl with a large ziplock plastic bag and pour 3 c. of the stock & juices in, let sit for a couple minutes until fat rises to top. Lock the bag and hold it over a medium saucepan, then cut a hole in the bottom and pour stock into pan, stopping before the fat nears the hole. Bring stock to a simmer. Make a slurry of the soy sauce and cornstarch. Add the fresh thyme and soysauce/corn starch slurry to the stock and bring to a boil. Reduce heat and simmer, whisking often, until the au jus thickens a bit. Spoon over sliced roast.

*Note: Okay that was Cooking Light's suggestion on how to transfer the stock from the roasting pan to the saucepan for their gravy recipe. If you are anything like me in the kitchen (and Lord, I hope you are not) that technique will have stock AND the fat all over your stovetop. I let mine sit in a large measuring cup until the fat rose and then I skimmed the fat off - then EASILY poured the stock into the saucepan. Voila. No holes, no trying to stop the flow when the fat gets near the hole, no mess. Sheesh. :D

Labels: , ,

Sunday, October 08, 2006

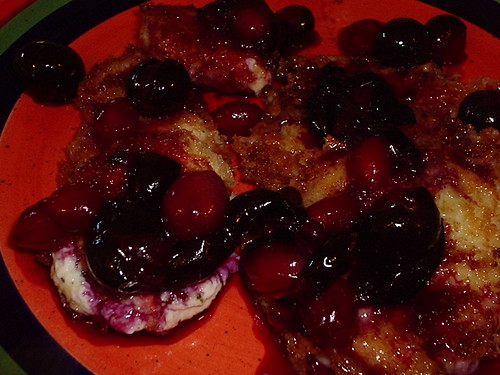
Ilva's Formaggio Fritto Con Uva Fragola

Dear sweet jebus I have just tasted heaven.. Oh My God.

Being an avid fan of Ilva's, I read her blog each and every day equally for her breath taking pictures and her unique recipes. I lurve her. So.. back in September she posted a recipe for Formaggio Fritto Con Uva Fragola or Fried Cheese with Concord Grapes.. not necessarily two foods I'd ever think of combining together. But her pictures and her description were all it took for me to decide right then and there that I would make this recipe. I'm a big fan of the sweet/savory combination, so I knew that even though this dish looked a bit "foreign" to me, that it would be quite delicious.

I had no idea.

I had to stop myself from eating. I was already through almost half of a log of goat's cheese and was working on the slices of fontina when I realized that if I did not stop soon, there would be none for Hubbs. If he wasn't so interested in this "concoction", as he called it, then I wouldn't have given a damn and would have happily continued eating my weight in fried cheese with concord grapes - and lemme just tell you.. that's a whole hell of a lot of cheese and grapes. So, I guess, it's a good thing that he wanted some, eh?

I used both kinds of cheeses because he totally turned his nose up at the goat's cheese. But when I gave him a taste of the goat's cheese with the grapes first.. his eyes literally lit up and he got this hysterical grin on his face. It was quite funny.. quite funny for such a nay sayer! Then I gave him a slice of the fontina with grapes and asked which he liked better - he said the first one (goat's cheese) and I "Uh huh'd!" him and told him he DID like the goat's cheese better - for which he replied, "Oh no.. I meant the SECOND one!" liar.. liar.. liar!! teee!

I loved the goat cheese the best.. it's a bit more saltier and a whole lot creamier than the fontina so it paired much better with the sweet grapes for me. The fontina was good, the melt was more like mozzarella so it was chewy instead of melt in your mouth like the goat's cheese. But the grapes went equally well with it. I used Panko crumbs which gave all the cheese a terrific crunchy coating. This was bliss. I am so happy I tried my third in a long list of "must do's" of Ilva's recipes. So we are 3 for 3 in fabulous tasting unique recipes that came to me via a beautiful and talented woman all the way from Tuscany. Thank you, again, Ilva.. I can't wait to try number 4 (whatever it may be)!

Dear lord, I'm almost ashamed to include my horrible picture of this delectible dish.. actually, I am ashamed, but I feel the need to do it anyway.. PLEASE head over to Ilva's to see a beautiful picture that does justice to the taste of Ilva's Formaggio Fritto Con Uva Fragola! :D

Fried goat's milk cheese with concord grape sauce
Ilva's Formaggio Fritto Con Uva Fragola

Softish cheese like half soft goat's cheese or cow's milk cheese
Egg
Bread crumbs
Uva fragola or concord grapes
Honey
Olive oil

- Rinse the grapes and put them in a small pan together with a little oil (optional) and honey and heat it up slowly, stirring all the time. When they begin to soften, put the pan aside.

- Cut the cheese in finger thick slices, cut off the rind if you feel that it's needed.

- Turn one slice at a time in the whisked egg(s) and then you turn them in the breadcrumbs so that each slice is completely covered.

- Fry the cheese quickly in olive oil until golden and crisp.

- Serve the fried cheese together with the warm concord grapes.

Labels: , ,

Saturday, October 07, 2006

The Apple Orchard

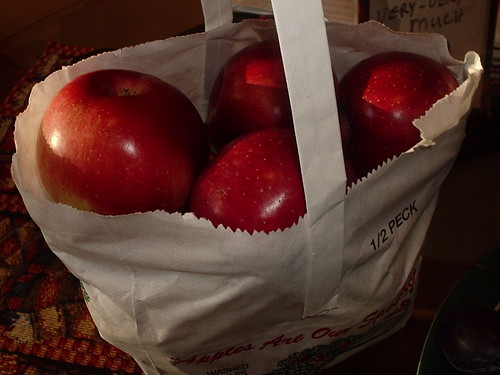
This is just a quickie to show yous how we made out at a local apple orchard today. We got up early so we could have breakfast at this little diner we discovered last year when we were too early and the orchard wasn't open yet. The food was fabulous that visit.. I had a belgium waffle that was about 5 inches of fluffiness, my eggs were cooked perfectly (no slime!) and their homemade breakfast sausage links were better than any I had had before. Hubbs' breakfast was equally as good - although I can't quite remember what he had other than their homemade latkes, which he loved. This year, however, the diner is under new management and that's a crying shame. My eggs were cooking in that fake butter/oil stuff - so they had a very chemically taste to them (and there was slime to boot! ugh!) they don't have the previous owner's sausage and the waffle was uhmm.. 3 burnt pancakes. It seems our lil waitress "forgot" to tell me that the waffle iron was on the fritz so she just subbed pancakes, because "what's the difference?" Yeah. Hubbs ordered an scramble that included eggs (plus their shells.. bonus!) dried out corned beef and something that was suppose to be melted cheese but well.. it looked kinda like.. uhhh.. a body fluid. Needless to say, we both sent back our food, paid for our drinks and left. We ended up across the street at the local Dunkin' Donuts for coffee and a danish. Woo.

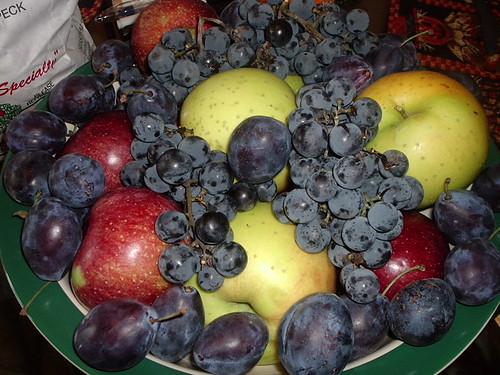
But, thankfully, the horrible start of the day did not continue on with us. The orchard was busy but not so packed that we felt we had to rush. We tasted a bunch of different varieties and both chose a small bag of an eating apple - he got Macouns and I got Honeygolds. I also bought a 1/2 peck of Jonagolds to bake with. Two other fabulous finds were more Italian plums and some beautiful looking (and tasting!) Concord grapes.. I have plans for those grapes.. thanks to Ilva. ;)

From the apple orchard

1/2 Peck

After the orchard we stopped in at a new grocery store in a little town we travelled through and picked up a few items and some delicious artisan bread.. oh yeah baby.

The rest of the day was/is quiet and relaxing.. he's out fishing and I'm, well.. I'm on here boring the crap outta yas about my apple excursion. hee! Oh well.. at least we'll have a post or two comin' up using some of those apples and those grapes!

Hope everyone is having a great weekend =)

xoxo

Labels: ,

Thursday, October 05, 2006

My Mom's Goulash

Dreary, dark, rainy and chilly - that's what's happenin' in the Armpit of the Midwest. Probably any other time of the year, this weather would be slightly depressing to me, but not now. Although I do prefer the sunny, crisp days of Autumn, the rain and chill doesn't bother me - it only makes me want to curl up under the blankets with a good book or movie after, of course, I've made something that's comforting and warm to go with. Lots of options for delicious dishes when that chilly air hits.. but nothing as comforting as my Mom's Goulash. This was a staple in our family as I was growing up. She made this probably once a month even during the summer and we were all fans, regardless that we'd probably ate it 1,000 times over. =)

The pasta is interchangeable in this recipe.. I've used rotini, shells, cavatappi and elbows. Anything that allows the sauce to stick is fine. Most everyone will have these ingredients on hand in their pantries and refrigerators, so it's a dish that can be made with little to no beforehand thought. It's also a one pot meal, which makes clean up a breeze. And.. it makes a lot - so if you are into left overs for lunch the next day, this is the perfect meal!

As always, when cooking one of my Mom's recipes.. there is no real measuring. "Eyeball" it, as Rachael says - you really can't go too wrong if you taste it as you are cooking it.

I hope if you try this recipe, that it will become a family favorite for you and yours as it is to our family. =)

Mom's Goulash
Mom's Goulash

The following recipe is written exactly as my Mom recited to me.. below is how I made it last night.

3 lbs. ground round
2-3 sm. onions, chopped
1 green bell pepper, chopped
2 lg. cans of tomato sauce
2 lg. cans of water
garlic powder
onion powder
dash of oregano
2 bay leaves
salt and pepper
2-3 cans of sliced mushrooms
1 lb. springs (rotini pasta)

Saute onions & pepper in a very small amount of vegetable oil until they start to soften, add ground beef and brown. Add tomato sauce, water and seasonings. Cook until it cooks down just a bit. Add mushrooms and springs - either already cooked to al dente or they can be thrown in dry, cooking time will just take a little longer and you might have to add a little more water. Let simmer for at least 30 minutes (or until pasta is cooked if you use dry).

*Note: Just so you can see how versatile this is.. I didn't have the large cans of tomato sauce, so I used 1 large can of crushed tomatoes and 2 regular sized cans of the tomato sauce (filled each can with water). Also.. we're talking just plain tomato sauce in a can.. not marinara (Ragu, or the others). I only had 1 med. vidalia and 3/4 of a yellow pepper as well as only 1.5 lbs. of ground round.. worked fine. I'd say for the amount of tomatoes I used, the measurements for the seasonings were.. 2 heaping tsps. of the garlic and onion powders. 1 heaping tsp. of the oregano and salt. 6 turns of the pepper mill. I used 1 sm. carton of fresh sliced mushrooms. And I probably added about 3 cups of elbow macaroni, which I threw in dry - and the simmering time was still just about a 1/2 hour as the elbows were small. Also, I like a lil sprinkling of grated Pecorino Romano on top. It's not rocket science.. use what you have and don't sweat it. :D

Also! This is her chili recipe as well.. sub kidney beans for the pasta and spice it up with hot pepper flakes and a diced jalapeno or two. =) No wait, there's more! hehehe This is also her Mexican Rice recipe! I know!! Sub rice for the pasta and you're good to go! tee! :)

Labels: , , , ,

Wednesday, October 04, 2006

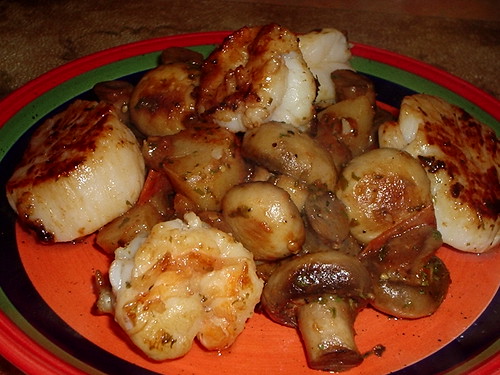
Pan Seared Shrimp & Scallops with Mushroom "Hash"

Remember the old Reese commercials where the slogan was "Two great tastes, that taste great together!"? 'kay well this was not the case last night. I had two skewers of giant scallops and jumbo shrimp that I had purchased from our seafood store, but didn't feel like grilling them. So I just started dumping ingredients in a pan that I thought would be good with the shellfish. Ohhh and was it good. Garlic, butter, fresh parsley, lemon juice and a splash of white wine.. the scallops were tender and sweet, the shrimp was creamy and flavorful. I might just have to prepare my shellfish like this from now on - yum!

I needed something a little on the substantial side to go with the shellfish as there were only 2 scallops and 2 shrimps per serving.. so I decided to go with baby new potatoes and fresh button mushrooms. I started preparing them the same way as with the shellfish - garlic and butter. At about the time I was allowing the veggies to carmelize a bit, Hubbs walked in with 2 late garden tomatoes - so I decided to seed one, cut it in chunks and add it to the veggies. I let the whole thing cook down a bit and what I got was a fabulous side dish that really could have been ate as the main course. The only problem was that by adding the tomato, the veggies ended up on the rich side and were a little too heavy to go good with the light shellfish. I will prepare this veggie dish again and again - but will pair it with beef or pork next time, for sure.

So there you have it - 2 new dishes for me, wonderful on their own, but not quite right with each other. =)

Pan Seared Scallops & Shrimp
Pan Seared Shrimp & Scallops with Mushroom Hash

3 TBS. butter
3 cloves garlic, minced and then mashed into paste
2 TBS. fresh, chopped parsley
juice from 1/2 lemon
splash of a good white wine (I used a Pinot Grigio)
1/2 lb. sea scallops
1/2 lb. large shrimp, shelled & deveined
pinch of sea salt

Saute garlic in butter until fragrant, about 3 minutes. Add the lemon juice and wine and cook until sauce reduces a bit, about 4-5 minutes. Add scallops, season with pinch of sea salt. Sear for about 2-3 minutes, flip the scallops and season, then add the shrimp and fresh parsley. The shrimp won't take as long so once you see them starting to turn their pretty creamy pink color, flip them. By the time the shrimp are cooked through, the scallops will be done as well.

Mushroom Hash
I'm not even sure Hash would be the right term for this side dish?
1 small carton of small to medium button or crimini mushrooms, leave whole
5-6 small new potatoes, peeled and chunked
1 lg. tomato, seeded and chunked
3 TBS. butter
3 cloves garlic, minced
Cracked black pepper
Sea salt
1 TBS. fresh parsley, chopped

Saute garlic in butter for about 3-4 minutes, add potatoes and allow to cook until lightly browned on the bottom, about 4 minutes, flip. Add the mushrooms, cap side down, cook for another 4 minutes or until the caps have gotten goldeny brown and add the tomato. Simmer for 6 minutes or until the juice from the mushrooms and tomato has reduced by half. Season with salt & pepper, stir in parsley.

Labels: , , ,

Tuesday, October 03, 2006

Brownies! The Apple Variety!

I bought 8 Granny Smith's last Friday with the intention of making my Apple Crisp *swoon* for my little get together this past weekend. Unfortunately procrastination took over and I ran out of time so I didn't get to make it for my friends. Or maybe it was my subconscious subliminally forcing me not to make it so I wouldn't have to share it?? I am that selfish when it comes to The Crisp.. I admit that. But yeah.. no, it was because I was lazy and didn't want to get my fat arse up from the loveseat an hour earlier than I had too.. it was cold.. I had a blankie and 3 pooches on my lap!! hee!

Yesterday morning I realized that dear Hubbs had already ate 3 of my apples. (!!) So I figured if I didn't get on The Crisp he'd eat the star ingredient and I'd be S.O.L. So directly after work last night while he was standing knee deep in some river trying to catch a smelly trout, I started peeling and slicing my apples.. I was giddy with anticipation of how my house was going to smell in just a few minutes. My oven was pre-heating and I was humming (okay badly singing) to the 80's hairband music that was playing in the living room all the while peeling and slicing and practically doing a jig in the middle of my kitchen while the kids looked on in mild alarm. I went to gather the rest of the ingredients, Rachael Ray style, piling them precariously in my arms.. when to my utter shock, as I lifted a rather light cannister of quick oats, I realized I didn't have close to enough for The Crisp! Now how the hell was I to make my number one most favorite dessert of all time without quick oats?? *sob* My apples were peeled! My oven pre-heated! What the f*ck does a girl do?

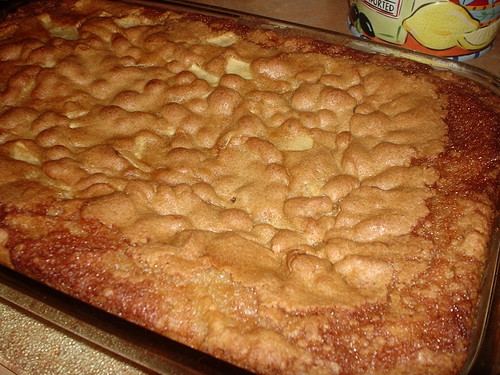
Well firstly, she throws a temper tantrum. I'm so mature that way. The F bombs were flyin', the dogs were cowering and I was literally stomping my feet. I dropped the rest of the ingredients on a counter and ran back to the office in search of a new recipe that called for 4 cups of sliced Granny Smiths! I didn't feel like the apple cake I've made before - although quite yummy - I figured since I couldn't have The Crisp, I should try something new. Simultaneously searching through both All Recipes and Recipezaar, I came across a couple interesting recipes and ultimately chose something called Apple Brownies only because I couldn't be bothered with making a pastry dough as it was already closing in on 7 pm. I'm quite happy with the end result - the "brownies" were easy to put together, they baked to a lovely golden brown and although they looked exactly like the apple cake in the baking dish, I had hopes that they would be chewy like a brownie and not cake like.

After a quick dinner of ham steaks, baked potatoes, kraut and green beans I sliced into the brownies, which were still warm. I topped each slice with a lil french vanilla cool whip and served it to Hubbs. This was after 9 and I was whipped, so for the first time ever since starting my lil blog, I did not take the time to take a picture of the plated slice. I know! I'm going to hell!! I'm going to have to describe what an apple brownie looks like.. okay.. refer to this picture and remove the cinnamon sauce and replace with cool whip.. there ya go! Although the brownies did resemble the apple cake they didn't taste like it at all. They are dense where the middle of the slice is on the gooey side and the sides carmelized to bring a most excellent chewy texture as well as the top being crispy. I doubled the recipe to fill a 9" x 13" x 2" baking dish (original recipe called for a 9" x 9" x 2"). The brownies are on the sweet side, so I'm not sure if that was because I doubled the ingredients or if they are suppose to be so sweet. The ONLY change I'll make next time is to cut back on the white sugar by at least 1/2. All in all, these Apple Brownies rock! I'm looking forward to trying a completely cooled slice later tonight to see if the sweetness has mellowed out. I'll letchas know! :D

Apple Brownies
Apple Brownies
Courtesy of Recipezaar

The following recipe is doubled with the apple amount tripled

1 1/3 c. butter (ya'll!)
2 c. brown sugar
2 c. white sugar (I'd cut it to 1 cup or less)
4 eggs
2 tsp. vanilla
3 c. flour
4 tsp. baking powder (does that equal to a TBS.?)
1 tsp. cinnamon (I added this - wasn't in original recipe)
1/2 tsp. fresh nutmeg (I added this as well)
1/2 tsp. salt
3 c. chopped apples
1 c. chopped walnuts or pecans (I omitted this and subbed raisins)

Preheat oven to 350º F.

In two separate bowls, combine all dry ingredients and combine all wet ingredients. Add the dry slowly to the wet until just combined. Add the raisins (or nuts) and the apples, mix.

Transfer to a greased 9" x 13" x 2" glass baking dish and bake in pre-heated oven for 45 minutes. If your brownies are goldeny brown at this point, loosely cover the dish with foil and continue baking for another 15 minutes. Test with toothpick for doneness.

Yum! :D

I'm 2 days late.. but I realized these brownies would be perfect for Sara's WCC No. 9 - the theme this month is to use an ingredient from your country's culture. Although apples are found world-wide, I believe picking apples from local orchards in the fall is quite traditional for us Yanks, so I'm going to try to slip this in if Sara doesn't mind. ;) Check out the rest of the fabulous dishes at The Weekend Cookbook Challenge!

Labels: , ,

Monday, October 02, 2006

Seafood Chowder and Honey Cornbread

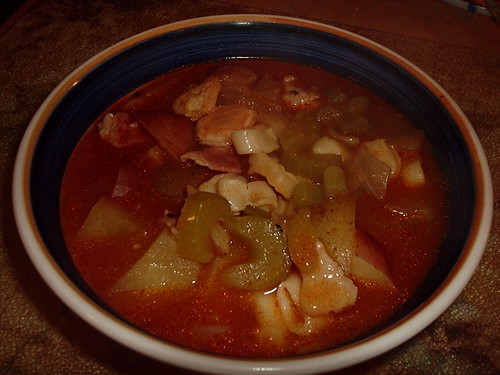
I wasn't even going to post the Seafood Chowder recipe as I did not like it at all. But, I do not like seafood in soups/chowders unless it's my father's clam chowder - AND I'm not a fan of bacon in my soups either.. I figure this recipe must be decent though, as Hubbs ate not one.. not two.. but three fakkin bowls of the stuff! Therefore, I'm sharin' =)

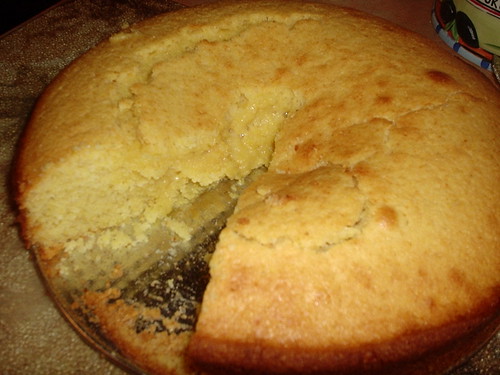
The Honey Cornbread, on the other hand, was delicious. Not too sweet and not too crumbly. Unfortunately, I didn't cook it long enough (as you'll see in the picture) and the very middle was smooshy - but the rest of it was pretty tasty!

Seafood Chowder
Seafood Chowder
Courtesy of Recipezaar

3 slices of bacon, chopped
1 TBS. olive oil
1 c. celery, sliced
1 c. onions, chopped
2 c. chicken stock
1 bottle of clam juice
2 c. potatoes, peeled & chopped (I used baby reds, so I didn't bother peeling)
1 c. carrots, sliced
1 can (15 oz.) tomato juice
1/4 tsp. pepper
1 tsp. sea salt
1 TBS. corn starch (See Note)
1 TBS. water
1 lb. of seafood (I used a bag of assrt. seafood that I purchased at Trader Joe's - shrimp, bay scallops and calamari rings)

Saute bacon in medium to large stock pot until crisp, add 1 TBS. olive oil, onions and celery sauteing until soft.

Add stock, clam juice, tomato juice, potatoes and carrots. Season with salt & pepper. Bring to a boil, lower heat and simmer for 35 minutes.

Add seafood and a slurry made of the cornstarch and water. (1 TBS. cornstarch and 1 TBS. of water didn't come close to thickening this chowder - so I added 2 TBS. of both and it still didn't thicken.. I gave up, basically because it wasn't a big deal to us that the chowder was more like a soup. So if you want this thick, I suggest starting with 2 TBS. of cornstarch and water and then adding more to get the thickness you desire). Cook for an additional 10 minutes.

Honey Cornbread
Honey Cornbread
Courtesy of Recipezaar

1 c. all purpose flour
1 c. yellow cornmeal
1/4 c. sugar
1 TBS. baking powder
1/2 tsp. salt
2 eggs
1 c. heavy cream
3 TBS. honey
1/4 c. vegetable oil

Preheat oven to 400º F.

Combine dry ingredients in a small bowl.

Combine wet ingredients in a medium bowl and then slowly add dry ingredients. Mix until just combined. Transfer to either a 9" springform pan or a 8" x 8" baking dish that's well greased. Bake for 20 minutes in preheated oven, or until toothpick comes out clean. (guess who was rushing and forgot to check with a toothpick? *sigh*)

Slather slices in butter (ya'll) and enjoy! ;)

Labels: , , , ,

Sunday, October 01, 2006

Blog of the Week October 1, 2006

Ever come across those blogs that are so well written that you find yourself hours later still sitting in front of them mesmerized by the pictures painted in words? I'm talking so well written that it doesn't bother you a bit that the blog isn't loaded with pictures of recipes created or actually even loaded with recipes?

I've found such a blog.

Callipygia of FOODchair owns that blog. I love her writing - the way she takes me to the time and place of her stories. How she makes me feel as if I'm sitting in her kitchen while she is making a meal and telling me the tale of why she loves the food she is preparing at that moment. Her words are like a symphony to me.. I feel highs, lows and plateaus while reading what she's written. I lose myself and time because I'm hanging on every vision that forms before my eyes. Seriously, I'm quite taken with this blog and I'm thankful that I came across it. My only problem with FOODchair is that it isn't updated as frequently as I'd like it to be. But I guess if Callipygia were to do that she'd have no time for anything else because I wouldn't be happy until I saw a new post every hour on the hour. ;)

Don't get me wrong when I say that I don't mind the blog isn't loaded with recipes, because it is.. each entry is regarding a treasured recipe or food and some do have step by step instructions, but the entries I love most are the ones where she offers ways to prepare that food. She does it in a way that allows you to be creative on your own.. there usually isn't an ingredient list and step by step instructions. Instead what she does is gives you a guideline to follow so that you can use your own imagination and tweak her foundation to fit your lifestyle and tastes. The reason for this? Because I don't think she has a recipe to follow when she creates her meals. She thinks in flavors and textures and then mixes and sautes and kneads and well.. you get the idea. She is inspiring - to say the very least.

There is so much more that I want to say about this blog, but sitting here I can't seem to find the words to accurately do so. I've deleted whole sentences over and over again because what I write doesn't come close to articulating how I feel. I'm not good at that.. but Callipygia is. Instead what I'm going to do is give you a couple links that I love so you can see for yourself what I'm trying to badly describe here. Please keep in mind.. these two links are not the cream of the crop.. or the tip of the iceberg, to throw out a couple cliches. There is so much more to this blog - but I'll allow you to discover for yourself. My finest suggestion would be.. don't click on the links to the entries I'm going to share or on the main link of her blog until you've got yourself a little time and maybe a hot cup of tea or coffee to sip on while you read. This blog is not one to check out in a hurry because once you start reading, anything else planned for the next hour or so will fall to the wayside..

Cheers to Callipygia.. thank you for sharing with us.

Labels:

"Just Jack 2006"! or Cheesefest 2006!

Last night has got to be my most favorite lil soirée I've ever thrown. A friend in need just had to get away from it all before she went insane - she's the semi-new mother to twin 19 month old girls, she works full time for a lawyer who makes Scrooge look like a saint, her hubby is a decent man but he's the type who believes the child rearing, house cleaning, cooking and just about everything else should be taken care of by his wife AND she just got a new puppy.. so yeah she definitely needed a night away. I was happy to be able to provide such a night for her! Originally we just thought she'd come over and we'd play some games and have some nibblers.. but I thought our much needed night together should be a little more special than that. So I called a couple of our dearest friends, Greg, and his partner Bob (who truly is my soul sister) to see if they'd join us. They were happy for the invite and were just as excited as I was to get the old gang back together. We also invited her brother Tim - who came up from Columbus to join in on the festivities.

We dubbed the evening, "Just Jack 2006!", I jumped on Amazon.com and ordered a couple new games to play and got to thinking about what lil nibblers I would make. I knew I'd have to make those lil cheesy sausage snackers or they'd all end up shootin' me.. and I've fallen in love with homemade jalapeno poppers (yes you heard that right - jalapeno!) but what else? After searching through my books and my usual go-to site on the web, I decided on a Roasted Garlic and Olive Pate that I found on Recipezaar and an amazing Buffalo Wing dip (recipe from Bob) that tastes better than the real thing!

Every lil nibbler turned out beautifully.. but after it was all laid out for us to snack on throughout the night, we realized every single dish had cheese in it. Lots and lots of cheese. Sausage cups have chive & onion cream cheese, the poppers have cream cheese, the pate has brie and fontina, Greg and Bob brought two nibblers - a delicious cheese log made of feta and cheddar and a brick of cream cheese that Bob topped with homemade pepper jelly and finally, the Buffalo wing dip? Yep.. 2 pkgs. of cream cheese. Dear God. Oh wait! I almost forgot.. I made a couple of my pizzas.. yanno, loaded with cheese? har! Needless to say, "Just Jack 2006" quickly turned into Cheesefest 2006.

It was a fantastic night.. after sampling everything we decided to play a few drinking games (God) and then we retired to the living room and played the new games I had purchased.. and lemme just tell you - the Friends edition of Scene-it was fantastic (lots of Chandler Bing questions - yay!) but the highlight was The Price is Right hahahahhaaa! It was like actually standing in contestant's row, people!! The only thing missing was Bob Barker reminding us to spay and neuter our pets! Too funny!

Below are the recipes for the Pate and the Buffalo Wing dip along with pictures of the nibblers Greg and Bob brought to share. So if you're feelin' a lil mousey.. try these! Don't be put off by the looks of the pate.. it was fabulous. I added sun-dried tomatoes to the recipe (imagine that!) which really put it over the top. This is very similar to the olive tappenaude I frequently make, but the addition of the creamy brie and fontina cheeses takes it to a whole new level. And that wing dip? Seriously.. it's like eating excellent buffalo wings from your favorite dive - minus the annoying bones. ;) Perfect on crackers, Tostitos Scoops and/or toasted slices of baguette (my personal favorite). Try! Try!

Cream Cheese with Homemade Pepper Jelly Cheesy something or other
Cream cheese with homemade pepper jelly - Fantastic! and Feta/Cheddar log - Yum!

Roasted Garlic, Olive & Tomato Pate
Roasted Garlic, Olive and Tomato Pate

8 cloves garlic (skin on)
1/4 lb. Brie cheese, cut into small chunks
1/4 lb. Fontina cheese, cut into small chunks
1 c. Kalamata olives (pitted)
1/4 c. Extra-virgin olive oil
7 sun-dried tomatoes in oil

Preheat oven to 350º

Wrap the unskinned garlic cloves tightly in foil and place in oven to roast for 30-45 minutes. Let cool. Once cooled enough to handle, squeeze roasted garlic out of their skins and place in food processor.

In a double boiler, melt the Brie and Fontina.

Add the olives, sun-dried tomatoes and the olive oil to the garlic in the processor and process for 10-15 seconds. You want a very fine chop. Once the cheese has melted, add that to the ingredients in the processor and process for 5 seconds or until it's all mixed well.

Line a small bowl with plastic wrap and transfer the pate to the bowl, covering the top well. Let set up in the refrigerator for at least 4 hours. When you are ready to serve, position a serving plate over the bowl and invert, then take the plastic wrap off and serve with toasted, sliced baguette or crackers.

Buffalo Wing Dip
Buffalo Chicken Dip

3 chicken breasts, boiled and then shredded or chopped
1 (14-16 oz.) bottle of ranch dressing (I used Hidden Valley)
1 c. finely chopped celery
2 (8 oz.) pkgs. cream cheese, softened
1/3 c. of your favorite hot sauce (this measurement will be mild.. add more if you prefer a hotter dip)

Preheat oven to 350º F.

In a mixer, combine the cream cheese and ranch dressing until it's smooth. Add the chicken and celery and mix, then add the hot sauce and mix.

Transfer dip to a baking dish (I've made it in a 9" x 13" x 2" or a 8" x 11" x 2") and bake, uncovered, for 30 minutes or until lightly golden and bubbly.

Serve with crackers or tortilla chips

*Note: Forgive my pictures (as usual! hee!) the dip is a bit blurry because I was told to hurry the hell up so they could dig in. :D

Labels: