Malto Mario


Feast


The Lady & Sons


1,000 Italian Recipes

Wednesday, November 29, 2006

I Went South of the Border for My Lasagna

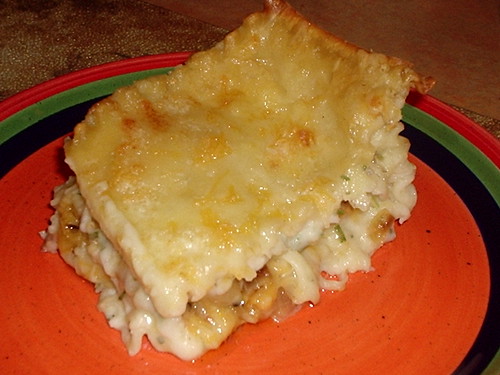
I made this a couple nights ago, because another slice of turkey was going to make me implode. I found the recipe in one of the Cooking Light magazines, but their recipe was basically vegetarian and although it did sound tasty, we wanted beef. I kept searching for something but the idea of a mexican lasagna sounded really, really good. So I used their "technique" and subbed ingredients I had on hand.

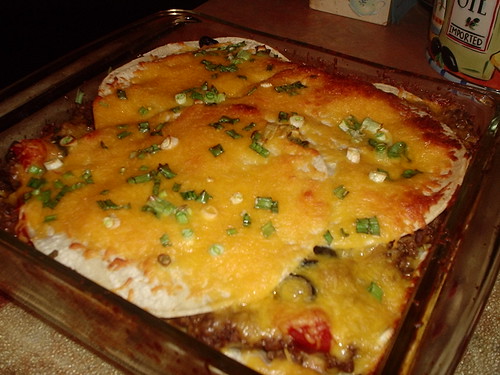
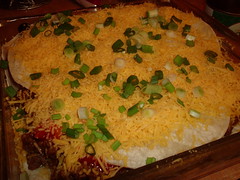
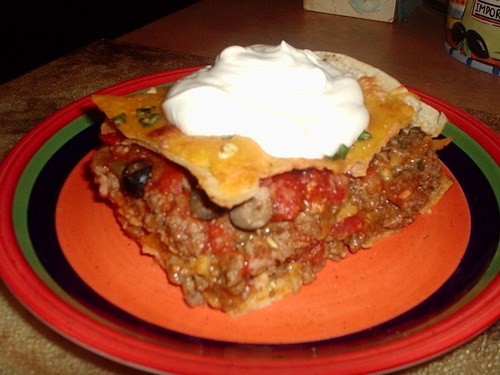
Simply put, you substitute corn tortillas for lasagna noodles. Layering the tortillas between ground beef (ground chicken or turkey would work really well too) simmered in taco seasonings, cheese, salsa, black olives and sliced green onions. Bake until the cheese is golden and bubbly and you've got a quick dish that turned out pretty good. It was like a deconstructed taco! The corn tortillas were a lil tough though and the next time I make this I will use flour tortillas, for sure. Oh yeah, I guess I should mention.. my version is no longer of the "light" variety. Imagine that! Although it could easily be taken there again by using ground chicken or turkey breast and reduced fat cheese and sour cream. Which I think would still be delicious. :D

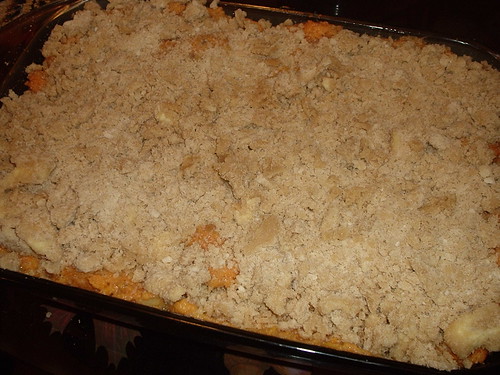
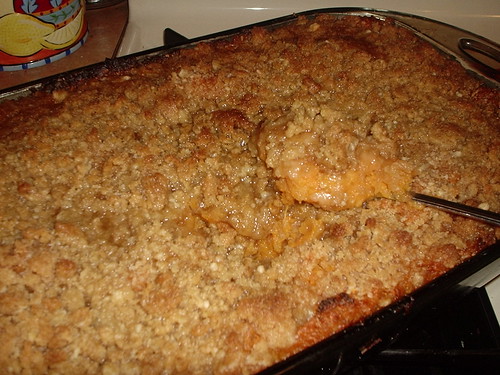
Mexican Lasagna 3
Mexican Lasagna Lisa's Way
Adapted from Cooking Light Magazine - find original recipe here.

1 lb. ground sirloin
1 tsp. vegetable or canola oil
1 TBS. chili powder
1 1/2 tsp. cumin
2 TBS. Worcestershire sauce
1 pkg. 6" corn tortillas (usually 10 in a package)
2 c. Mexican blend shredded cheese or Monterey Jack cheese
1 jar salsa (I used a chunky garden-style salsa)
1 small can of sliced black olives
5 green onions, sliced thin
Cooking spray
Sour cream (optional)

Preheat oven to 400º F.

In a large skillet brown the sirloin with 1 tsp. oil, add the chili powder, cumin and Worcestershire sauce.

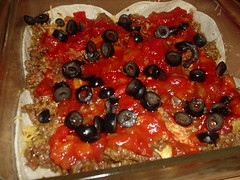
Spray an 8" x 8" Pyrex baking dish with the cooking spray and layer 4 of the tortillas on the bottom. Sprinkle a handful of cheese on the tortillas and then a layer of beef over the cheese. Next comes the salsa, a few tablespoons will do ya.

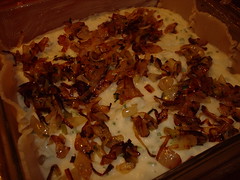
Mexican Lasagna 1

Then sprinkle olives and green onions, followed by another small handful of cheese. Repeat layer starting with 2 tortillas laid diagonally over cheese. Top this layer with the last 2 tortillas, the remaining cheese and the remaining green onions.

Mexican Lasagna 2

Bake for 30 minutes in preheated oven or until the cheese is bubbly. Let set for about 5 minutes so it's easier to cut and serve. Top each serving with a dollop of sour cream and more sliced onions, if you so desire.

Mexican Lasagna 4

Labels: , , , ,

Monday, November 27, 2006

Part III - The Finale

Okay so it's a new week and Thanksgiving is past us.. I debated on whether to blog about this most excellent of all the Gooey Butter Cakes, because yanno what? I am sick of Thanksgiving. Yes, I've said it. I've given my thanks, I've cooked my heart out and now I want to for-get it. BUT this version of Paula Deen's Gooey Butter Cakes is the best one of all - so good that just because it's pumpkin doesn't mean you can't (and shouldn't!) make it any time during the year. Cut into smaller bars, this would be perfect for your Christmas dinner as well - or even as part of your Christmas baking gifts.

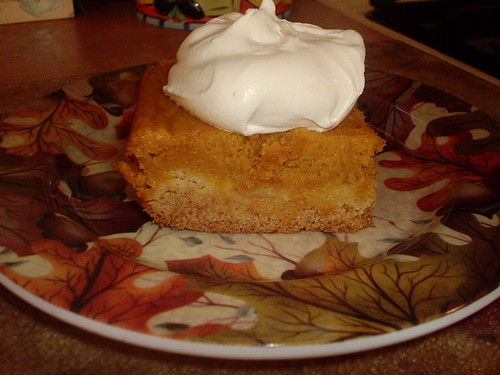
Paula said in her book to not be surprised if you never go back to a traditional pumpkin pie again after trying this cake. She's right. Again, I bring up my mother - who's stuffing was a staple at our Thanksgiving table for over 20 years.. until I made the Easy Stuffing. Now her stuffing is a thing of the past. Same with her pumpkin pies. She made beautiful pumpkin pies every year and there was rarely any left over after the first assault on leftovers. Until.. until I watched the lurve of my life, the reason my cholesterol is high, Paula Deen, make this cake on one of her shows. It was the first Gooey Butter cake that I'd ever made. And it is now the replacement of my Mom's pumpkin pies.

Pumpkin Gooey Cake
Pumpkin Gooey Butter Cake
Courtesy of Paula Deen

1 (18 1/4-ounce) package yellow or butter cake mix
1 egg
8 tablespoons butter, melted (1 stick or 1/2 c.)
Filling:
1 (8-ounce) package cream cheese, softened
1 (15-ounce) can pumpkin
3 eggs
1 teaspoon vanilla
8 tablespoons butter, melted (1 stick or 1/2 c.)
1 (16-ounce) box powdered sugar
1 teaspoon cinnamon
1/2 teaspoon nutmeg

Preheat oven to 350º F.

Combine the cake mix, egg, and butter and mix well with an electric mixer. Pat the mixture into the bottom of a lightly greased 13 by 9-inch baking pan.

To make the filling:
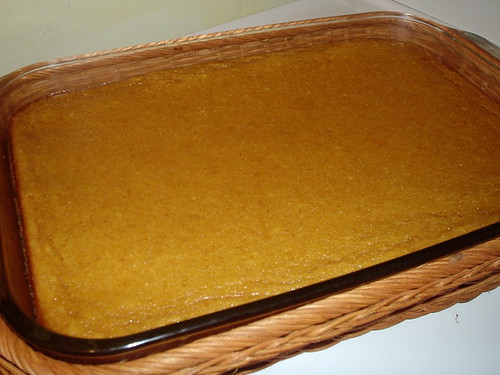
In a large bowl, beat the cream cheese and pumpkin until smooth. Add the eggs, vanilla, and butter, and beat together. Next, add the powdered sugar, cinnamon, nutmeg, and mix well. Spread pumpkin mixture over cake batter and bake for 40 to 50 minutes. Make sure not to overbake as the center should be a little gooey.

Serve with fresh whipped cream.

Gooey Pumpkin Cake slice

Labels: , ,

Saturday, November 25, 2006

Part II of the Fixin's

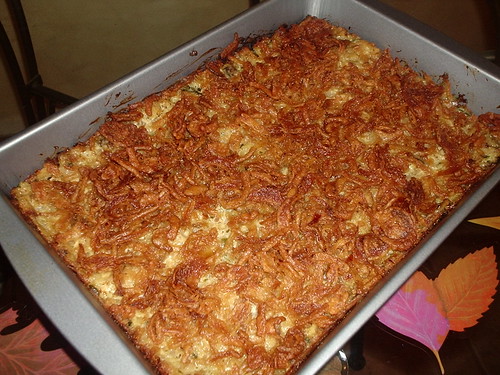
We don't make anything spectacular or fancy for our side dishes. I pretty much make everything my mother has made since I was a child - and I'm pretty sure she made everything her mom made for her. And pretty much means, I make everything the same except for that elusive sweet potato recipe I keep looking for and the stuffing. The recipe I'm going to share below is something you'd find Sandy Lee getting her panties in a bunch over, I'm almost embarrassed to say. Although this is NOT a Semi-Homemade recipe, but a recipe I was given from a friend many years before the fine people at Food TV even entertained the thought of giving Sandra Lee her own show.

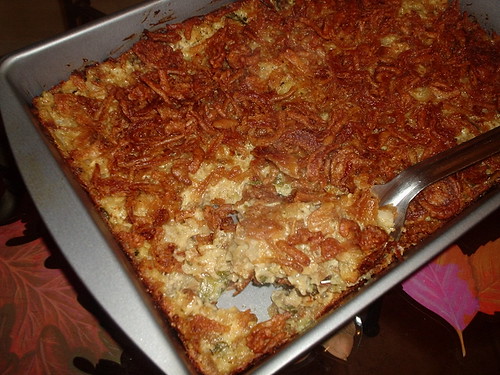
Made with a box stuffing mix (gasp!), zucchini, onions, cream of chicken soup and other decidedly artery clogging ingredients, this is the easiest and most delicious stuffing I've ever had in my life. So delicious, in fact, that my MOM requests it every year and won't even think about making her own stuffing FROM SCRATCH that she prepared all those years prior.

TRUST ME when I urge you to try this easy stuffing the next time you serve chicken or chops. You will be amazed at the flavor of this recipe.

The Best Easy Stuffing EVER 1
Easy Stuffing

1 box of chicken flavored dry stuffing mix (I use Stouffer's Stove Top)
2 medium zucchini, sliced and then quartered
1 med. vidalia onion, chopped
1 small carton of button or crimini mushrooms, either sliced or quartered
1 stick of butter + 2 TBS., room temperature
1 can of cream of chicken soup
8 oz. sour cream
1 sm. can of French's French Fried Onions

Preheat oven to 350º F.

Lightly grease an 8" x 8" Pyrex baking dish (I had to use a 9" x 13" metal baking pan on Thanksgiving because someone had already filled my glass 8" x 8" with the buffalo chicken dip by mistake *oops* - but if it's all you've got, cut the baking time down to 20-25 minutes) and set aside.

In a large skillet, over medium-high heat, melt the 2 TBS. of butter and then add the quartered zucchini and onions. Saute for about 5-7 minutes until the onions are beginning to brown. Add the mushrooms and saute another 5-10 minutes.

In a large bowl, combine the cream of chicken soup and sour cream, then add the dry stuffing mix and the butter, mix well. Once vegetables are lightly browned, dump them in with the stuffing mixture and stir well.

Transfer to the prepared baking dish and sprinkle the french fried onions over top. Cover with foil and bake 25 minutes, remove foil and bake an additional 5 minutes or until the french fried onions are goldeny brown.

The Best Easy Stuffing EVER 2

The rest of our sides are pretty much the same as everyone else has - the staples, if you will. Smashed potatoes, corn, brussels sprouts, green beans, corn bread, rolls, waldorf salad, cole slaw and cranberry sauce (not the canned jelly kind - ewww). Dessert is an apple pie and Paula Deen's Gooey Butter Pumpkin cake. Which I will share in the next post. And then? I'd like to forget about Thanksgiving and start thinking about Christmas presents.. ugh. hahaa!

Labels: ,

Friday, November 24, 2006

The Day After... Part I

Well it's over. Hours upon hours of cooking. And then in a matter of 45 minutes or so those hours are a memory, your tummy is stuffed and all you can think about is that big over stuffed sofa with your heiney planted firmly upon it. Thanksgiving. Whadda ride.

It started, for me, at 8:30 yesterday morning until 5:30 yesterday evening. I took about an hour break when I noticed there was a dog show on the tube. Can't pass those up, no I can not. My sister arrived during that time so we made a lil lunch and watched the cute puppies. My mom was due in a few hours and our other guests were due around 6ish. Everything was going well and I was pretty happy with myself and my progression through the day. At noon I had both desserts done, 3 side dishes prepped and ready to go into the oven later that night and 2 side dishes melding their flavors in my fridge. Not a bad start at all.

So what the hell happened at 4 pm when I started freaking out because I wasn't even halfway through my list? It's like I left this dimension for a couple hours to be returned with hardly any time left to finish up! Appetizers had to be made! The stuffing wasn't prepared yet! The wine! Where the hell is the wine? Every single one of my lil candles needed a new tealight put in and My. God. is that dust on the TV? Just when I'm pattin' myself on the back, all the little stuff starts closing in on me and I panic. Much to the chagrin of Hubbs and my family, but they all know.. BACK OFF and let her go!

I did finish everything with a 1/2 hour to spare to get myself presentable before our friends were due to arrive. Not too shabby, if I do say so myself. Quite a feat for the world's most unorganized cook. At 6 pm I was presentable and no longer smelling of flour, cinnamon and bananas (yes, bananas). I was ready to relax with my family and friends and to give thanks for another year of good fortune. No one died. I still own my house and vehicles. And my job? Regardless of how mind numbingly boring it is, I still have it. My 3 most favorite people were with me on this beautiful, sunny day and both of my kids were in good health and looking quite spiffy after their baths. Life is good. =)

And then the phone rang at 6:01. They weren't coming. Someone is sick. I'm being told this story of dizziness and disorientation all the while scanning my counter tops, laden with various sized bowls and platters and baking dishes full to the brim with all that food. My party of 7 just got downsized to a party of 4. Well I guess it's better to have more than enough than too little, yes? And before anyone allows the thought to cross their mind that I'm a cold-hearted Thanksgiving chef who can only think of all the food she's made and not be concerned about her sick friend. Dizziness and disorientation also means, drunk with his buddies and most likely praying to the porcelain goddess while his wife called with her regards. Wayne saw his vehicle up at the local bar around 10:30 yesterday morning when I sent him out to procure more sweet potatoes and bananas because I feared the first batch just wasn't enough for 7 people. ha! And? This has happened before. Eh? Whatcha gonna do?

What you do is carry on and enjoy the evening regardless! And that we did! Everything tasted wonderful, we got to play some games and watch a ridiculously stupid movie (You, Me and Dupree) and my sis and I got to have our giggling gossip time after everyone else went to bed. I thoroughly enjoyed myself :D

So over the course of the next couple days I'm going to share with you some of the tried and true recipes we make each year as well as a new recipe I tried that really turned out well. Which is what I think I'll start with today.

The morning of the Fabulous Food Show! I caught Tyler Florence's Ultimate Thanksgiving episode where he made all kinds of wonderful looking dishes including a recipe for Sweet Potatoes with Bananas and Honey. I was intrigued. Bananas and sweet potatoes? Kinda weird, but also kinda yummy sounding. I knew that morning that I'd be making it for Thanksgiving this year because it's the sweet potatoes that I haven't perfected yet.. always trying a new recipe each year. Here's to hoping that Tyler's would be the one!

They were delicious, to say the least. The sweet potatoes and bananas really work well with each other. The only thing I wasn't crazy about what how sweet the dish turns out. A pretty heavy addition of honey to the mash and then the sweet topping of a brown sugar/butter/flour mixture was a bit too much. This could pass, easily, for a dessert. Now, I like my sweet potatoes sweet, but I need a lil savory there as well.. and there is no savory about this dish. But because of the banana/sweet potato combo, I will not give up on this recipe. I've already jotted down my notes for next year - I will cut the honey measurement in half, for sure. I will also go with a bigger sweet potato to banana ratio and will season this using more salt and pepper than called for. Finally, I will cut the brown sugar topping down to maybe a 1/3rd. With luck, those changes will create the ultimate sweet potato mash for my Thanksgiving dinners.

I'm going to do something with the left over mash - possibly a pie or tart of some sort, maybe some muffins or a quick bread. We'll see what's left after Mom and Sis take their share of the leftovers later today. ;)

Tyler Florence's Whipped Sweet Potatoes with Bananas and Honey

5 medium sweet potatoes, scrubbed
4 bananas, unpeeled
1 cup (2 sticks) unsalted butter, at room temperature
1/4 cup honey
Kosher salt
1/2 cup all-purpose flour
3/4 cup dark brown sugar
1 1/2 cups pecans, chopped (Hadda leave 'em off cuz I can't have them. *sigh*)

Preheat the oven to 375 degrees F.

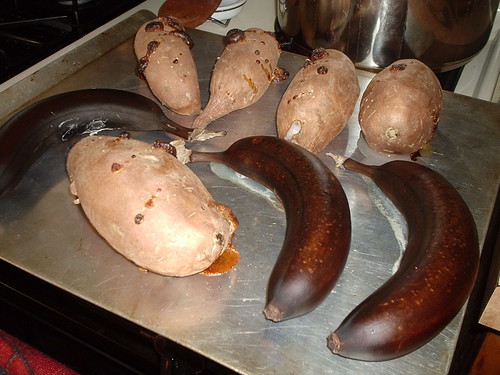
Prick the sweet potatoes all over with a fork, put them in a roasting pan and roast for 30 minutes. Toss the bananas into the pan and continue roasting for 10 to 15 minutes, until both the bananas and potatoes are very soft. Remove the pan from the oven but don't turn the oven off.

Sweet Potatoes with Bananas and Honey 1

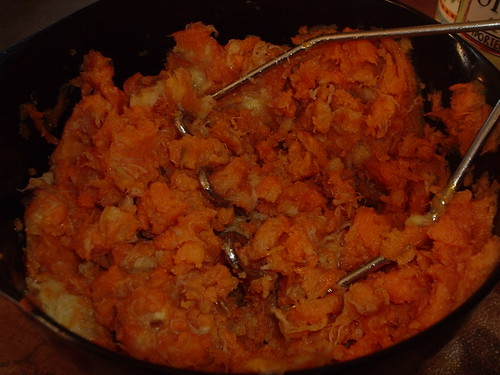
When the potatoes are cool enough to handle, scoop out the flesh into a large mixing bowl. Peel the bananas and add them to the bowl then give it all a good smash with a potato smasher or fork.

Sweet Potatoes with Bananas and Honey 2

Add 1 stick of the butter, and the honey. Season with salt and beat vigorously with a wooden spoon until everything's well combined and the mixture is fluffy. Spoon into an oven-proof serving bowl and smooth the top.

Sweet Potatoes with Bananas and Honey 3

In a separate mixing bowl, use your fingers to rub together the remaining stick of butter, the brown sugar, flour, and pecans until the mixture is the consistency of coarse crumbs. Sprinkle the crumb mixture over the sweet potatoes and return to the oven. Cook for about 20 minutes, until the crumbs are golden. Serve hot.

Sweet Potatoes with Bananas and Honey 4

My Notes: This dish can be prepared well ahead of time. I had my potatoes and bananas roasted early in the morning. Mashed them all together sometime during the afternoon and then put them in the baking dish with the topping a good hour or two before baking time. This could definitely be made a day ahead, stored in the fridge and maybe leaving the topping off until you're ready to bake.

Labels: ,

Wednesday, November 22, 2006

Speaking of Bananas

I've been debating on whether it's okay for me to share this and have decided that I think it's okay, as I've seen a few of my favorite bloggers share more recipes from that now (I'd say) famous book, Baking: From My Home to Yours by Dorie Greenspan. Oh yes, my friends, I did not stop baking from it after the Cookbook Spotlight event, oh noo I did not. :D

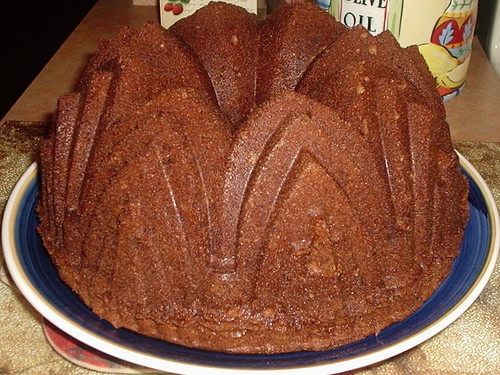
Banana Cake

You see that picture? That's me showing off my brand new fancy pants Bundt pan. Okay well it's that AND it's showing off the best freaking banana cake recipe in all the world. I thought I had a really good banana cake/bread recipe in my repertoire already, but oh how wrong I was. This is now my favorite and I truly doubt I'll ever go in search of a new recipe again. Moist, extremely banana-y, not too dense and with each passing day it just kept getting better and better. All of that and I even think I baked it too long. It browned up pretty quick in my new cake pan, next time I'll shave a good 5 minutes off and cover it with foil around the 30 minute mark. I didn't even wait for my bananas to ripen much. But by the taste you would think that they were brown/black by the time I used them and they weren't at all. There's even an added bonus to this recipe - you will not believe how good your WHOLE house will smell while this baby is baking. Hello!

To give credit where credit is due, this is not an original Dorie recipe, but a favorite recipe of Emily Einstein, who with her husband, Dan, owns Sweet Sixteenth bakery in Nashville. Way to go Emily! =)

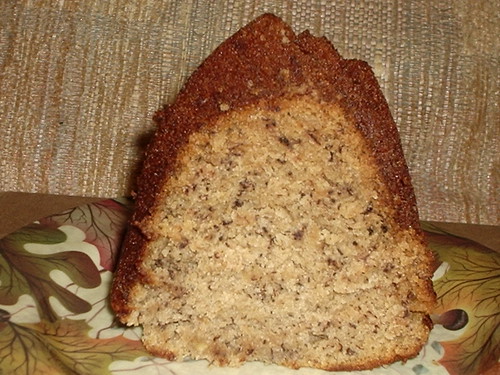
Banana Cake slice
Classic Banana Bundt Cake
Adapted from Baking: From My Home To Yours by Dorie Greenspan, Houghton Mifflin Company, November 2006

3 c. all-purpose flour
2 tsp. baking soda
1/2 tsp. salt
2 sticks (8 oz.) unsalted butter, at room temperature
2 c. sugar
2 tsp. pure vanilla extract
2 large eggs, preferably at room temperature
about 4 very ripe bananas, mashed (you should have 1 1/2-1 3/4 cups)
1 c. sour cream or plain yogurt
1 generous tsp. vietnamese cinnamon (Optional, recipe didn't call for it but I always add cinnamon to banana cake/bread)

Getting Ready:
Center a rack in the oven and preheat the oven to 350º F. Generously butter a 9- to 10-inch (12-cup) Bundt pan. (If you've got a silicone Bundt pan, there is no need to butter it.) Don't place the pan on a baking sheet - you want the oven's heat to circulate through the Bundt's inner tube.

Whisk the flour, baking soda, salt and cinnamon, if using, together.

Working with a stand mixer, preferably fitted with a paddle attachment, or with a hand mixer in a large bowl, beat the butter until creamy. Add the sugar and beat at medium speed until pale and fluffy. Beat in the vanilla, then add the eggs, one at a time, beating for about 1 minute after each egg goes in. Reduce the mixer speed to low and mix in the bananas. Finally, mix in half of the dry ingredients (don't be disturbed when the batter curdles), all the sour cream and then the rest of the flour mixture. Scrape the batter into the pan, rap the pan on the counter to de-bubble the batter and smooth the top.

Bake for 65-75 minutes, or until a thin knife inserted deep into the center of the cake comes out clean. Check the cake after about 30 minutes - if it is browning too quickly, cover it loosely with a foil tent. Transfer the cake to a rack and cool for 10 minutes before unmolding onto the rack to cool to room temperature.

If you've got the time, wrap the cooled cake in plastic and allow it to sit on the counter overnight before serving - it's better the next day.

Dorie also provides a Lemony White icing recipe to drizzle over the top of the cake, but I didn't feel it needed anything to improve it.

Lemony White Icing:
Sift 3/4 cup confectioners' sugar into a bowl and squeeze enough fresh lemon juice (start with 2 tsp. and add more by drops) to make an icing thin enough to drizzle down the Bundt's curves.

Labels: , , , ,

Tuesday, November 21, 2006

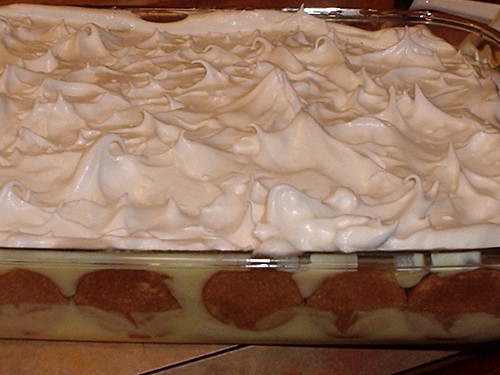
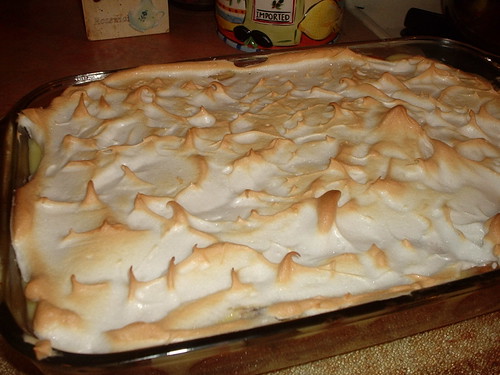
Banana-Banana Pudding

One of the guys in our shop brought me some home made banana pudding a few weeks ago. I thought it was very sweet of him. What he didn't know was that I did not really like banana pudding. hehe I had only had it once in my life at some chain restaurant and the vanilla pudding was overwhelming even the taste of the bananas and to me it was just vanilla bland and I didn't like it at all. Which bummed me out as I pretty much love anything with bananas.

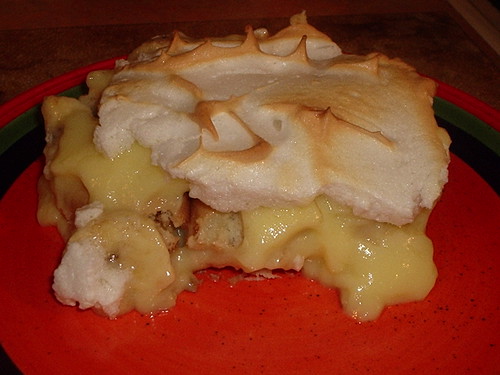
So I'm looking at this huge container of pudding. I smelled it.. and got quite a banana punch. I noticed it was more yellow than the banana pudding I had at that restaurant and there was a meringue on top. "Ahh, what the hell?" I found a spoon. Holy crap. This was the best banana pudding in alla world. Definitely not traditional, the instant I tasted it I knew the pudding was actually banana flavored and not vanilla. The meringue lended a great layer of flavor and texture. The wafers were almost cake like and the bananas were super sweet. I was in heaven. I had to literally force myself to put down the spoon and have Hubbs take the container away from me. I was going to eat the whole damn thing!

And so, I've been wanting to make a big ol' dish of this ever since. I finally got on it this past weekend. Course it doesn't taste EXACTLY like my friend's did - as nothing tastes as good as something made by someone else, but it's pretty darned good nonetheless. ;)

Not your traditional banana pudding - instant banana pudding is used instead of slow cooked from scratch vanilla pudding and there is that layer of meringue where I believe most traditional banana puddings have a whipped cream topping. But so, soooo good!

Unbaked Southern Banana Pudding

A snap to put together and equally as good served a lil warm, at room temperature or cold from the fridge. Try this when you are looking for something easy, quick and creamy good! :D

Baked Southern Banana Pudding
Banana-Banana Pudding

2 boxes of instant banana pudding
4 c. milk (I used 2%)
1 box of vanilla wafers
4-5 bananas, sliced
3 egg whites
1/4 tsp. cream of tartar
3 TBS. white granulated sugar

Preheat oven to 350º F.

Start with a layer of vanilla wafers, flat side down, side by side on the bottom of a 9" x 13" x 2" Pyrex baking dish. Then layer banana slices on top of the wafers, but put the bananas side by side as well (not just 1 slice on top of a wafer - cover those wafers well with nanners).

Prepare the first box of banana pudding with 2 cups of milk and whisk until it starts to thicken (see instructions on box), pour over the first layer of wafers and bananas - using all of it.

On top of the pudding, put another layer of wafers and then bananas - you should use all the bananas here and maybe all but 8 or 9 wafers from the box. With the left over wafers place 4 (or 5 depending on how many are left) along the long sides of the Pyrex, tucking them down in the pudding. Prepare the 2nd box of pudding as you did the first, pour over the 2nd wafer/nanner layer and then give the whole dish a lil shimmy shake to even it out and to remove as many air bubbles as possible.

In a mixer, preferably using the whisk attachment, whisk the eggs and cream of tartar at high speed. When they just start to come together, add the 3 TBS. of sugar slowly. Continue to whisk until the eggs become glossy and form stiff peaks. Spread over the pudding and create lil peaks with the tip of your knife or spatula.

Bake for 10-15 minutes in preheated oven, or until the meringue starts to brown. Allow to cool at room temp. This pudding can be served warm, at room temp or after being chilled for a few hours in the fridge.

Southern Banana Pudding

Labels: ,

Sunday, November 19, 2006

Pretzels and a Cream Puff!

So one day I was talking with a friend through e-mail about baked goods, after I had left a comment on her blog, and I asked her if she'd ever (or was going to in her baking classes) made pretzels before. She hadn't, but she wanted to try them. So I suggested we find a recipe and each make a batch and then post about them on our blogs the same day. That friend is Ivonne. You might have heard of her? She's that extremely sweet and talented writer, baker and chef behind that lil blog some of you might be familiar with, Cream Puffs in Venice? Yeah.. that's the one!!

I was very excited about the prospect and off I went in search of a good pretzel recipe. Ivonne did the same and after we got back to each other with what we'd found, we both agreed to make the recipe from The King Arthur Flour Baker's Companion and we set a date of November 19th to try it.

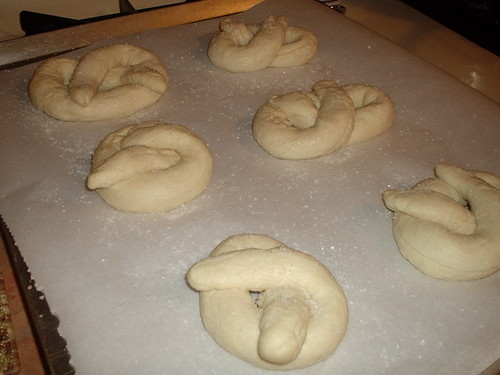
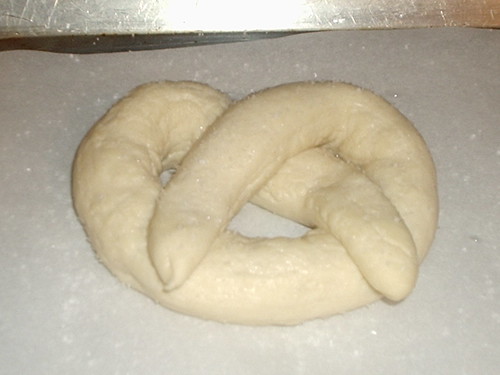
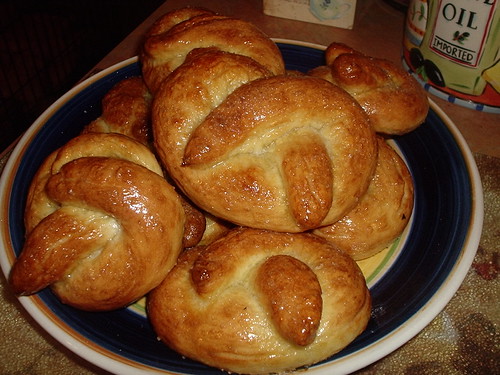
It's the 19th! We've both made our pretzels and now it's time to share with our friends. I haven't seen Ivonne's post yet, but from what we've discussed through e-mail it sounds as if we had different experiences, so say the least. As I was telling her, mine worked out beautifully from the start all the way up to the opening of the oven door after baking time was up. It was only then that I thought maybe something went wrong. My finished pretzels ended up looking like pretzel shaped dinner rolls. And they had that kind of taste as well. More bready than pretzely (it's my new word). They were good, especially after the butter soaked in.. but they weren't what I was hoping for. Now Ivonne said her's turned out the complete opposite where her dough didn't rise much and they were very pretzely. So go figger. I can't wait to see hers!

Here's mine along with the recipe. These were super easy to make and had my dear Hubbs allowed me to have just one more minute with them, I was planning on making a few with cinnamon/sugar - but he didn't give me that chance. I actually got 9 (yes some where bigger than others) pretzels out of my batch, there are 2 left. I had one. I'm grateful for that. I'm also grateful I still have my fingers. I'd say he liked them! =)

Unbaked Pretzels Best one!
All twisty and ready to go in!

Best one baked! ha!

Baked!

baked
They are pretty aren't they? But where are the holes?? hahaa =)

You can find the recipe here and also at Ivonne's
(Her pretzels are GORGEOUS! Well done, my friend! Well done! =))

Labels: , ,

Blog of the Week November 19, 2006

This week's review is a blog that's dear to my heart. I don't know the author very well, as I have just discovered her through my most favorite Cream Puff in alla world, back during the Festa. But her site is of the most comforting types of reads for me as she is a lovely Italian gal who can cook up a storm! I don't care what it is that she's featuring on her blog, it's always mouth wateringly wonderful and her stories behind her dishes bring me so many memories of my Dad and his side of the family. Her name is Orchidea and her blog is Viaggi & Sapori.

Orchidea is originally from Italy but now lives in Sweden. Her cooking is definitely Italian and most times quite original in the way she uses her ingredients. I love not knowing, each time I click on her blog on my favorites list, if I'll be reading about a tried and true dish that has been brought to the states and is popular with us Yanks or if she'll create something that I'd never think of making myself. Only because I'd never heard of the dish.

I am equally proud of my Mother's Irish/German/English/Hillbilly heritage, but when it comes to the food and traditions and way of life, it's my Father's Italian side I find so enthralling. Quite possibly, as our family restaurant was Italian and my Father taught my Mother so many traditional recipes that he had learned from his Mother and so that is mostly what my Mom cooked for us outside of the restaurant as well.

So when I find these authentic blogs such as Viaggi & Sapori, as well as Lucullian Delights AND my sweet Cream Puff, I get so very happy! Reading about these gals' cultural experiences, their family traditions and drooling seriously over their food brings such pleasure to me.

But hey.. you do not have to be of Italian descent to enjoy these blogs. Heck no. You will take away so much from Orchidea's teachings and stories that you, too, will be quite happy after reading what she's got to say.

I urge you to check out Viaggi & Sapori if you haven't yet.. Methinks you'll enjoy it very much =)

xoxo

Labels:

Friday, November 17, 2006

Comforting Irish

Wow.. talk about a month for comforting foods! I think, other than the scallops, we've ate pretty much nothing BUT comforting foods so far this November. November is a kick-ass month! =)

One of my most favorite dinners in alla world is my Mom's Irish Boil. Her side of the family is predominantly Irish, but I don't recall many Irish recipes made by her other than two different types of "boils". Without doing much research, as I am a lazy bugger, I'm guessing that these two recipes are take-offs of what many Irish mother's would make for their family that was relatively cheap, convenient and used what was probably staples in their households. I'm sure the meat has changed from those boiling pots in Ireland to the boiling pots here in the US, but the concept is probably the same.

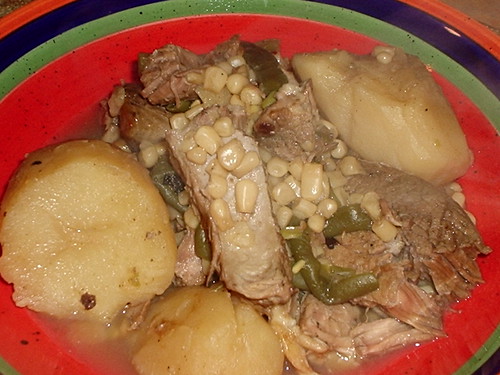
The first type of boil is basically one or two small cottage hams, a head of cabbage and a bunch of potatoes seasoned and covered in water - then brought to a boil and simmered for hours until the meat and cabbage were tender. Delicious. The boil she made yesterday was the one she called her Irish Boil. It consists of either bone in or boneless western style pork ribs, several potatoes, a couple cans each of green beans and sweet corn. All seasoned with nothing but salt and pepper, then covered in water and boiled. A few hours later, the ribs are melt in your mouth tender, the potatoes have soaked up the juice of the ribs and the vegetables are not mushy at all. A big bowl, a fork and a piece of good, crusty bread is all that's needed for a delicious and filling dinner that is the perfect ending to a cold day.

Beware! This type of dinner is NOT camera friendly. Do not be turned off by the looks.. as the taste is truly magnificent. =)

Irish Boil
Mom's Irish Boil

3 lbs. western style pork ribs
7-8 russet potatoes, peeled
2 cans cut green beans (fresh can always be used)
2 cans sweet corn
salt and pepper to taste
enough water to cover all ingredients by at least an inch or two

In a large soup pan, over medium-high heat, brown the ribs that have been seasoned with salt and pepper. Once browned, add the rest of the ingredients and bring to a boil. Lower heat to a medium-low and simmer for 2-3 hours, stirring occasionally and checking to make sure water has not evaporated too much. If it has, just add more. Depending on how fatty your pork ribs are, you may need to skim the fat off the top - but we usually don't see that too often.

That's it.. simple, but tasty! :D

Labels: , ,

Wednesday, November 15, 2006

Monthly Mingle #5 - Give Thanks

monthlymingle5

For this month's Mingle, my sweet friend, Meeta has picked a theme about giving thanks. I like this idea as it's always good to think about what we have and to acknowledge our appreciation for it. Sure, we've all got our problems - who doesn't - but instead of stressing over them, it's rather nice to take a moment or two to think about your loved ones and how they care about you, your home and how there is no better feeling than coming home. Your health and how grateful you are to be alive to share your life with your loved ones, be it family and/or friends. The list can go on and on.

I'm thankful for many, many things. I have a Mom who is also my best friend. I have a man who loves me for who I am and who I love deeply. I have three beautiful "furry" kids who I cherish more than I ever thought possible. I have a nice home that's cozy and welcoming. I have a handful of true friends that I know will always be there for me and who I hope they know I'll always be there for them. I have my health - although I'm not in the best shape that I could be - I am alive and grateful for it.

My list goes on and on as well, but you get the idea, yes? =)

For this month's Mingle I've decided to say thanks to Hubbs. This man may drive me insane on occasion (heee!) but I do love him with all my heart. He shows me affection constantly. He helps around the house, he takes care of his yard, he comforts me when I'm down, he cracks me up like no one else can, he likes to do the same stuff I like to do and he's shown me things I've never seen before. He's easy going which is nice because I'm the stressed out worrying alla time type - so I know I can count on him to "talk me down" when I get wacko. lol Above all, he makes me feel loved and special.

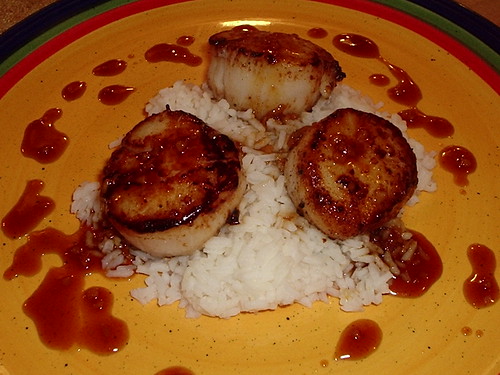
And so, to show him some of my appreciation this week, I made him his absolute favorite food. Scallops. He doesn't care how they are prepared, all he cares about is that he's getting scallops. I've made them many times for him - and always a different way. This time I wanted to make a sauce that was tangy with a nice punch of heat. So I chose this ginger-lime sauce to drizzle over them.

When I first tasted the sauce while it was reducing, I was quite alarmed - whoa baby was it salty! Woo!! I thought I screwed up and was already getting out ingredients to make the old stand-by garlic and butter sauce to replace it. But I continued cooking it and added a lil sugar to tone it down a bit. This sauce ended up being fantabulous with the seared scallops and white rice that I served with it. It really brought out the taste of the scallops, which surprised me. If you decide to make this sauce, my only words of caution are - use it sparingly as it does pack quite a punch. We found that just a drizzle over the scallops and then maybe a spoonful or two over the rice was just perfect. It's tangy and salty and sweet and spicy all at the same time.

Seared Scallops with Ginger-Lime Sauce

1 lb. of sea or diver scallops
1 TBS. butter
4 TBS. soy sauce (this could be cut down to lessen the salt - or use the low-sodium soy sauce)
2 TBS. light brown sugar
2 TBS. fresh ginger - either grated or minced
2 tsp. ground chilis (I used ground ancho chili powder)
2 tsp. fresh, minced garlic
1 tsp. rice wine vinegar
1 tsp. lime juice (I upped this to 2 tsp.)
1 tsp. ground black pepper
1/2 tsp. onion powder
1 TBS. corn starch
2 TBS. water

Melt the butter in a medium saucepan over medium-high heat until it's just starting to brown. Lay your scallops between two layers of paper towels and apply pressure to coax the extra liquid out of them. Season the tops with sea salt and pepper then transfer them, top side down, to the hot skillet. Season the other side and leave them alone for about 3 minutes or until the bottoms are nicely seared. Flip only once and sear until browned and cooked through - approximately another 3-4 minutes, if even.

For this sauce recipe you could do two things. Put all ingredients, except the corn starch and water, into a jar or container with a tight lid and shake until combined then refrigerate for 24 hours before use. This preparation would be more for a marinade. Or you can add all ingredients to a small saucepan and cook over medium high heat until you get the desired thickness you'd like. That's the way I went.

*Note: I also doubled all ingredients except for the cornstarch and water as that was plenty to thicken the double batch perfectly. And I added 2 scant TBS. of white granulated sugar to help cut the salt a bit.

Labels: , , ,

Monday, November 13, 2006

Retro Recipe Challenge #4 - Fall Favorites

I've felt horrible the past two Retro Recipe Challenges as I failed miserably to participate in both of them. I do not know what the problem was, but give me the mission to find a retro recipe and my mind goes blank. It's not that our lovely Laura Rebecca doesn't give us tons of reference websites or ideas, it's that nothing I find trips my trigger enough to get my arse into the kitchen to make it. Or, quite possibly, the traumatic experience I had when creating my recipe for Retro Recipe Challenge #1 has left an indelible mark on my psyche. That could be it.. as it was a VERY traumatic experience.

This month, for Retro Recipe Challenge #4, I was determined to join in! But here we are, already the 12th of the month, the deadline looming near and I still had not found a damn recipe that I liked. Until yesterday morning, I had started panicking again. And panicking again over being an ASS and not just picking out a recipe started to tick me off and then before I knew it, I was in a foul mood.. course that could also be the lingering effects of the fakking Fabulous food show.. I dunno. But! I started thinking about the 2nd part of the challenge - Fall Favorites - and then ideas started coming.. Fall IS my favorite - especially when it comes to food because Autumn sca-reams comfort foods and I have a long list of comfort foods!

Thus brings us to my respectfully submitted retro recipe - FINALLY. Although I can not tell you, specifically, what year this recipe was first made, I do know that Carol Brady made it for Mike and the kids, therefore it MUST fall into the Retro category, yes? Also, my mom made it for us when I was a wee lil tot - and after just turning 39 fakking years old, I KNOW this is a retro recipe as I am on the verge of becoming ancient. ha!

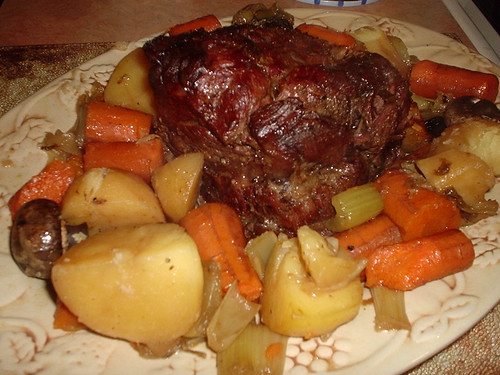
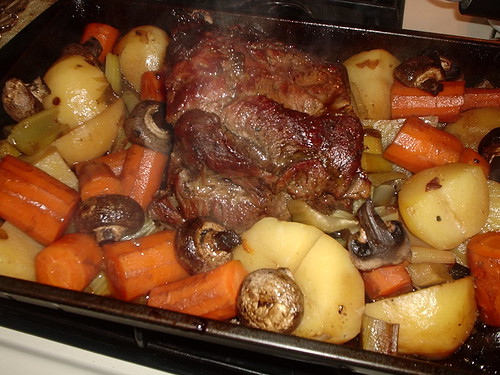
So here we have it my friends.. my submission for Retro Recipes #4 - The Almighty Pot Roast:

Pot Roast 2
Pot Roast

1 (2 to 3 lb.) Beef Chuck Top Blade Boneless Pot Roast (Or English Cut)
1 TBS. butter
2 c. beef stock (You could use water but I find the stock adds great flavor)
4 potatoes, peeled & quartered (I used Yukons)
4 carrots, peeled & cut into 1 inch pieces
4 celery stocks, wiped clean and cut into 1 inch pieces
1 med. Vidalia onion, quartered (I used up a good sized leek this time)
1 small carton of whole button mushrooms
Salt and Pepper to taste
1 TBS. Soy sauce
1 TBS. water
1 TBS. cornstarch

Preheat oven to 375º F.

Season roast with salt and pepper. In a medium skillet sear all sides of the seasoned roast in the TBS. of butter until browned.

In a roasting pan (You can omit the skillet and roasting pan if you are the luckiest person in the world and own your very own Dutch or French oven, which I do not. *sob*) place seared roast (along with the juices and bits from the skillet) in middle and arrange your veggies around it. Season veggies with salt and pepper. Pour the beef stock over it all and cover with foil.

Pot Roast 1

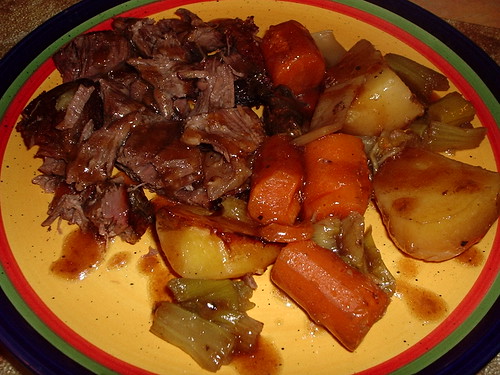
Cook for 2.5 to 3 hours or until the roast falls apart with a fork. To test this, insert a fork at the very edge and pull gently, if there is no give, it's done! Transfer roast to cutting board or serving platter and let rest for 5-10 minutes.

While roast is resting, using a slotted spoon, remove vegetables and transfer to serving platter or other dish and pour broth and juices into a small sauce pan and add a slurry made of 1 TBS. soy sauce, 1 TBS. of water and 1 TBS. of cornstarch. Stir constantly over medium-high heat until gravy thickens. Actually this makes an au jus/gravy combination type sauce. It's not a recipe for authentic gravy as I really have never made it. Go figger. Gravy is retro though - so make it by all means! hee! :D

Pot Roast 3

Labels: , ,

Saturday, November 11, 2006

Cleveland's "Fabulous" Food Show

***UPDATED AT BOTTOM OF POST***

Two months ago, I checked out the website for information on this Fabulous Food Show and I could not wait for this weekend to finally get here. My idol, the love of my life, the apple of my eye, the butter in all that is holy, Paula Deen was going to be there!! And if that wasn't enough to get my britches into a bunch well, Tyler Florence being there too sure did the trick! He's so dreamy *drool*

Two months ago I asked dear Hubbs if he'd take me for my birthday and he agreed. Bless his cotton socks! I sent an e-mail telling a couple of my friends who also get into all things foodie, and they were just as excited at the prospect of seeing this Fabulous food show we've all heard about for many years but never made it to. Last year I missed Alton Brown and I was bummed.. this year I was NOT going to miss my Paula OR the hunky Tyler. NO fakkin' way, my friends.. No Fakkin' Way.

And so it was settled. Hubbs, myself, Min and Cin were going to the food show - Yay! So I checked in on the website periodically for more information on what vendors and attractions were going to be there, I probably read that website 20 times before the day we decided to buy the tickets. We really didn't want to buy them 2 months ahead.. I mean, that's two months. Lots of stuff could happen in two months. The day we decided to buy our tickets was 4 weeks before the show. Being the saavy computer geek that I am, I volunteered to buy them online and print them out for everyone. I'm nice like that. I got out my shiny credit card and sat down in front of my PC and typed in the addie for the website that, by then, I knew by heart. I clicked on the button to "Buy Your Tickets Now!" and even before the whole page was loaded I clicked on my sweet southern gal's name and then clicked on her first show of the day for Saturday, November 11th. You see, I'd made about 4 dry runs before the actual ticket buying day. I knew that I had to click on the show I wanted to see as the first step in the ticket buying process. I knew!

Here's what I didn't know. Thanks to absolutely no mention of it on the site. Not only are you buying your ticket for entrance into the Fabulous Food Show, you are also buying your seat to the show you want to see. It's not all general admission. "Huh.", I said to myself.. and continued on past the show time page to the seat arrangement page. "Huh?", I said to myself again, when I saw that there were no available seats. "Well that sucks", I muttered to myself as I clicked on the back button to choose her next slated show time of the day (there were 3). "The hell??", I wondered out loud as that show had no available seats either. Back button again.. choose her last show of the day and guess what? Sold. The. Fuck. Out. (*@)#*$!!!! Pardon my French. Okay then, guess we'll go on Sunday. But nooooooooooooo that would be too EASY. You see she's headed to whereeverthehell she's headed to after her last show on Saturday. She no be there on Sunday, sucka!! I might have teared up a lil when I saw she wasn't even going to be there. *sob*

Well all was not lost. Thank God. I could still go see the very hunky and slightly pudgy (I heart his love handles) Tyler's show AND get my books signed by my lurve, Paula, at the Sur La Table's Celebrity Book Signing Pavilion!! HOOO-RAY!!! This surely had to be Fate! or Grand Luck! I'll get to be near BOTH of them. Party on, Wayne! Party on, Garth! Schawinnnnnnggg! So they didn't have 4 seats even remotely next to each other for Tyler's show.. that didn't matter now. Now all that mattered was that I was going to see him up close and personal, making magic in the Main Kitchen Stadium Pavilion! And then? And then I was going to get my THREE books signed (I chickened out on my original idea of bringing a pound of butter for her to sign) by Paula. Life is good. :D

So last night I stayed up super late (11:30!) and made my French Toast with Apples and Raisins Casserole, so it could soak up all it's custardy goodness over night. I set the table for my guests and I chopped up some onions and red peppers for Hubbs' awesome Eggy, Potatoey, Sausagy, Oniony, Peppery, Cheesy bake thingie he was going to make. I crawled (almost literally) into bed and fell asleep immediately dreaming wonderfully erotic dreams of Tyler's love handles, butter and giving birth to Paula's children.

Yeah. Don't ask.

I woke this morning with a spring in my step (I tripped over a dog toy) and a smile on my face! I made the coffee and caught up on a couple e-mails, then woke Hubbs and realized we only had an hour before Min and Cin were due - so I, as always, went into panic mode to get his Eggy, Potatoey blah blahy bake finished and my arse into the shower. They came.. we ate, it was wonderful.. hadda go - gonna be late for Tyler's show!!

As soon as we got there we heard a crowd cheering and we realized that Paula had just taken the stage for her first show. Although quite envious of those people, I had a mission - to figure out where the hell the stage was for Tyler's show and where the hell the Sur La Table's Celebrity Book Signing Pavilion! was, so I knew where my landmarks were. As we walked around we found the Main Kitchen Stadium Pavilion where Tyler would be without much problem and in plenty of time. He wasn't due for another 45 minutes. Then we found the Sur La Table's Pavilion and we all about dropped a load in our pants. There ALREADY had to be about 47 KAGILLION people standing in line waiting for Paula. Are you FUCKING KIDDING ME??? Pardon my French again. That's when, my friends, my attitude went sour real quick. Not only would I not be able to see her show, now there was no doubt in my mind that I will not be getting my books signed by her in this lifetime. Hubbs offered to go stand in line while we went to see Tyler's show, but I couldn't let him do that. We'd prolly see Tyler's show and walk around for another 3 hours and he'd still be in line. I was not a happy camper. Yes, I prolly should have put a lil more thought into the day. Paula is quite the popular gal right now, I should have known (especially after seeing how her shows were sold out) there'd be a huge crowd at the book signing pavilion as well. I blame myself. But I also blame the fakkin' website. They should have put in GIANT LETTERS that the shows were NOT general admission. Fakky McBastards.

We went and saw Tyler - he did put on a great show and he looked simply scrumptious.. he made a cream of cauliflower soup, followed by a clams and pasta dish topped off with a lemony custard and macerated berry dessert. Everything went off without a hitch and he was very warm and hospitable and quite charming and funny. He played up the crowd and introduced his sous chef and had that Jack gal, that hosts "How To Boil Water" with him, come up for a bit. I took many pictures with the crap cam and although I was only probably 100 feet from him, they all turned out blurry and looked as if I was sitting with a better line up of the planets than the stage - but I shall post them at the end.. for anyone who wants to see blurry lil pics of Tyler and his sexiness. =)

After his show we walked around for hours checking it all out. If the disappointment of not being able to see Paula (Oh, btw, I did get to see her.. when she came out on the stage at the book signing thing, I saw her head. It was nice.) hadn't soured my experience with the Fabulous Food Show - the crowd of rude people, the very long lines, the way that you paid $25.00 to get in and yet had to pay extra for any thing you wanted to do inside, that there were probably just as many (if not more) vendors for non-foodie services and products as there were for foodie services and products, and finally, only ONE local restaurant was there representing - did.

The whole experience, except for his show, was over priced and highly disappointing and I doubt I'll ever go back to this again. Unless, of course, Paula comes back next year. And if so, I'll buy my tickets 6 months in advance, camp outside the doors a week before the show and remember to bring that fakkin' pound of butter because I'll want something to sell on E-bay to make up for it all.

Below.. gratuitous, yet crappy, pictures of Tyler:
TylerFlorence (6) TylerFlorence (5)
TylerFlorence (4) TylerFlorence (3)
TylerFlorence (2) TylerFlorence (1)
TylerFlorence
You can click on each one to see a bigger (blurrier) version if you'd like.

Hi kids. Maybe I'm just super sensitive and taking a couple comments the wrong way, I'm not sure - but I just want to clarify something. In no way, shape, or form was I criticizing Tyler's physique. I find men with a lil meat on their bones to be irresistable. Lemme just tell ya. That man is F.I.N.E., and yes I agree - in person he is so much more dreamier than on TV for sure!

I am over weight - I have been over weight most of my life and there is no way I would ever say anything bad or judgemental about ANYONE with extra pounds. I was simply expressing my admiration of Tyler. I've always found him attractive, I just find him more attractive now as my personal taste in men leans more to the way he looks now. Which is perfect, IMHO. =)

This is just MY personal opinion. So, please, if you did take offense to my comments about his sexy love handles, don't be offended, I didn't mean it in a bad way at all. I'm the last person on the face of the planet that would be judgemental of body weight. Trust me. ;)

Labels: ,

Friday, November 10, 2006

There is such a thing as a perfect birthday...

You guys!! You just rock! Thank you all for such lovely wishes for my birthday.. I was blown away - seriously!

I really figured the day would just come and go without much notice - and I was okay with that, I mean.. more than okay. Numbers really never effected me before. My 35th was chock full of "you're getting old" jokes and ha ha aren't you funny people. NOT. But I took it all in stride and didn't put too much thought into getting older. And without going into too much detail (as it's all been talked about over and over again) about what happened in my life this past year, the numbers did start to get to me. Not so much, "Gah. I'm almost 40" ('kay well a lil "Gah!" here and a lil "Blah!" there hehe) but "WOO! Looks like I'm really gonna make it to 40!" when around this time last year, it was questionable.

But did I expect all of your good wishes? Your adorable and sweet e-cards and e-mails? Your cards sent to my home?? The BEST birthday present a gal could ever ask for, nestled in my mailbox?? Hell no. THAT was all completely UNEXPECTED and it was what made my birthday one of the best and memorable I've ever had.. thank you so very, very much! *sniff* Is someone slicing onions in here again?? *sniff*

My day started off with the guys at work singing happy birthday over the truck radios shortly after I got there.. that was a hoot. There's nothing like hearing that song being sung by 14 different roofers coming in over the dispatch radio. ha! And then I was serenaded by the shop guys over the P.A. system when I went out into the warehouse to tack the daily leak calls to the board. That was embarrassing as it can be heard from quite far away. lol I also received a very cute card that was signed by everyone and a triple chocolate torte that was quite beautiful and delish =) Ohhh! And one of the guys made me - HOME MADE - banana pudding. haaa!!! I gotta tell ya.. not a big banana pudding fan here. But this stuff was AMAZING. I had to have Hubbs take the dish of it home as I couldn't stop eating it and was afraid I'd eat the whole damn pan. I've asked for the recipe and will be making it and blogging about it VERY SOON. *swoon*

And then I made my usual stop at home during my lunch break to let the kids out and what did I find? My mailbox stuffed with cards and a box that travelled all the way from New Zealand! I about peed!

The Best Birthday Present EVER

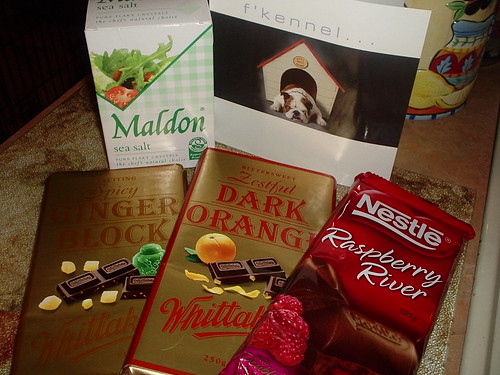
Do you see this?? It's Chocolate and Salt. Hello? Could a gal ask for anything more?? hahahahaaaa!! It reminded me of one of my favorite episodes of Cheers! when Rebecca was upset about something and she was sitting in Sam's office smoking cigarettes and eating chocolate - wishing she had a chocolate cigarette. The only thing she was missing was the salt. A girl's best friend, chocolate and salt. Oh Yeah Baby. =)) And those bars?? Yeah, they are GIGANTIC! One is called "Bittersweet Zestful Orange" *swoon* the other is "Exciting Spicy Ginger Block" which is dark chocolate with nuggets of crystallized ginger *still swooning* and finally the third is "Raspberry River" - chocolate with a "river" of raspberry inside. *faint* And that's not your ordinary box of Morton salt, my friends.. oh nooooo.. it's a big box of Maldon Sea Salt that I shall use lovingly in my cooking - I can't wait! :D Each item was wrapped up in some very pretty and funky tissue paper and a very funny birthday card featuring a not too happy bulldog was also tucked inside - all of this came from my dear, sweet friend, Morven, who I lurve so very much!

Last night I was taken out to dinner by Hubbs and my Mommie where I ate good food, laughed the whole time, and while I was thanking my lucky stars for my good fortune, I was handed two envelopes. One with a gift certificate to Amazon.com (woo!) then another card with a gift certificate from a local kitchen specialty shop, that I adore, with a note from Hubbs promising to build more shelves for my new toys. I'm going to need a bigger kitchen! And finally, when we took Mom home I was presented with my favorite birthday cake that only my Mom can make.. a chocolate cake with bananas tucked in the middle, and covered in chocolate butter cream with a hint of cinnamon throughout. Yum! The best part about this year's cake was that she accidentally poured too much milk into the frosting, which made it very thin, and she didn't have enough powdered sugar to make up for it - so she basically, poured the frosting over it. Imagine a perfect 2 layer round cake sitting on a big plate with a pool of chocolate/cinnamon butter frosting pooled around the bottom. ha!! It was the best cake she's ever made - but now, maybe, you can see where I get my frosting talents from? hahahahaaaaa! :D

Okay.. enough of me gushing.. you get the picture, yes? It was one of the best birthday's I've ever had and it was because of all of you beautiful people.. Thank You. Thank you. Thank you! I am one of the luckiest gals in the world to have such nice friends as all of you =)

xoxo

Labels:

Thursday, November 09, 2006

A Night Off..

Hubbs had stayed home Monday with a sore back. Being the stubborn man that he is, did he stay off his feet and keep ice on his back all day? Uhhh no. His back must have been extremely painful as he NEVER misses work because of aches and pains.. but yet he managed to wash 3 loads of his work clothes, tidy the house, play with the kids outside - after he blew the leaves AND he made me dinner. I coulda killed him.

ha!

I had high hopes that the man would take it easy for ONE day.. just lay around and relax and do what had to be done to make his back feel better, as I've had back problems before and I know how excruciating the pain can get. He says moving around made it feel better - so move around he did. hehee! Course he ended up staying home Tuesday because it hurt worse, but who am I to say I TOLD YOU SO??!! :P

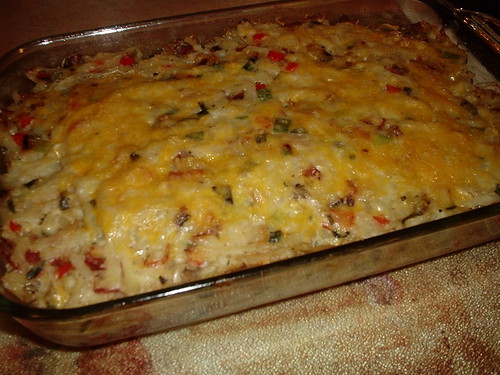
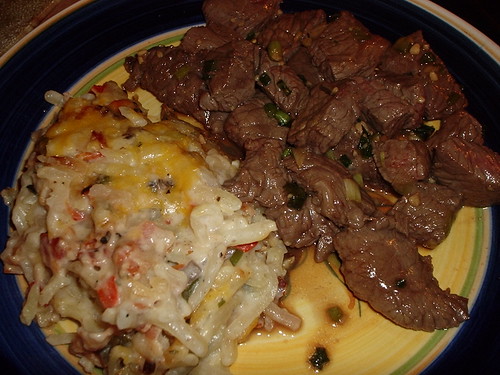
So this dinner he made me.. Hubbs is a pretty good cook - he makes the best chicken soup I've ever had and his chili and beef stew aren't too shabby either. I refer to him, on occasion, as the "Bowl Chef" - if it is to be served in a bowl, he can make it well! hehe I was quite surprised with this dinner - he knows how much I lurve my Cooking Light cookbook so he took it down and went through it and picked two recipes to make - and neither required a bowl to serve it in! His first dish was Hashbrown Casserole with Bacon, Onions and Cheese. Out of the two this was my favorite. It was a creamy and smokey casserole that was really flavorful. I think it'd be the perfect side dish to pork chops, chicken or steak. He went with beef to serve with it, specifically Asian Beef. This was also very flavorful, but we both agreed, probably not the best to be served with a bacony potato side. It really needed a more benign side dish, to allow it's flavors to be the "star" of the dinner. Tender sirloin steak marinated in soy, ginger, rice wine vinegar, brown sugar and sliced green onions. The recipe called for the whole steak to be broiled until cooked the way we prefer, but he asked me if I'd mind showing him how to stir-fry. So he sliced it into bite sized strips while I heated the wok and just a few minutes later we had Stir-fried Asian Beef. I liked this, as it had a sweet tangy flavor and the onions really came through as well. I think this marinade would be much better on pork and I'd like to try it that way one day served with rice.

All in all it was a very nice dinner made by a very nice man =)

Hashbrown Casserole
Hash Brown Casserole with Bacon, Onions and Cheese
Adapted from Cooking Light's Annual Recipes 2006

6 bacon slices
1 c. chopped onion
2 garlic cloves, minced
2 (32 oz.) package frozen Southern-style hash brown potatoes (We just had plain refrigerated hash brown potatoes, so he doctored them up with red bell pepper)
1 c. (4 oz.) preshredded Classic Melts Four Cheese blend, divided (Never heard of that particular cheese, so he just used shredded 4 cheese Mexican blend)
1/2 c. chopped green onions
1/2 c. fat-free sour cream
1/2 tsp. salt
1/4 tsp. freshly ground black pepper
1 (10.75 oz.) can condensed 30%-reduced-sodium, 98%-fat-free cream of mushroom soup, undiluted
Cooking spray

Cook bacon in a large nonstick skillet over medium heat until crisp. Remove bacon from pan, and crumble. Discard drippings in pan. Add 1 c. onion and garlic to pan, cook 5 minutes or until tender, stirring frequently. Stir in potatoes, cover and cook 15 minutes, stirring occasionally.

Combine crumbled bacon, 1/4 c. cheese, green onions, sour cream, salt, pepper and soup in a large bown. Add potato mixture; toss gently to combine. Spoon mixture into an 11 x 7-inch baking dish coated with cooking spray. Sprinkle with 3/4 c. cheese. Cover with foil coated with cooking spray. Refrigerate 8 hours or overnight.

Preheat oven to 350º F

Remove casserole from refrigerator, let stand at room temperature 15 minutes. Bake casserole, covered, at 350º for 30 minutes. Uncover and bake an additional 30 minutes or until bubbly around edges and cheese begins to brown.

Yield: 6 servings - serving size about 1 cup.

Hashbrown Casserole and Asian Beef
Asian Beef
Adapted from Cooking Light's Annual Recipes 2006

1/3 c. chopped green onions
3 TBS. low-sodium soy sauce
2 TBS. rice wine vinegar
2 TBS. brown sugar
1 tsp. toasted sesame oil
1 tsp. minced garlic - about 1 decent sized clove
1 tsp. minced ginger (recipe called for bottled, he used fresh)
1 pound flank steak, trimmed (he used a 1 lb. sirloin steak)
Cooking spray

Preheat boiler

Combine first 7 ingredients in a small bowl, stirring with a whisk. Place steak on a broiler rack coated with cooking spray. Pour soy mixture over steak.

Broil steak 3 inches from heat 5 minutes on each side or until desired degree of doneness. Let stand 5 minutes; cut around grain into thin slices.

Yield: 4 servings - serving size 3 ounces

Note: If using a more tender cut of meat, such as we did, you can get away with stir-frying this, by cutting the meat into strips, adding a tsp. of oil to a well heated wok and then placing the meat along with a couple TBS. of the marinade and stir-frying until meat is done the way you like it.

Labels: , , ,

Tuesday, November 07, 2006

Being Lazy is Sometimes a Good Thing!

Our Sunday plans somehow ended up not happening. Well, actually that "somehow" was because Hubbs woke up with terrible back pain and I insisted he put ice on it and take it easy. Poor guy. So in between doing mountains of laundry (Fakking Febreze - some dogs and Febreze DO NOT go well together, beware!!) all day, watching football games and squeezing in a movie when he was napping I had forgot about dinner.

Around 7ish, I made a quick run up to the grocery story and picked out items for an extremely easy and tasty dinner - and I'm talking, ya just can't get lazier easier than this!

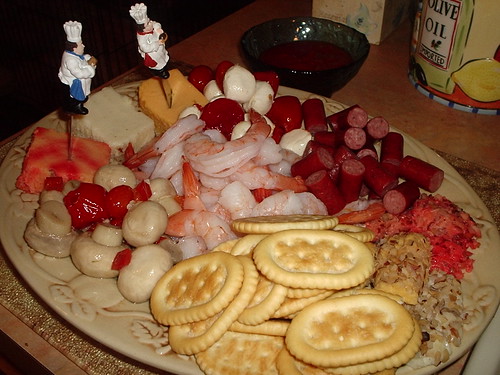
Sunday dinner!

Yeppers.. we dined on a pound of good sized cocktail shrimp, 3 hunks of cheese (port-wine, sharp cheddar and a garlic-herb infused swiss), those cute lil beef sausage bites, some mozzarella & tomatoes, picante peppers, crackers and italian marinated mushrooms. WOO! I was exhausted by the time I plated and presented his dinner to him. teeee!!

And lemme tell ya.. a quick prepared foods dinner like this is sometimes AWESOME! The different tastes and textures was really quite nice. It was filling and there was only ONE dish to wash - party on!

Labels:

Sunday, November 05, 2006

Dishes of Comfort

When I saw that my most favorite Cream Puff and my most favorite Italian gal living in Sweden had come up with the idea for an event that highlighted comfort foods, I mentally ticked off a long list of foods that I consider comforting. My problem was choosing which one to submit to their event!

I have two requirements for a food to be "comforting". The first - something that my parents (especially my Mom) made while I was growing up. These dishes were always looked forward to when I was told as I was leaving the house for school what dinner would be when I got home. And secondly - any food that brings back memories of being made to feel special, loved and just happy. That list doesn't necessarily mean creamy, steamy, sink your gums into, stick to your ribs type fare that usually was made for you by your Mommie. The second list is more the type of foods where the occasion is more memorable. Like raw oysters. I love them. And each time I eat them, I think of being with my Dad as we were the only 2 in the family that liked them - so it was our special time to enjoy a dozen on the half shell, while the rest looked at us in disgust. hee! Or even just a plate of chunked up cheeses and pepperoni with a hunk of bread that we'd all share sitting on our back porch or at the bar of our restaurant before we'd open for the day.

Now that first list.. wow, it's long. My mother's macaroni and cheese usually served aside her fried chicken wings. Her sweet and sticky ribs paired with Dad's linguine and clam sauce (my birthday dinner for many, many years!). Her cabbage rolls, her boiled dinners of cottage ham, cabbage and potatoes. My Auntie's pizza. My mom's meat loaf and the baked potatoes that were creamy on the inside of a crisp skin. Her pot roasts. Her chocolate cake with bananas sliced in the middle and chocolate butter frosting. Her wings and peppers. My family's marinara sauce and meatballs generously dousing any particular pasta that caught your fancy. My father's home made Christmas ravioli. My father's Christmas calamari sauce (of which I have STILL not found a recipe *sob*). I mean this list goes on and on and on.. my Mom's lasagna! Her stuffed shells! Her goulash! My father's fish salads - YES! FISH SALADS!! I can't stop listing!

I had to walk away.

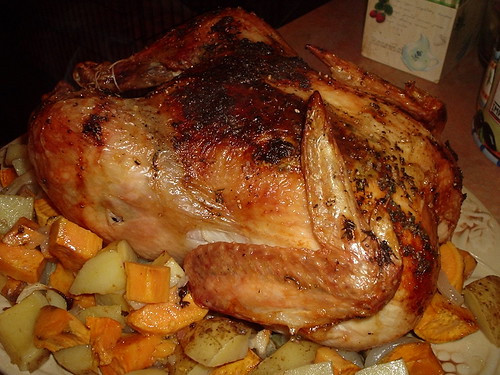
Anyhoo.. what I've chosen to blog about is my Mom's roasted chicken. Flavorful throughout thanks to the lemons and garlic stuffed in the cavity and the herbed butter slathered both on top and under the skin of the breast, this chicken always comes out tender and juicy on the inside and the skin crisps up - always causing riffs between my sisters and I over who would get the biggest pieces. She would make this roasted chicken once a month throughout the Autumn and Winter seasons. Always accompanied by roasted potatoes and carrots as well as her warm and buttery dinner rolls. We'd eat this dinner at the back table of the restaurant's dining room with only the lights directly over the table lit, the rest of the huge dining room would be dark, making this table feel cozy. My father would always be in charge of carving and saying the dinner prayer. And then there'd be silence for the first few minutes as everyone blissfully engorged themselves. Soon the silence would be broken (most likely over the aforementioned fight between my sisters and I over a piece of crispedy skin) and we'd start talking about the week that passed or the week coming up. This had to be done, that had to be made, weren't those people who sat in the corner Saturday night a nice couple? How about that family who let their kids just run around and cause havoc? God. My father would ask each of his daughters how their week of school went and what had they learned? And with each story that we shared with him, he'd have a story from his days as a child - and oh the horrors he went through!! "Well Lisa, I understand that your friend Annie has the newest in Nike fashion and that you MUST have the same sneakers, but when I was growing up, there was one pair of sneakers that my 15 brothers and I HAD to SHARE, which meant that for 14 days in a row, I'd have to wear the cardboard box those sneakers came in!" hahahaahaaaa!! I remember the first time he made that comment and my mother about choked on her coffee. He always told the funniest stories - course they weren't funny back then - I wanted the damn sneakers and didn't care that he had to share with his 15 brothers, dammit. teee!

And so, once a month during the Autumn and Winter months, I now make this roasted chicken for Hubbs. And although we usually sit in front of the God forsaken TV instead of at our dining room table when enjoying this bird, I've added to my memories of childhood - the comforting thoughts of snuggling up on the couch and laughing with him at whatever we're watching (usually Rachel Ray - YUM-O!), or just talking about whatever we feel like talking about. =)

Roasted Chicken
Mom's Roasted Chicken

1 fresh roaster chicken, approximately 7 pounds
4 TBS. butter, softened
1 TBS. fresh, chopped rosemary leaves
1 TBS. fresh thyme leaves
1 TBS. fresh, chopped sage leaves
2 tsp. sea salt
2 tsp. cracked black pepper
1 lemon, cut in half
6 cloves of garlic, smashed
Optional:
3 med. yukon gold potatoes, large dice
1 lg. red garnet sweet potato, large dice
1/2 vidalia onion, large dice
4-5 carrots, peeled and cut into 1 inch pieces
1 TBS. butter
1/2 c. water

Preheat oven to 425º. Place a roasting rack into a roasting pan.

Rinse chicken and thoroughly pat dry with clean paper towels.

In a small bowl, combine butter, herbs, 1 tsp. salt and 1 tsp. pepper. Cut lemon in half and smash each clove of garlic with the flat side of a knife to easily peel.

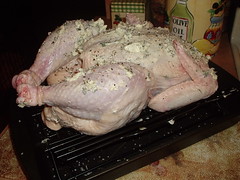
Using a teaspoon, slide a good sized dollop of the butter mixture under the skin of the breast and with your other hand on the top of the skin remove the butter off the spoon and smoodge it around as far down the breast meat as it'll go. Repeat with the other breast. With your fingers slather the outside of the bird with the rest of the butter mixture.

Slathered Nekked Chicken

After washing your icky hands, sprinkle the remaining salt and pepper all over the bird's nekked body. Shove the lemon halves and the garlic cloves into the cavity and tie the legs together with kitchen twine. Place freshly slathered, not as nekked, bird onto the roasting rack (breast side up) and place in pre-heated oven. Bake for 30 min.

While the bird is in the oven, peel and chop your veggies. After 30 minutes reduce heat in oven to 375º, and haphazardly arrange the veggies on the bottom of the roasting pan with the TBS. of butter (pinch off lil pieces) and 1/2 c. water. Bake another 90 minutes or until the internal temperature of the bird reaches 190º.

Let set on carving board for 10 minutes before carving.

Labels: , , ,

Saturday, November 04, 2006

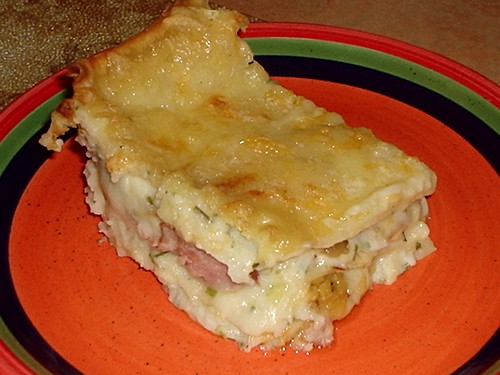
Pan Pierogi

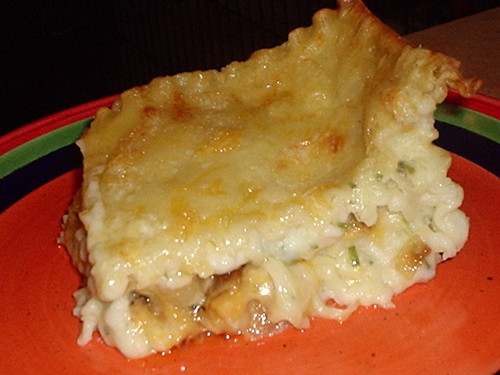
If you are a lover of Pierogi then this dish is for you. The recipe can be easily double or tripled for a great potluck contribution. This potato dish can be made as a side dish or with the addition of meat, a main dish that'll knock your pierogi loving socks off.

Easy to put together and made with ingredients that most have on hand, it's a quick dinner for those nights when time seems to slip away. Filling and tasty, it's one of our favorites. You can switch up the cheeses, meats, or even add flavorings to the potatoes and create your own version. The inside is creamy and the lasagna noodles get a little crunchy on the edges (the part I like the most!). This is a perfect Autumn/Winter dish.. try it! :D

Pan Pierogi 1
Pan Pierogi

1 large vidalia onion, either sliced thinly or diced medium
2 TBS. butter
9 lasagna noodles, cooked al dente
3 c. smashed potatoes (I cheat and use a bag of pre-smashed potatoes - Yoder's brand)
handful of fresh, snipped chives*
1 c. sour cream*
2 c. shredded cheese (I'll usually use 1 c. swiss and 1 c. sharp cheddar)
1 package of Keilbasa sausage, sliced on the diagonal* (I use Hilshire Farms)
1 TBS. butter

Preheat oven to 375º F. Butter a 8" x 8" baking dish - I usually use a glass Pyrex.

Saute the onions in 2 TBS. of butter until lightly browned and carmelized.

I like to buy the regular smashed potatoes and then in a med. saucepan I heat them and add the sour cream and chives. This is optional. You could add the potatoes cold or buy the flavored kind or smash your own - do whatever you feel is best.

Place 3 lasagna noodles in the bottom of your baking dish and then spread about 1 c. of the smashed potatoes on top. Sprinkle potatoes with 1/2 the onions.

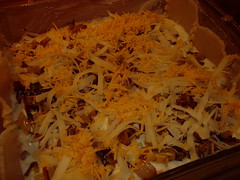
Pan Pierogi - layer 1

Next layer is the cheese, I usually do a small handful of each flavor (making sure to reserve some for the top).

Pan Pierogi - layer 2

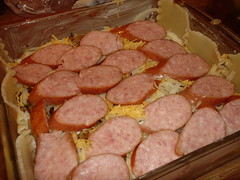
Top with the sliced keilbasa, if you are using.

Pan Pierogi - layer 3

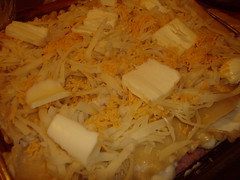
Then start your layers again; noodles, potatoes, onions, cheese, sausage. Top with last 3 lasagna noodles and the remaining cheeses. Slice off excess lasagna noodle so that it's flush with the top of the dish. If you don't, the excess noodles will burn. Dot the top with 1 TBS. butter and bake, uncovered for 45-60 minutes, or until golden and bubbly.

Pan Pierogi - ready to bake

Let sit for about 5-10 minutes so it will set up and make for easier cutting.

Pan Pierogi 3
Pan Pierogi 2

*Note:The chives, sour cream and Keilbasa are optional - use whatever you want or leave plain. Also, if I have it on hand, I sometimes like to add about a 1/2 c. of sauerkraut to the onions when sauteing. Adds a nice lil zing! :D

Labels: , , ,

Friday, November 03, 2006

Spotlight on Baking: From My Home To Yours by Dorie Greenspan

I'm not going to say too much about Baking: From My Home To Yours because I don't want my knack for going on and on about something (keep scrolling - it really does eventually end) to overshadow the simple truth about Dorie's latest book.

I'm not a big baker. I feel I am a novice in the kitchen when it comes to baking anything more complicated than a simply frosted cake or an apple crisp. There are a lot of baking books out there that don't take into consideration the average home cook and his/her lack of experience or knowledge of baking. This book is the exception. There are some complicated recipes included in the pages of Baking, but not one of them looks as if it couldn't be accomplished by an average home cook as well as someone who has lots of experience in baking. It is for that simple reason and not the pretty pictures or the large variety of baked goodie recipes, that has me loving this book so very much. This is a book that I will buy for friends and family so they can enjoy it as much as I have. This is a book that I will continue to refer back to when I want to make something special. This is a cookbook that I thoroughly enjoyed reading as opposed to just searching for a recipe and following the instructions.

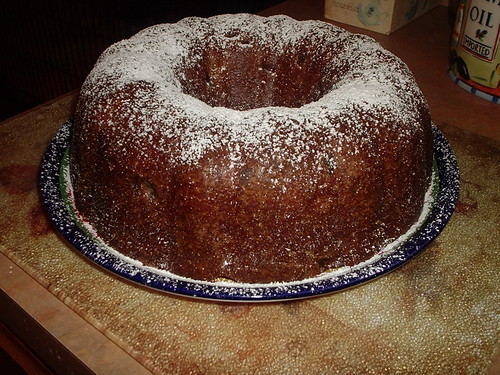
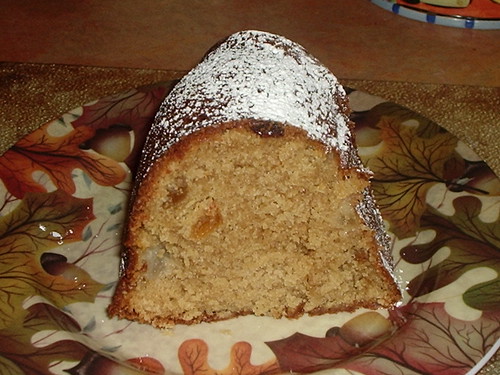
My last go at one of the recipes from this book was Dorie's Brown Sugar Bundt Cake. As much of a lover of all that is chocolate and all that is apples that I am, this was my favorite recipe by far. It was super easy to put together and the end result was a very moist caramel tasting cake loaded with plump golden raisins and sweet bosc pear chunks throughout.

I'll be making this cake again, and often. I found it to be perfect for breakfast! I think that next time, I'll be baking the batter in muffin tins and maybe changing up the fruit. Caramel and bananas sound good!

Brown Sugar Bundt Cake
Adapted from Baking: From My Home To Yours by Dorie Greenspan, Houghton Mifflin Company, November 2006

2 1/4 c. all-purpose flour
1/2 c. ground hazelnuts or walnuts (or 1/4 c. more all-purpose flour)
1 tsp. baking powder
1/2 tsp. baking soda
1/4 tsp. salt
2 sticks (8 oz.) unsalted butter, at room temperature
2 c. (packed) light brown sugar
3 large eggs, at room temperature
1 1/2 tsp. pure vanilla extract
1/4 tsp. pure almond extract (only if you're using the ground nuts)
1 c. buttermilk, at room temperature
2 medium pears, peeled, cored and cut into 1/4-inch dice.
1/2 c. moist, plump prunes, snipped into 1/4-inch pieces, or 1/2 c. moist, plump raisins (dark or golden)

Confectioners' sugar, for dusting

Getting Ready:
Center a rack in the oven and preheat the oven to 350º F. Butter a 9- to 10-inch (12 cup) Bundt pan, dust the inside with flour and tap out the excess. If your pan is not nonstick, dust the interior of the pan with flour, then tap out the excess. (If you've got a silicone Bundt pan, there's no need to butter or flour it.) Don't place the pan on a baking sheet - you want the oven's heat to circulate through the Bundt's inner tube.

Whisk together the flour, nuts, baking powder, baking soda and salt.

Working with a stand mixer, preferably fitted with the paddle attachment, or with a hand mixer in a large bowl, beat the butter and sugar together at medium speed until light and fluffy, about 3 minutes. Add the eggs one at a time, beating for 1 minute after each addition. Beat in the vanilla and the almond extract, if you're using it. Reduce the mixer speed to low and add the flour mixture and the buttermilk alternately - add the flour in 3 additions and the buttermilk in 2 (begin and end with the dry ingredients). Mix only until the ingredients are incorporated and scrape down the bowl as needed. With a rubber spatula, stir in the pears and prunes. Scrape the batter into the pan and smooth the top with the spatula.

Bake for 60 to 65 minutes, or until a thin knife inserted deep into the center of the cake comes out clean. (If the cake looks as if it's browning too fast, cover the top loosely with a foil tent.) Transfer the cake to a rack and cool for 10 minutes before unmolding, then cool to room temperature on the rack.

When you are ready to serve, dust the top of the cake with confectioners' sugar.

*Dorie's Note 1: Dorie suggests, if you have the time, to wrap the cake well and leave it on the counter to ripen the flavors for a day before serving.

*Dorie's Note 2: This cake will keep well for about 5 days wrapped well and at room temperature and can be frozen for up to 2 months, defrost still wrapped.

*Playing Around: For a nuttier cake, use 2 cups all-purpose flour and 3/4 c. ground nuts - hazelnuts, walnuts or almonds. Decrease the vanilla extract to 1 1/4 tsp., and use the almond extract. Omit the pears and prunes and stir in 1 cup of chopped toasted nuts - use the same nut as the one you ground.

*Lisa's Notes: I can't have nuts, so I omitted the ground and the almond extract, which gave me a very caramel tasting cake. I also substituted golden raisins in lieu of the prunes just because it's what I had on hand. I did eat this cake the day of baking as well as every freaking day after (5 days!) and it did get better with each passing day. *swoon*

Brown Sugar Bundt slice

Labels: , , , ,